Ana içeriğe geç

Portable Power Station UI 보드 분리

Uyarı: Ön koşul olan bir kılavuzu düzenliyorsunuz. Yapacağınız herhangi bir değişiklik bu adımın yer aldığı bütün 5 kılavuzları etkileyecektir.

Adım 6 çevriliyor

İngilizce
Korece
Adım 6
Portable Power Station UI Board Removal, Remove the UI board: adım 0, 3 resimden 1. Portable Power Station UI Board Removal, Remove the UI board: adım 0, 3 resimden 2. Portable Power Station UI Board Removal, Remove the UI board: adım 0, 3 resimden 3.
Remove the UI board
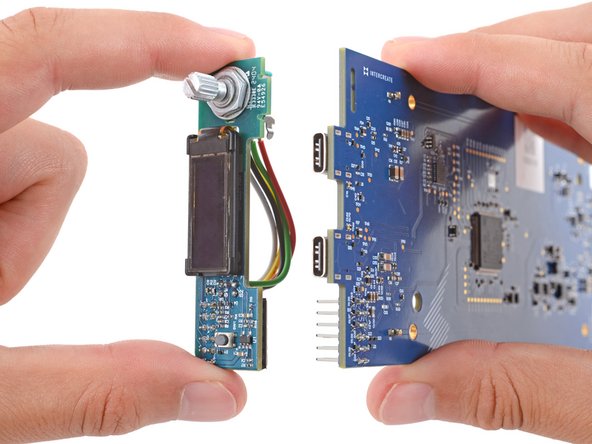
  • Long pins on the main board plug into the UI board and hold it in place.

  • With one hand, hold on to the main board.

  • Don't press the board down against your work surface, or you may damage the surface‑mounted components on the board.

  • With your free hand, grip the UI board by its edges and firmly pull it straight away from the main board to disconnect it.

  • Make sure the boards stay perpendicular to each other or the pins might get damaged.

  • During reassembly:

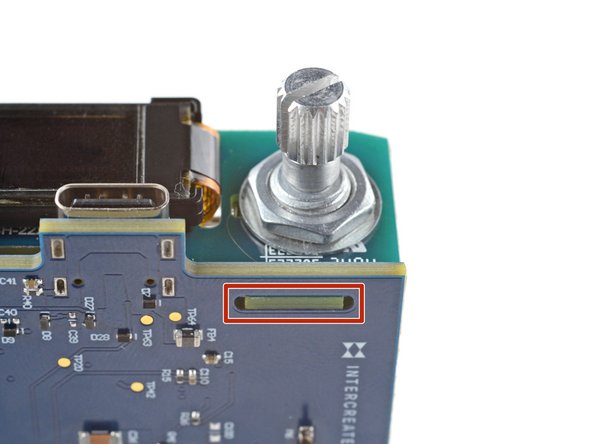
  • When pushing the UI board back into place, make sure the side opposite the sockets goes into its cutout on the main board. Otherwise, it will prevent the UI board from fully seating.

메인 보드의 긴 핀을 UI 보드에 꽂아 제자리에 고정하세요.

한 손으로 메인 보드를 잡으세요.

보드를 작업대 표면에 대고 누르지 마세요. 아니면 보드 표면에 장착된 부품들이 손상될 수 있습니다.

다른 한 손으로 UI 보드의 가장자리를 잡고 메인 보드에서 똑바로 잡아당겨 연결 해제하세요.

보드가 서로 수직을 유지하지 않으면 핀이 손상될 수 있습니다.

재조립할 때:

UI 보드를 다시 제자리에 밀어 넣을 때 소켓 반대쪽이 메인 보드의 구멍에 들어가는지 확인하세요. 아니면 UI 보드가 완전히 장착되지 않을 수 있습니다.

Katkılarınız, açık kaynak Creative Commons lisansı altında lisanslanmaktadır.