Adım 3 çevriliyor
Adım 3

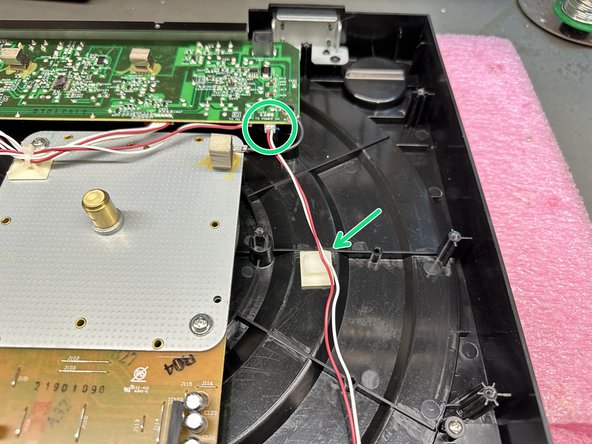
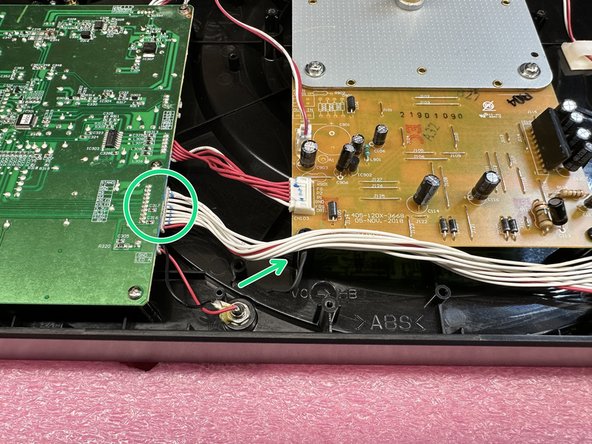


Velocity PCB Location and Removal
-
With the bottom panel removed, locate the Velocity PCB.
-
Locate the 3 connectors, and remove them from their corresponding PCBs.
-
Using a #PH0 screwdriver, remove these 6 screws.
Katkılarınız, açık kaynak Creative Commons lisansı altında lisanslanmaktadır.