Ana içeriğe geç

Canon EOS Rebel T2i Main PCB Board Replacement

Uyarı: Ön koşul olan bir kılavuzu düzenliyorsunuz. Yapacağınız bütün değişiklikler bu adımın yer aldığı diğer kılavuzları da etkileyecektir.

İngilizce
İspanyolca

Adım 1 çevriliyor

Adım 1
Canon EOS Rebel T2i Main PCB Board Replacement: adım 0, 3 resimden 1. Canon EOS Rebel T2i Main PCB Board Replacement: adım 0, 3 resimden 2. Canon EOS Rebel T2i Main PCB Board Replacement: adım 0, 3 resimden 3.
  • Use caution while handling ribbon cables and ribbon cables connects to avoid damaging them.

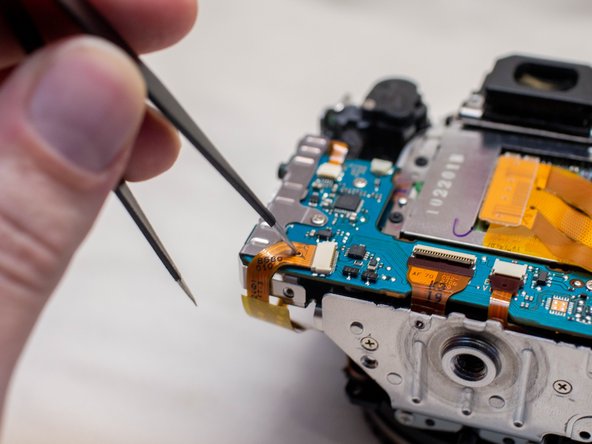
  • Locate these three ribbon cables located on the left side of the main PCB board.

  • Disconnect the ribbon cables.

  • Two of these ribbon cables features a hole in them which can assist with disconnecting them. Use either a pair of tweezers or another tool with a thin point to pull out the ribbon cables utilizing this hole.

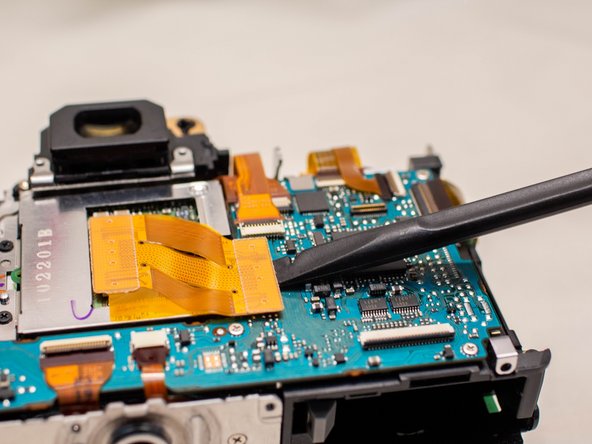
  • Use a plastic spudger tool to carefully push up and disconnect the imaging sensor ribbon cable.

Çeviri buraya girin

Çeviri buraya girin

Çeviri buraya girin

Çeviri buraya girin

Çeviri buraya girin

Katkılarınız, açık kaynak Creative Commons lisansı altında lisanslanmaktadır.