Ana içeriğe geç

Gateway SA1 Outer Casing Replacement

İngilizce
Korece
Adım 6
Gateway SA1 Outer Casing Replacement: adım 0, 3 resimden 1. Gateway SA1 Outer Casing Replacement: adım 0, 3 resimden 2. Gateway SA1 Outer Casing Replacement: adım 0, 3 resimden 3.
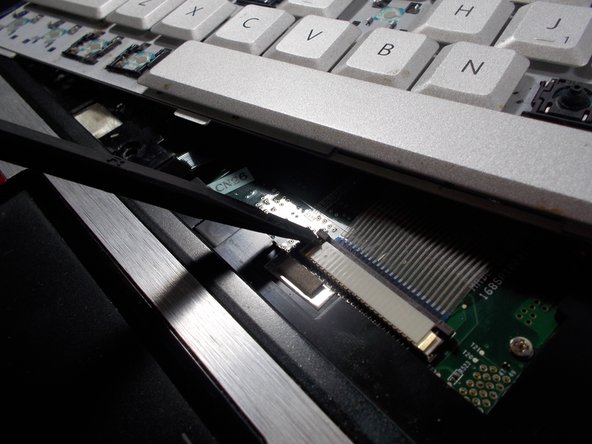
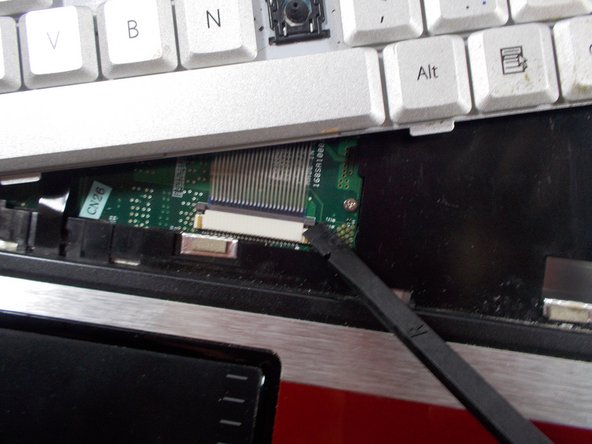
  • Carefully lift the keyboard off from the laptop. It is still attached as shown.

  • Using the spudger, detach the connector by pushing two tabs away from the white connector and then gently pulling the connector away.

  • The brown colored component with the tabs does not come out with the connector.

Çeviri buraya girin

Çeviri buraya girin

Çeviri buraya girin

Katkılarınız, açık kaynak Creative Commons lisansı altında lisanslanmaktadır.