Ana içeriğe geç

iPod 第5世代(ビデオ) バッテリーの交換

Uyarı: Ön koşul olan bir kılavuzu düzenliyorsunuz. Yapacağınız herhangi bir değişiklik bu adımın yer aldığı bütün 2 kılavuzları etkileyecektir.

Adım 1 çevriliyor

İngilizce
Japonca
Adım 1
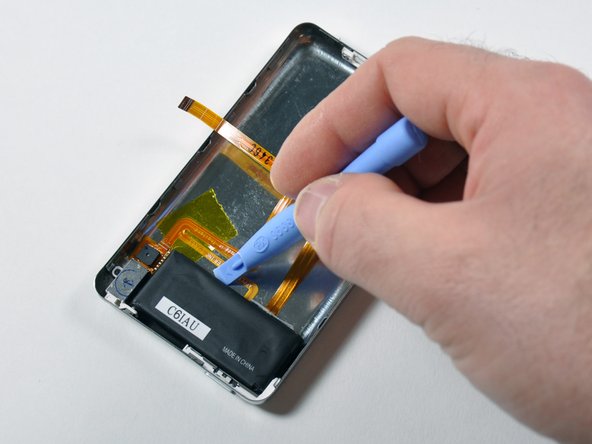
iPod 5th Generation (Video) Battery Replacement: adım 0, 3 resimden 1. iPod 5th Generation (Video) Battery Replacement: adım 0, 3 resimden 2. iPod 5th Generation (Video) Battery Replacement: adım 0, 3 resimden 3.
  • Be careful not to damage any of the headphone or battery ribbon cables while performing this step.

  • Insert an iPod opening tool in between the metal case and battery at the location illustrated by the picture.

  • Gently wiggle the tool while pushing it further in between the battery and back case. The adhesive holding the battery should give, allowing the battery to be removed from the rear panel.

この手順を参照しながら作業を進める際は、ヘッドホンもしくはバッテリーのリボンケーブルのいずれかも破損しないようにご注意ください。

iPodの開口ツールを、画像にあるようにメタルケースとバッテリーの間に差し込みます。

慎重に左右にツールを揺らしながら、バッテリーと背面ケースの間の奥に差し込みます。バッテリーを固定している接着剤が剥がれてきたら、リアパネルからバッテリーを取り出してください。

Katkılarınız, açık kaynak Creative Commons lisansı altında lisanslanmaktadır.