Ana içeriğe geç

Remplacement du disque dur du Gateway Lt4004u

Adım 1 çevriliyor

İngilizce
Fransızca
Adım 1
Gateway Lt4004u Hard Drive Replacement: adım 0, 3 resimden 1. Gateway Lt4004u Hard Drive Replacement: adım 0, 3 resimden 2. Gateway Lt4004u Hard Drive Replacement: adım 0, 3 resimden 3.
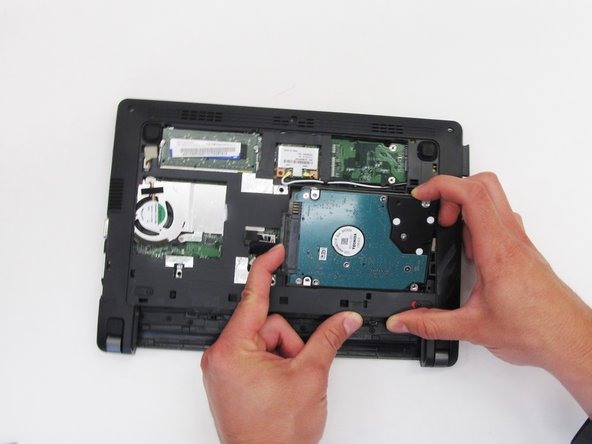
  • Locate the hard drive in the top left hand corner of the device. It is a teal blue-green color with the top right corner covered by a black piece of plastic.

  • Gently insert your fingernail or a spudger into the crevice on the right side of the hard drive in order to pry the hard drive from the bottom of the laptop.

  • Note that the laptop has been rotated 180 degrees from the first picture of this step to the second picture. The hard drive is shown in the top left corner in the first picture, but in the bottom right corner in the second.

Repérez le disque dur dans le coin supérieur gauche de l’appareil. Il est de couleur bleu canard avec le coin supérieur droit recouvert d’un morceau de plastique noir.

Insérez doucement votre ongle ou un spudger dans la fente sur le côté droit du disque dur afin d’extraire le disque dur du bas de l’ordinateur portable.

Notez que l’ordinateur portable a été retourné de 180 degrés pour la première image de cette étape. Le disque dur est montré dans le coin supérieur gauche de la première image, mais dans le coin inférieur droit de la seconde.

Katkılarınız, açık kaynak Creative Commons lisansı altında lisanslanmaktadır.