Ana içeriğe geç

Sostituzione disco rigido Mac Mini metà 2011

Uyarı: Ön koşul olan bir kılavuzu düzenliyorsunuz. Yapacağınız herhangi bir değişiklik bu adımın yer aldığı bütün 9 kılavuzları etkileyecektir.

İngilizce
İtalyanca

Adım 1 çevriliyor

Adım 1
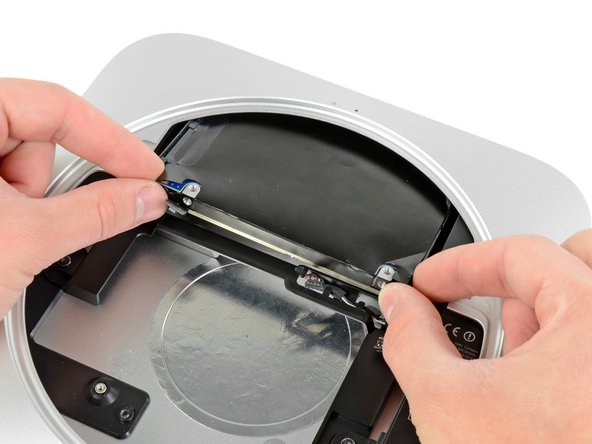
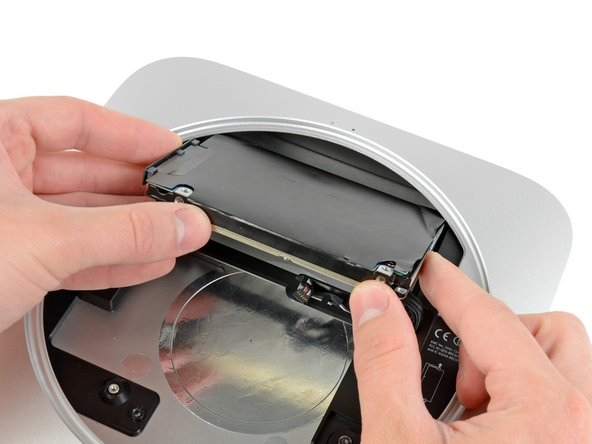
Mac Mini Mid 2011 Hard Drive Replacement: adım 0, 2 resimden 1. Mac Mini Mid 2011 Hard Drive Replacement: adım 0, 2 resimden 2.
  • Pull the hard drive away from the front edge of the mini and remove it from the outer case.

  • During reassembly, there are two pins on the inside edge of the hard drive that fit into the case. The holes have rubber grommets around them, so it may be difficult to tell when you have seated the hard drive correctly.

  • There are two pairs of holes in the case. Insert the pins into the holes closest to the bottom of the case.

Tira via il disco rigido dal bordo anteriore del Mac Mini e rimuovilo dalla copertura esterna.

Durante il rimontaggio, ci sono due perni sul bordo interno del disco rigido che si infilano nella copertura. I fori hanno delle guarnizioni in gomma attorno, quindi potrebbe essere difficile capire quando hai posizionato correttamente il disco rigido.

Ci sono due paia di fori nella copertura. Infila i perni nei fori più vicini alla parte inferiore della copertura.

Katkılarınız, açık kaynak Creative Commons lisansı altında lisanslanmaktadır.