Ana içeriğe geç

GoPro HD Hero2のLCDの交換

Adım 1 çevriliyor

İngilizce
Japonca
Adım 1
GoPro HD Hero2 LCD Replacement: adım 0, 2 resimden 1. GoPro HD Hero2 LCD Replacement: adım 0, 2 resimden 2.
  • Turn the motherboard assembly over to the side with the LCD and the camera lens.

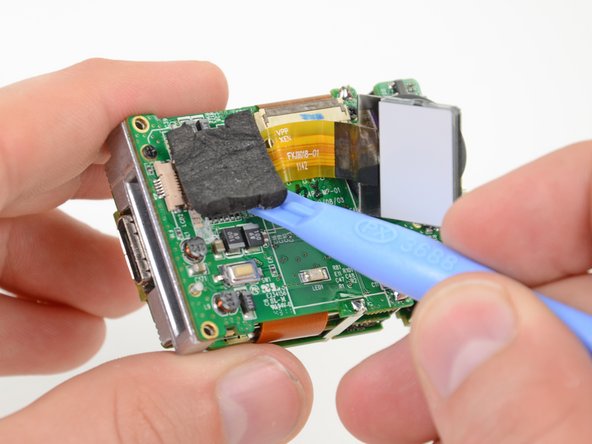
  • Gently wedge a plastic opening tool underneath the foam padding on top of the LCD ribbon cable.

  • Pry the foam padding up until the LCD ribbon cable can be lifted off the surface of the motherboard.

  • Do not try to remove the LCD yet, as its ribbon cable is still connected to the motherboard via a ZIF connector.

マザーボードアセンブリをLCDとカメラレンズ側に返します。

丁寧にプラスチック製の開口ツールをLCDリボンケーブル上のフォーム製のパッドの下に差し込みます。

LCDリボンケーブルがマザーボードの表面から外れるまで、フォーム製パッドをこじ開けます。

LCDをまだ外さないでください。リボンケーブルがZIFコネクターを通じてマザーボードと接続されたままです。

Katkılarınız, açık kaynak Creative Commons lisansı altında lisanslanmaktadır.