Ana içeriğe geç

why! N650DU Motherboard

Neye ihtiyacın var

  1. why! N650DU Motherboard, The Batteries: adım 1, 3 resimden 1. why! N650DU Motherboard, The Batteries: adım 1, 3 resimden 2. why! N650DU Motherboard, The Batteries: adım 1, 3 resimden 3.
    • Unlock the button without spring

    • Slide the battery up while unlocking the button with spring

  2. why! N650DU Motherboard, Access to major components: adım 2, 3 resimden 1. why! N650DU Motherboard, Access to major components: adım 2, 3 resimden 2. why! N650DU Motherboard, Access to major components: adım 2, 3 resimden 3.
    • Unscrew the two large screws circled in red

    • Unscrew the two small screws circled in green

    • Slide the plate down and lift the

  3. why! N650DU Motherboard, RAM memory: adım 3, 3 resimden 1. why! N650DU Motherboard, RAM memory: adım 3, 3 resimden 2. why! N650DU Motherboard, RAM memory: adım 3, 3 resimden 3.
    • Spread the two arms holding the RAM bar

    • Remove the RAM card

  4. why! N650DU Motherboard, SSD disk: adım 4, 2 resimden 1. why! N650DU Motherboard, SSD disk: adım 4, 2 resimden 2.
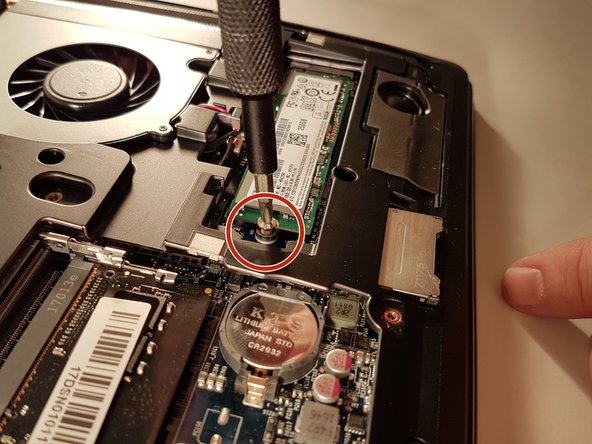
    • Unscrew the screw circled in red

    • Remove the SSD

  5. why! N650DU Motherboard, Hard disk: adım 5, 3 resimden 1. why! N650DU Motherboard, Hard disk: adım 5, 3 resimden 2. why! N650DU Motherboard, Hard disk: adım 5, 3 resimden 3.
    • Unscrew the screw circled in red

    • Pull the black tab up

  6. why! N650DU Motherboard, CD / DVD RW drive: adım 6, 3 resimden 1. why! N650DU Motherboard, CD / DVD RW drive: adım 6, 3 resimden 2. why! N650DU Motherboard, CD / DVD RW drive: adım 6, 3 resimden 3.
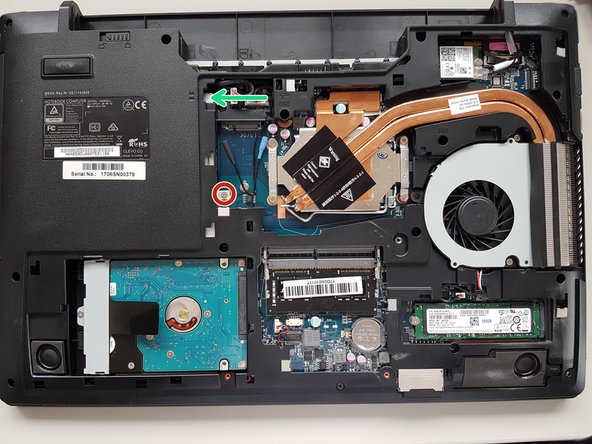
    • Unscrew the screw circled in red

    • Push the drive to the location indicated by the green arrow

    • Remove the drive from its location

  7. why! N650DU Motherboard, Carte WLAN: adım 7, 3 resimden 1. why! N650DU Motherboard, Carte WLAN: adım 7, 3 resimden 2. why! N650DU Motherboard, Carte WLAN: adım 7, 3 resimden 3.
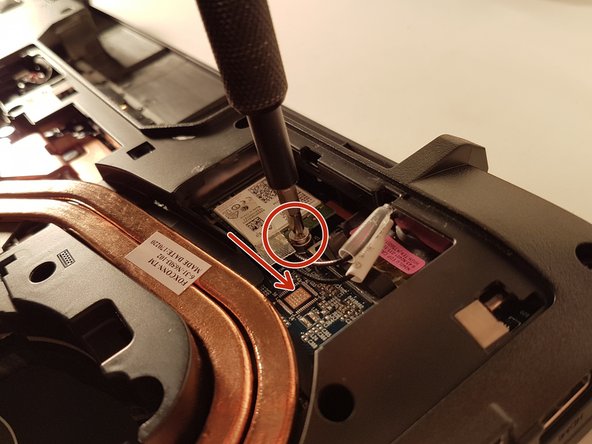
    • Unscrew the screw circled in red

    • Disconnect the WLAN card in the direction of the red arrow

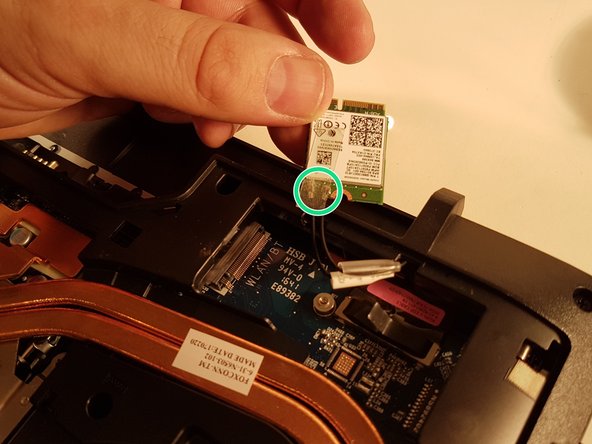
    • Unhook the two connectors circled in green on the WLAN card

  8. why! N650DU Motherboard, Processor: adım 8, 3 resimden 1. why! N650DU Motherboard, Processor: adım 8, 3 resimden 2. why! N650DU Motherboard, Processor: adım 8, 3 resimden 3.
    • Unscrew the four screws circled in red

    • Lift the radiator with the black label

  9. why! N650DU Motherboard: adım 9, 3 resimden 1. why! N650DU Motherboard: adım 9, 3 resimden 2. why! N650DU Motherboard: adım 9, 3 resimden 3.
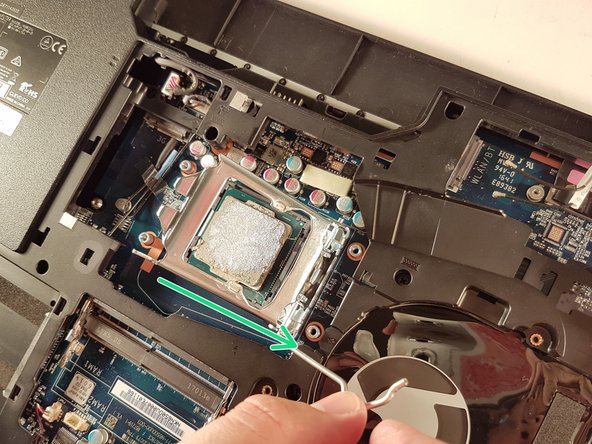
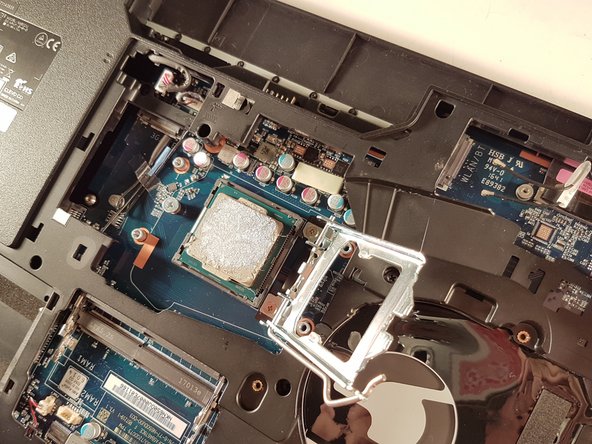
    • Push the lever in the direction of the red arrow while pushing it in

    • Lift the lever in the direction of the green arrow

    • Do not touch the bottom of the processor and take it by the sides

  10. why! N650DU Motherboard, The fan: adım 10, 3 resimden 1. why! N650DU Motherboard, The fan: adım 10, 3 resimden 2. why! N650DU Motherboard, The fan: adım 10, 3 resimden 3.
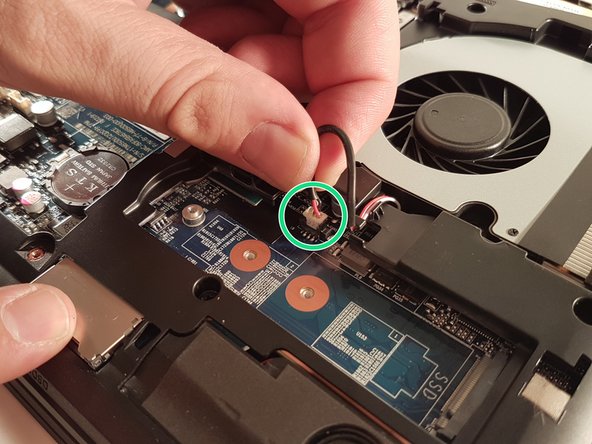
    • Unscrew the two screws circled in red

    • Disconnect the connector surrounded in green

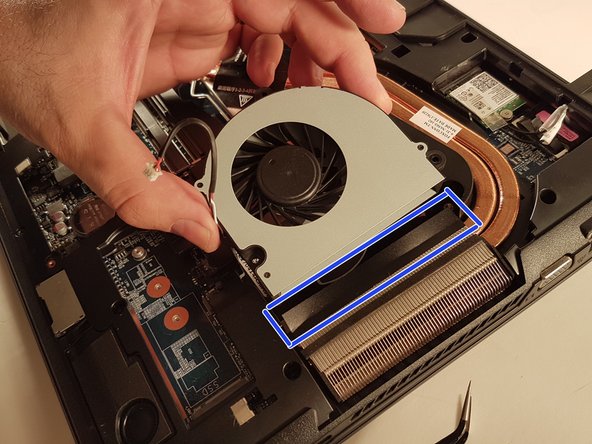
    • Remove the fan by lifting the blue framed tab

  11. why! N650DU Motherboard, Pile BIOS: adım 11, 2 resimden 1. why! N650DU Motherboard, Pile BIOS: adım 11, 2 resimden 2.
    • Remove the battery using a flat screwdriver

  12. why! N650DU Motherboard, The keyboard: adım 12, 3 resimden 1. why! N650DU Motherboard, The keyboard: adım 12, 3 resimden 2. why! N650DU Motherboard, The keyboard: adım 12, 3 resimden 3.
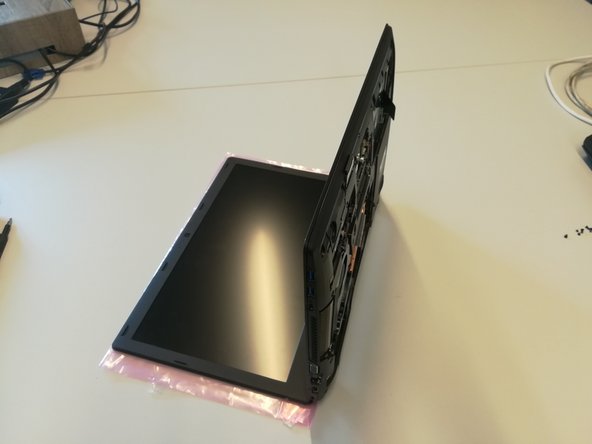
    • Unscrew the circled screws in red and green

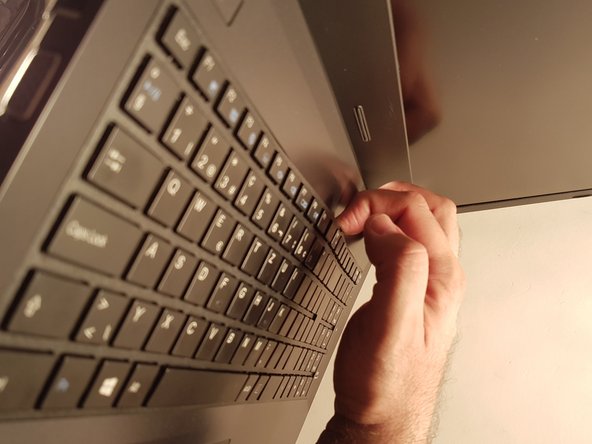
    • Put the computer in the position of the second image while pushing a paper clip into the hole of the screw circled in green until you hear a click

    • Lift the keyboard

  13. why! N650DU Motherboard: adım 13, 3 resimden 1. why! N650DU Motherboard: adım 13, 3 resimden 2. why! N650DU Motherboard: adım 13, 3 resimden 3.
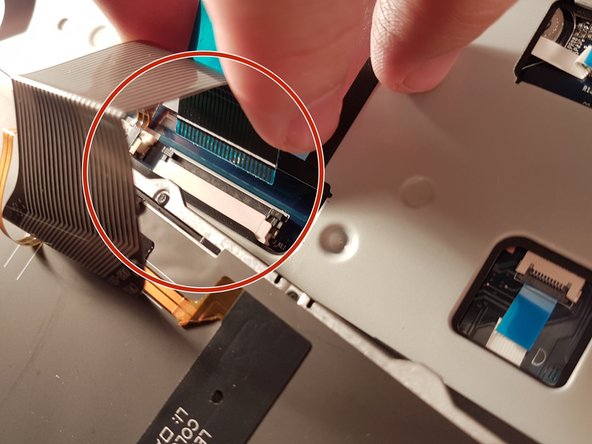
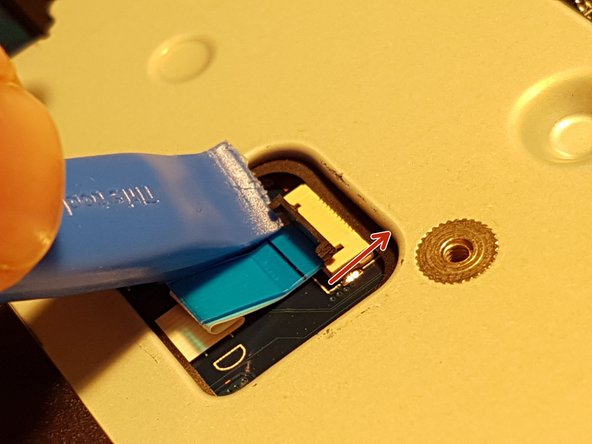
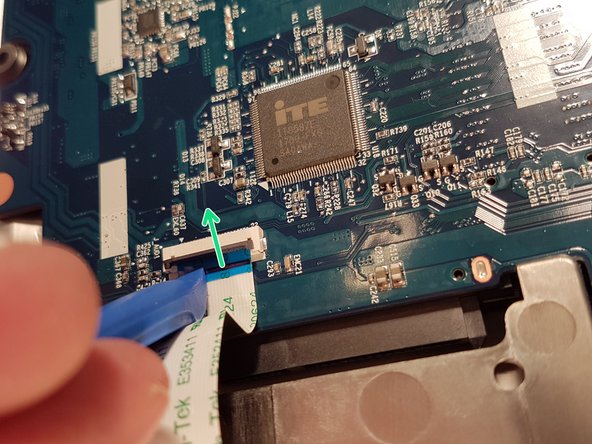
    • Remove the red circled connector

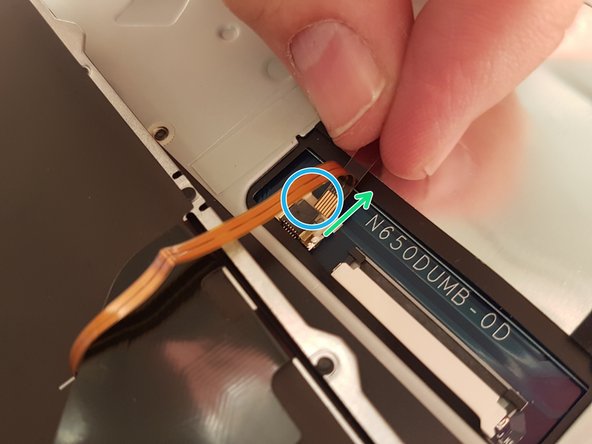
    • Pull the white drawer that holds the connector circled in blue in the direction of the green arrow

    • Remove the connector surrounded in blue

  14. why! N650DU Motherboard, Motherboard: adım 14, 3 resimden 1. why! N650DU Motherboard, Motherboard: adım 14, 3 resimden 2. why! N650DU Motherboard, Motherboard: adım 14, 3 resimden 3.
    • Lift the two black flaps

    • Remove the two connectors circled in red

  15. why! N650DU Motherboard: adım 15, 3 resimden 1. why! N650DU Motherboard: adım 15, 3 resimden 2. why! N650DU Motherboard: adım 15, 3 resimden 3.
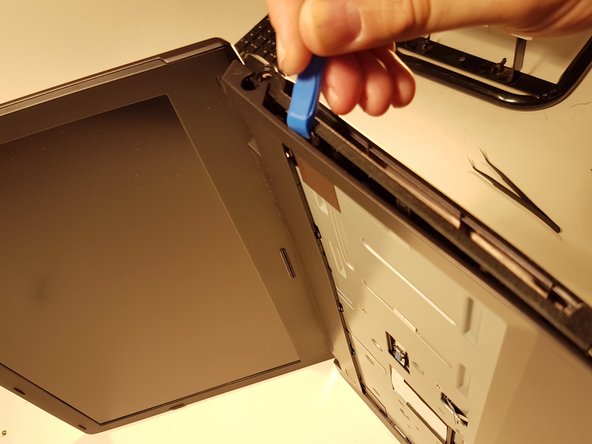
    • Remove the thirteen screws circled in red

    • Remove the top cover

  16. why! N650DU Motherboard: adım 16, 3 resimden 1. why! N650DU Motherboard: adım 16, 3 resimden 2. why! N650DU Motherboard: adım 16, 3 resimden 3.
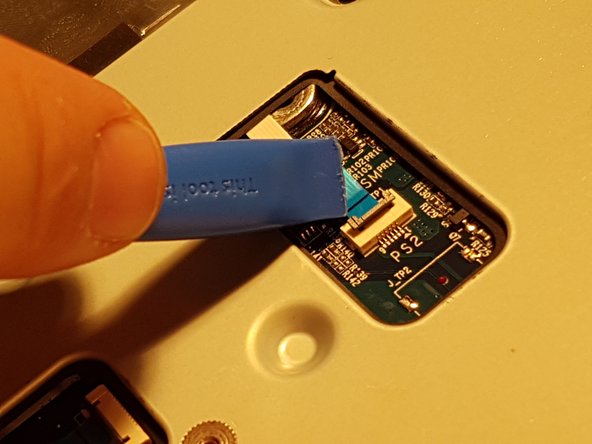
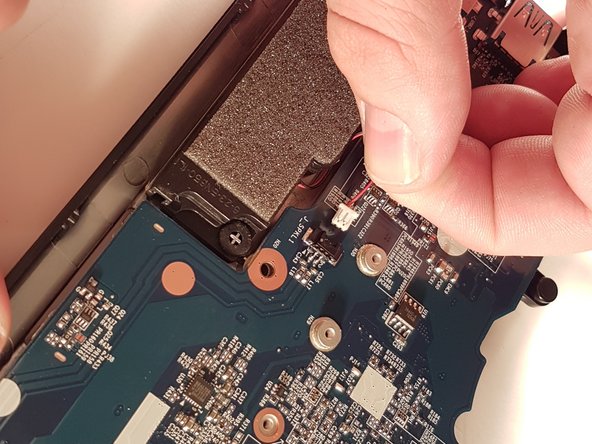
    • Lift the blue flap that holds the connector circled in green

    • Disconnect the connector surrounded in green

    • Disconnect the red circled connector

  17. why! N650DU Motherboard: adım 17, 3 resimden 1. why! N650DU Motherboard: adım 17, 3 resimden 2. why! N650DU Motherboard: adım 17, 3 resimden 3.
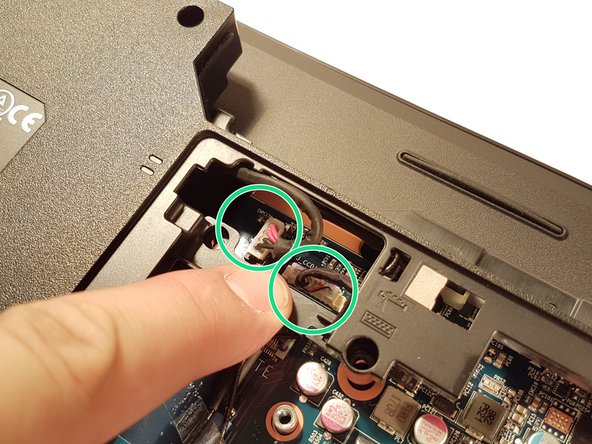
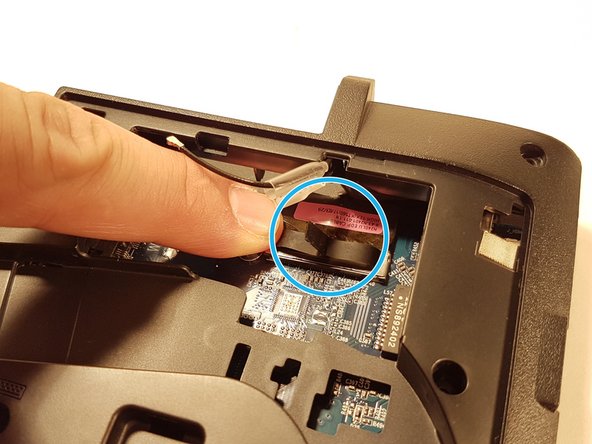
    • Disconnect the two connectors located in the green zone

    • Disconnect the connector surrounded in blue

    • Disconnect the red circled connector

  18. why! N650DU Motherboard: adım 18, 3 resimden 1. why! N650DU Motherboard: adım 18, 3 resimden 2. why! N650DU Motherboard: adım 18, 3 resimden 3.
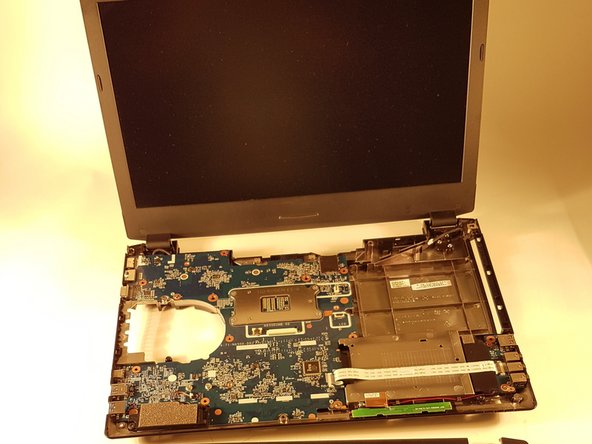
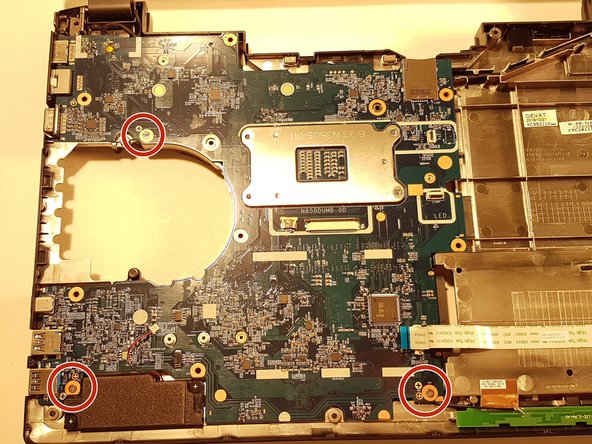
    • Remove the Micro SD port cover that is circled in green if there is one

    • Unscrew the three screws circled in red

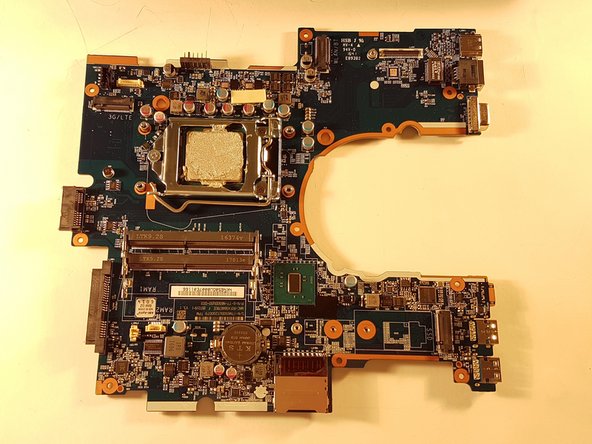
    • Carefully remove the motherboard

Sonuç

To reassemble your device, follow the instructions in reverse order.

Bu çevirmenlere özel teşekkürler:

fr en

100%

irlanda dünyayı onarmamıza yardım ediyor! Katkıda bulunmak ister misiniz?
Çeviriye Başlayın ›

Felice Suglia

Üyelik tarihi: 06/15/13

30.908 İtibar

264 adet Kılavuz yazıldı

0 Yorum

Yorum Ekle

İstatistikleri Görüntüle:

Son 24 Saat: 1

Son 7 gün: 2

Son 30 gün: 8

Her zaman: 558