Ana içeriğe geç

why! W650SZ CPU Replacement

Neye ihtiyacın var

  1. why! W650SZ CPU Replacement, Battery: adım 1, 3 resimden 1. why! W650SZ CPU Replacement, Battery: adım 1, 3 resimden 2. why! W650SZ CPU Replacement, Battery: adım 1, 3 resimden 3.
    • Slide the latch on the right to the unlocked position.

    • Slide the latch on the left to the unlocked position.

    • Remove the battery pack from the slot.

  2. why! W650SZ CPU Replacement, why! W650SZ Bottom Cover Replacement: adım 2, 3 resimden 1. why! W650SZ CPU Replacement, why! W650SZ Bottom Cover Replacement: adım 2, 3 resimden 2. why! W650SZ CPU Replacement, why! W650SZ Bottom Cover Replacement: adım 2, 3 resimden 3.
    • With your #0 Philips screwdriver remove the 2 screws from the bottom panel.

    • Now you can remove the bottom cover.

  3. why! W650SZ CPU Replacement, CPU: adım 3, 3 resimden 1. why! W650SZ CPU Replacement, CPU: adım 3, 3 resimden 2. why! W650SZ CPU Replacement, CPU: adım 3, 3 resimden 3.
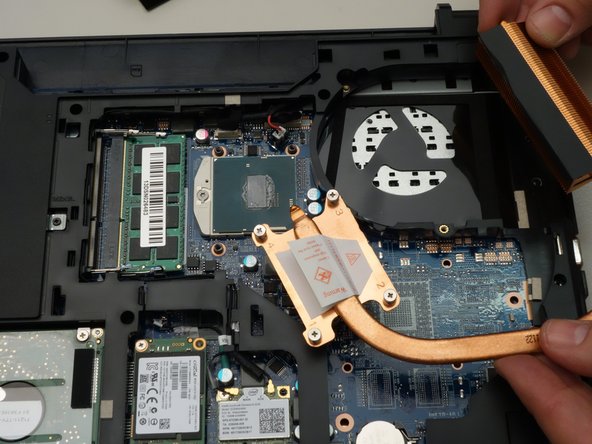
    • Using a Phillips screwdriver, unscrew the four captive screws securing the heatsink to the motherboard.

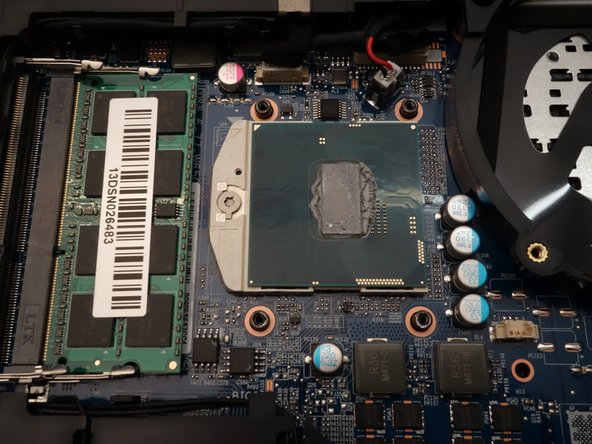
    • Remove the heatsink.

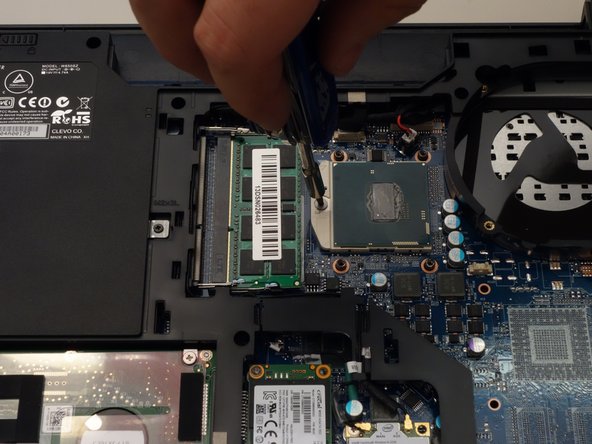
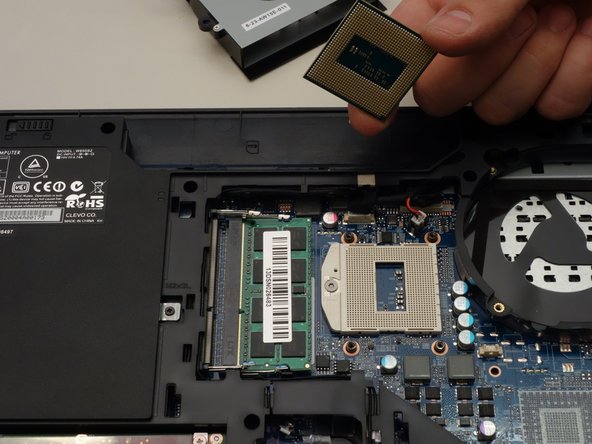
    • The processor and its retention mechanism is now visible.

  4. why! W650SZ CPU Replacement: adım 4, 3 resimden 1. why! W650SZ CPU Replacement: adım 4, 3 resimden 2. why! W650SZ CPU Replacement: adım 4, 3 resimden 3.
    • Unlock the processor using a small Torx screwdriver by turning the lock 180 degrees counterclockwise

    • Make sure the locking latch is pointing in the opposite direction.

    • You can now carefully remove the processor from its socket.

Sonuç

To reassemble your device, follow these instructions in reverse order.

Bu çevirmenlere özel teşekkürler:

fr en

100%

Jerry Wheeler dünyayı onarmamıza yardım ediyor! Katkıda bulunmak ister misiniz?
Çeviriye Başlayın ›

Felice Suglia

Üyelik tarihi: 06/15/13

30.908 İtibar

264 adet Kılavuz yazıldı

0 Yorum

Yorum Ekle

İstatistikleri Görüntüle:

Son 24 Saat: 2

Son 7 gün: 3

Son 30 gün: 6

Her zaman: 154