Ana içeriğe geç

why! W670SZQ1 Fan Replacement

Arşivlenmiş Kılavuz
Bu kılavuz sadece arşivsel amaçlarla muhafaza edilmiştir. Onarımınızı gerçekleştirmek için kılavuzun güncel halini kullanın.

Neye ihtiyacın var

  1. why! W670SZQ1 Fan Replacement, accumulator: adım 1, 3 resimden 1. why! W670SZQ1 Fan Replacement, accumulator: adım 1, 3 resimden 2. why! W670SZQ1 Fan Replacement, accumulator: adım 1, 3 resimden 3.
    • Open the latch of the accumulator on the left side.

    • Open the battery latch on the right side.

    • Remove the accumulator by simultaneously holding the right-hand latch open.

  2. why! W670SZQ1 Fan Replacement, Access to the most important components: adım 2, 3 resimden 1. why! W670SZQ1 Fan Replacement, Access to the most important components: adım 2, 3 resimden 2. why! W670SZQ1 Fan Replacement, Access to the most important components: adım 2, 3 resimden 3.
    • Use the Philips screwdriver to remove the two screws at the bottom of the cover.

    • Lift the cover at the bottom right with the iFixit Opening Tool

    • Lift the cover at the bottom left with the iFixit Opening Tool

    • Finally, remove the cover to gain access to the most important components.

  3. why! W670SZQ1 Fan Replacement, Fan: adım 3, 3 resimden 1. why! W670SZQ1 Fan Replacement, Fan: adım 3, 3 resimden 2. why! W670SZQ1 Fan Replacement, Fan: adım 3, 3 resimden 3.
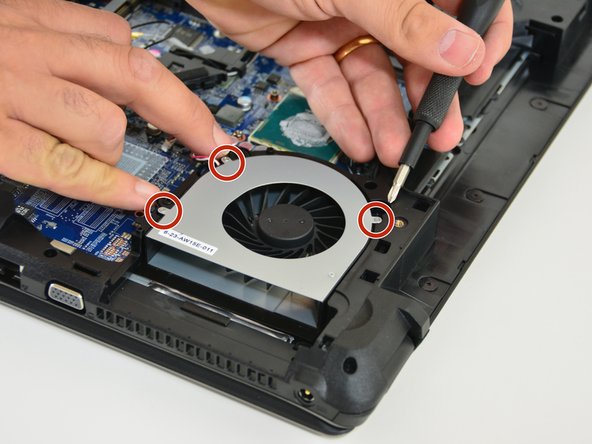
    • First, locate the fan. Then pull out the supply cable of the fan.

    • Remove the three retaining screws of the fan.

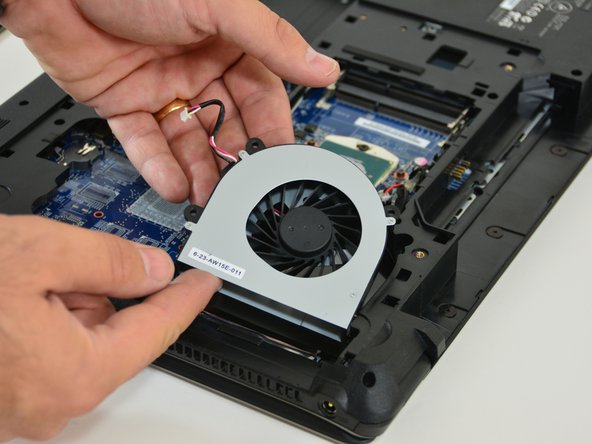
    • Finally, remove the fan by lifting it out.

Sonuç

Repeat the steps in reverse order to reassemble your device.

Bu çevirmenlere özel teşekkürler:

de en

100%

Bu çevirmenler dünyayı onarmamıza yardım ediyor! Katkıda bulunmak ister misiniz?
Çeviriye Başlayın ›

Felice Suglia

Üyelik tarihi: 06/15/13

30.884 İtibar

264 adet Kılavuz yazıldı

0 Yorum

Yorum Ekle

İstatistikleri Görüntüle:

Son 24 Saat: 0

Son 7 gün: 0

Son 30 gün: 1

Her zaman: 103