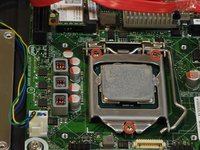
Ana içeriğe geç

why! WDi7SSD Replace processor (CPU)

Neye ihtiyacın var

  1. why! WDi7SSD Replace processor (CPU), why! WDi7SSD Opening procedure: adım 1, 3 resimden 1. why! WDi7SSD Replace processor (CPU), why! WDi7SSD Opening procedure: adım 1, 3 resimden 2. why! WDi7SSD Replace processor (CPU), why! WDi7SSD Opening procedure: adım 1, 3 resimden 3.
    • Make sure the computer is disconnected from the power source.

    • Flip the computer over.

    • Remove the six screws with a 2 mm Allen key.

    • Carefully remove the back panel, as well the left and right panel.

  2. why! WDi7SSD Replace processor (CPU): adım 2, 1 resimden 1.
    • Now flip up the base panel to which all components are attached.

  3. why! WDi7SSD Replace processor (CPU), Processor (CPU): adım 3, 3 resimden 1. why! WDi7SSD Replace processor (CPU), Processor (CPU): adım 3, 3 resimden 2. why! WDi7SSD Replace processor (CPU), Processor (CPU): adım 3, 3 resimden 3.
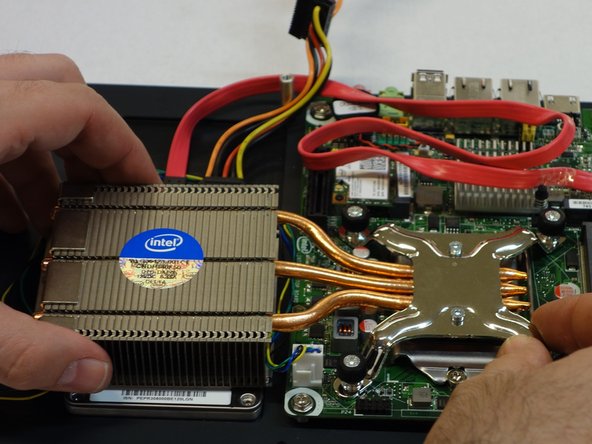
    • Loosen the 4 PH2 Phillips screws of the heat sink.

    • Now remove the heat sink.

  4. why! WDi7SSD Replace processor (CPU): adım 4, 2 resimden 1. why! WDi7SSD Replace processor (CPU): adım 4, 2 resimden 2.
    • Use the screwdriver to unscrew the three PH2 slotted screws to release the CPU holder.

    • Press down the spring on the right side of the CPU and pull it carefully to the side.

    • Put the CPU aside.

    • To remove the thermal paste, you can use isopropanol. The thermal paste must be completely removed from the heatsink and CPU.

Sonuç

To reassemble the unit, follow the instructions in reverse order.

Bir başkası bu kılavuzu tamamladı.

Bu çevirmenlere özel teşekkürler:

de en

100%

oldturkey03 dünyayı onarmamıza yardım ediyor! Katkıda bulunmak ister misiniz?
Çeviriye Başlayın ›

Felice Suglia

Üyelik tarihi: 06/15/13

31.100 İtibar

264 adet Kılavuz yazıldı

0 Yorum

Yorum Ekle

İstatistikleri Görüntüle:

Son 24 Saat: 0

Son 7 gün: 9

Son 30 gün: 13

Her zaman: 147