

It’s easy to forget, because they’re a lot of fun. But the major reason we do teardowns at iFixit is to see how things comes apart. After we’ve braved the glass, cables, and battery glue of a Galaxy Note 20, we tear one down more methodically (sometimes the original, if it can be saved), taking pictures and notes to create repair guides.
Like anyone who fixes these things over and over, we see trends, quirks, and recurring headaches. We steel ourselves for the hidden cable, the sticky glue, the little part that lives to get caught on your spudger. It’s high time we let you in on some of our shop talk.

So then! This post kicks off a series of explainers on certain brands of devices and what you might see any any one of them. It relies on the expertise of our teardown engineers, technical writers, and me, the charlatan who went to board repair school but, more importantly, can direct-message the experienced people who work here.
We can’t pretend to know every quirk, though, and there are people out there who have fixed up so many more devices than we have. If you have your own expertise with certain brands, and want to help those who might just be getting started, let us know what we should add here. Comment on the post, or find us on social media (Twitter, Facebook, Instagram), or email me: kevin at ifixit dot com.
The worst part: the back glass
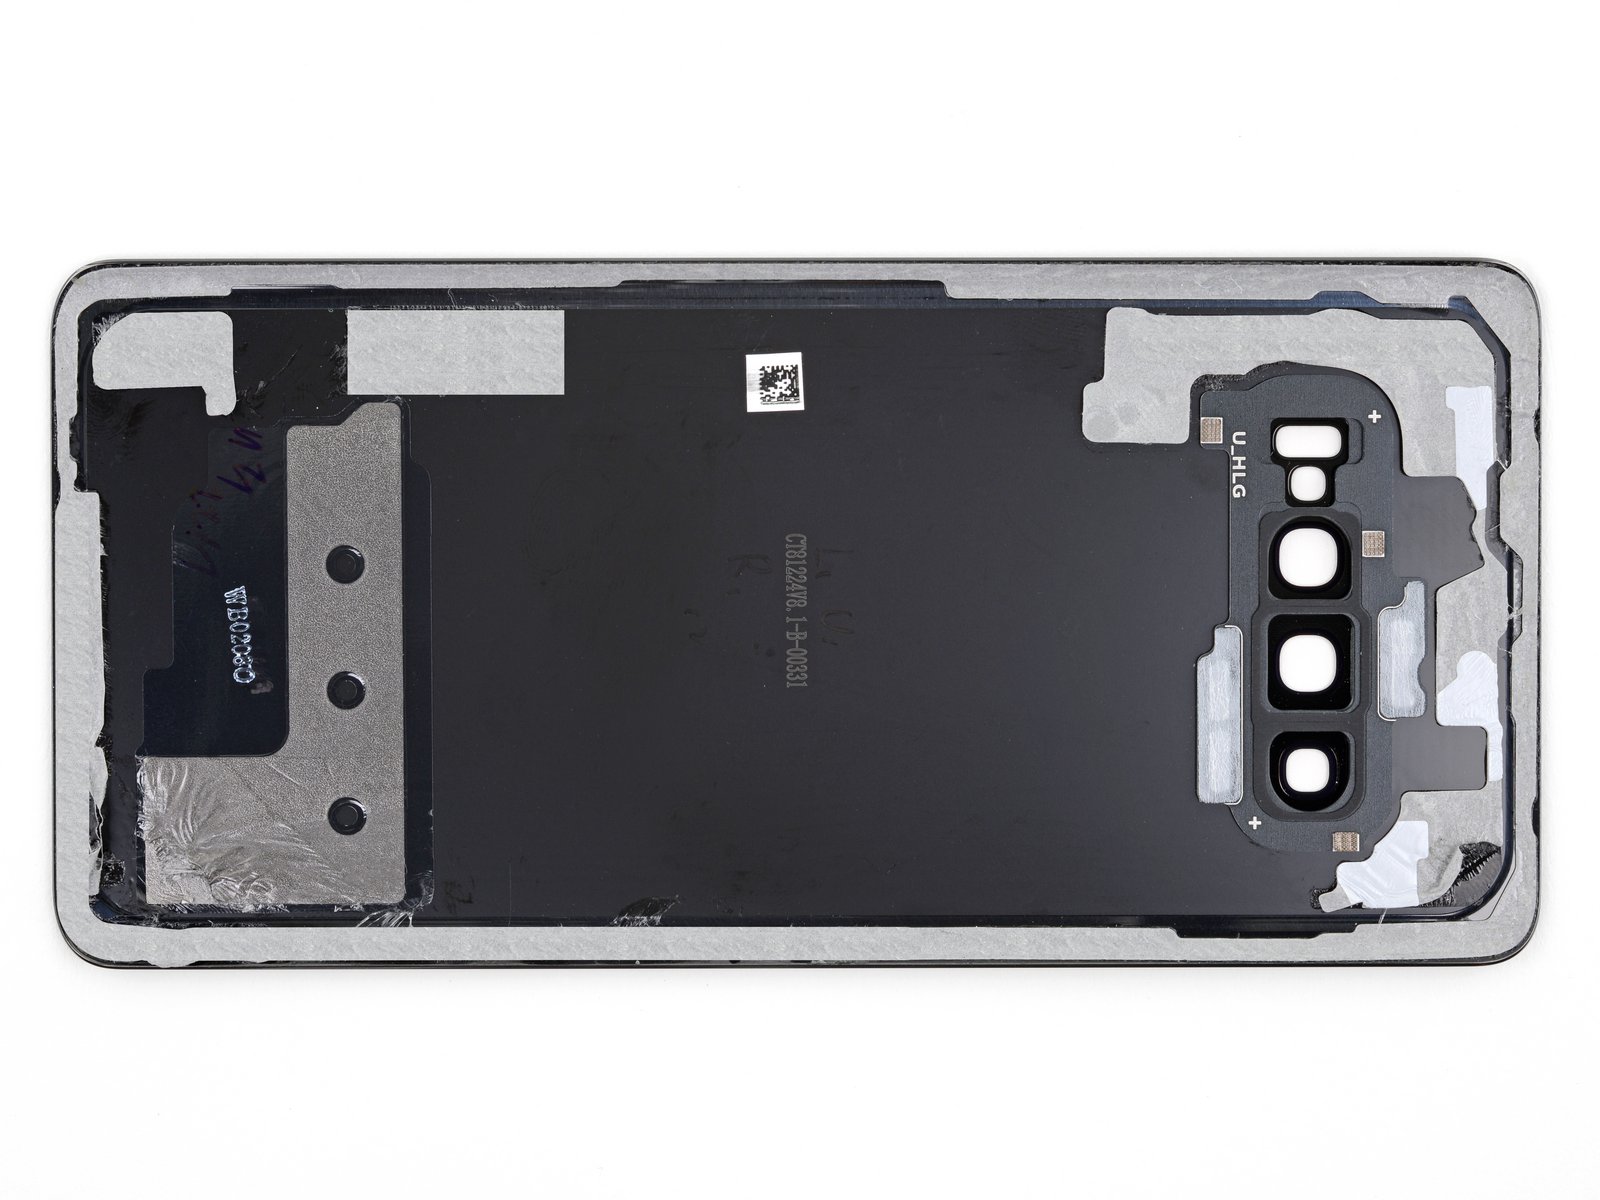
I once offered to do a screen and battery replacement on my friend’s Samsung Galaxy S8+, if they paid for the parts. It’s not something I’ll readily offer again, especially if they’re going to sit across from me while I do it. You have to take the back off a modern Samsung phone to get at anything else, and taking the back off involves heat, alcohol, prying, swearing, murmured prayers, and trying not to yelp when you see the first cracks.
Samsung is deeply proud of the “art” of its curved glass designs. The reality of working with them is far less elegant. If the rear glass has any cracks at all, using any tool to get underneath the curved edge of the glass will likely exacerbate them, or cause bigger spiderweb-style cracks. Getting a grip on the glass back is tricky, and then finding a prying angle that lifts the glass without too much pressure in one place—it’s bad.

What really kicks it up from “annoyance” to “treachery” is the glue. The glue holding the rear case onto a modern Samsung is “a thick, goopy black mess,” says iFixit writer and former lead teardown engineer Sam Goldheart. And it gets worse as the phone ages, which is of course precisely when you’d want to remove the cover for a battery change. It requires “an uncomfortable amount of heat to loosen,” says technical writer Arthur Shi, and still “sometimes feels like the rear cover is impossible to remove.”
“Apple may deter people from opening their phones with proprietary screws,” Shi says, “but Samsung’s brutal adhesive is often more effective.”
This is not to say you can’t do it. I got the back off the S8+ with our iOpener, a number of trips to the microwave, and patience. But if you’re not a veteran, it might be wise to buy a replacement back glass (such as this S9 version) along with your new battery or screen, so that you’re covered and can move forward with a bit more confidence.
You might have to transfer some smaller parts to a new back, like a fingerprint sensor or a camera flash (Tesa Tape comes in handy for that). But it’s still better than leaving your phone looking worse than when you dove into it.

Batteries

Once you’ve got the back off, and removed the midframe, you can get at the battery. Except, you can’t, actually.
There’s a whole batch of very sticky glue holding the battery in place, requiring either a lot of adhesive remover or isopropyl, heat to the front side of the phone, or both. But it’s not so simple as applying chemicals, then applying force. On some models, the compartment underneath the battery has a cut-out in the middle, exposing the back of the fragile OLED screen. So you have to apply, pry a bit, see how much leverage you can get on the battery, then try again. You can’t use metal tools, for fear of damaging the screen (or, worse, the battery).

Samsung batteries “are in these terrible tight wells that are hard to pry in,” notes Goldheart. You might think that after tight battery space seemed part of the cause of the exploding Note 7, Samsung would give their batteries plenty of room, and maybe even ease up on the glue. If anything, they’ve gotten more aggressive.
As with the back glass, the best tool you have is patience. Starting with the S7, Samsung batteries seem designed to release with isopropyl alcohol—there are even little teardrop wells on the sides of the battery compartment to channel the stuff underneath. Don’t pry too hard, don’t use the wrong tool out of frustration, and let the alcohol do its job.
Screens
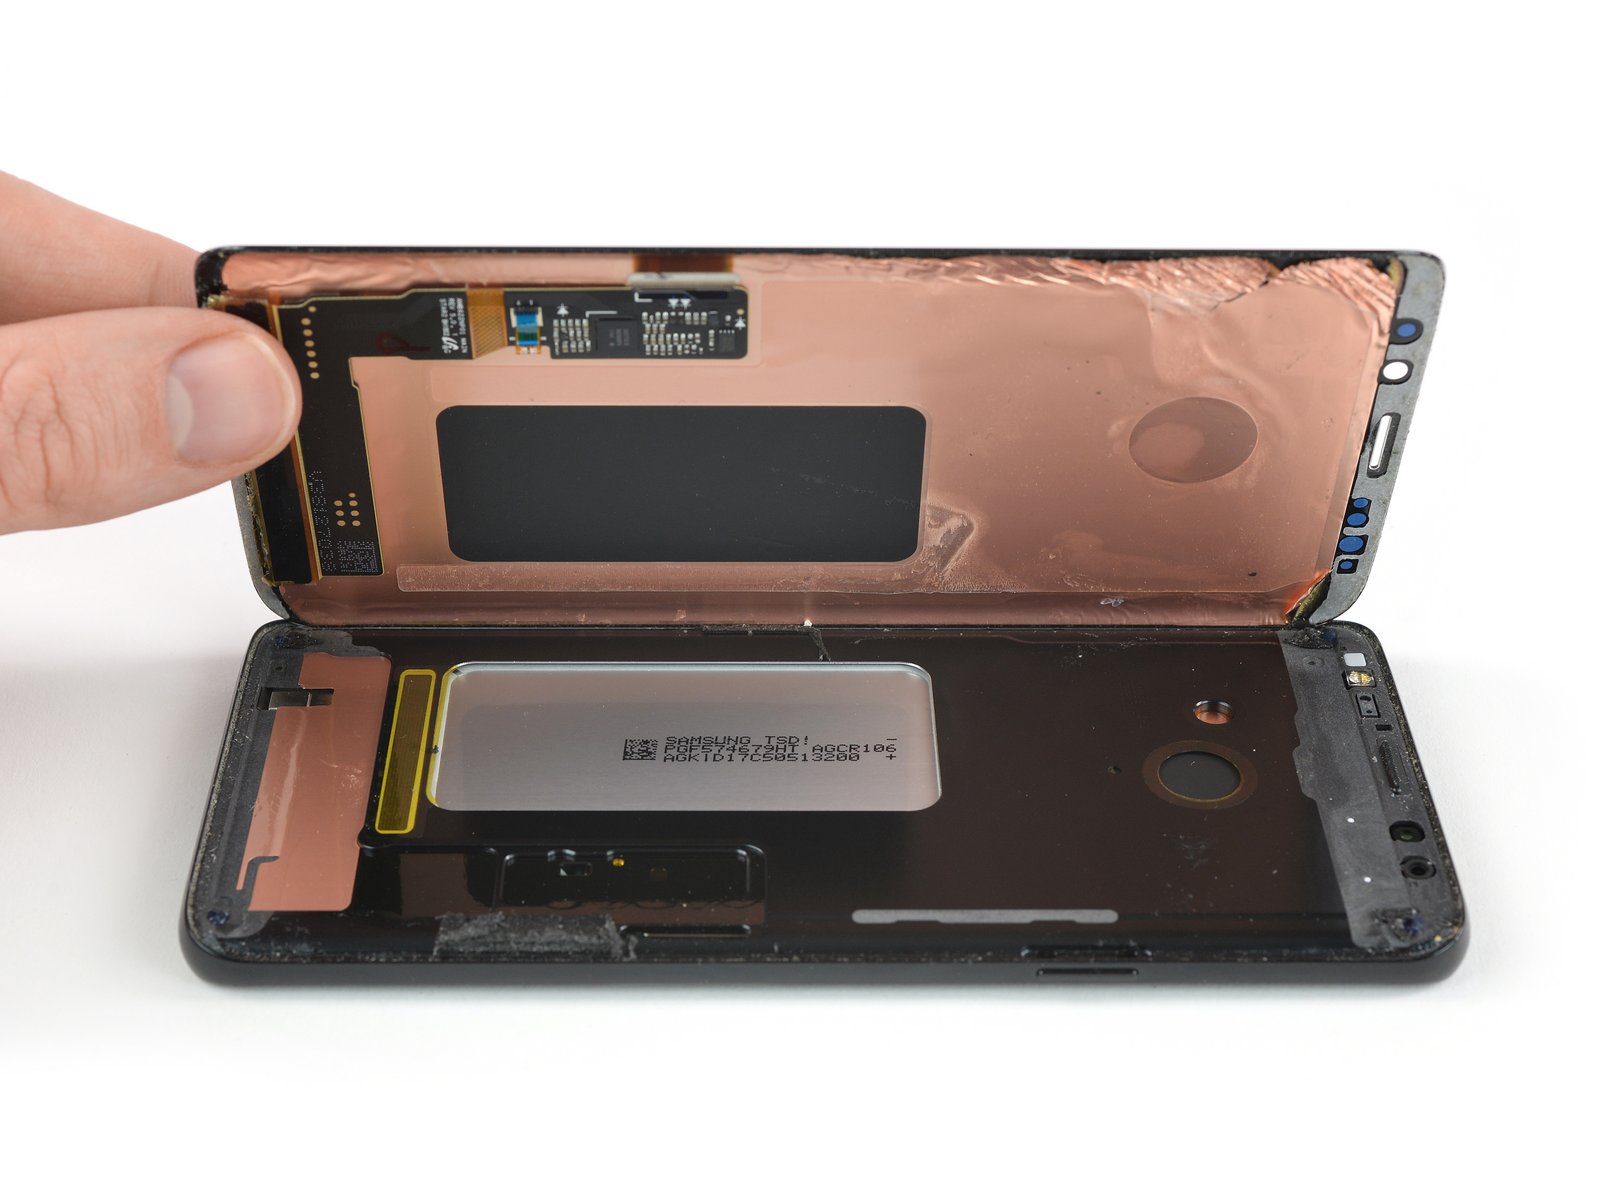
Once you’ve removed the back panel, disconnected or removed the battery, and disconnected the display plug from the back, you’re ready to go at the screen. Is the glue softer, the panel easier to remove than the back glass? It is not. It “can be significantly stronger,” we note in one guide, such that you might switch from an iOpener to a hair dryer or heat gun to up the glue-melting factor.
A modern Samsung display has the same curved glass and strong glue as the rear panel, but this time there’s a thin OLED display, too. It’s a little too easy to stab your pick or tool between the OLED and glass, which is likely to cause screen damage. On some models you will have to pry the motherboard up a bit to disconnect the display cable. It’s a lot of little risks that add up, all to replace a component very likely to be damaged in a phone drop.
Knowing this, some parts vendors, including us, sell Samsung screens with the case, midframe, and most of the other small parts attached. That means your job is to put your phone’s boards, battery, back glass, and other components back into the frame. Is that easier than removing two curved panels, held down by strong glue? For some. Is it quite sad that replacing the screen on a popular device requires choosing between hairdryer surgery and phone-of-Theseus maneuvers? Yes.

Samsung Galaxy Phone S
Repair guides and support for Android-based smartphones in Samsung's Galaxy S line.
View DeviceLittle bits
Okay, so there are some encouraging things to know about fixing a Samsung phone:
- While removing the back glass is a painful dice roll, at least you can replace the back glass on most Samsung phones. That’s not the case for iPhones, or other devices with a smaller parts market.
- There are not usually unexpected booby-trap cables connecting the front or back of a Samsung to the board, other than the obvious ribbons for display, fingerprint sensors, and the like.
- Biometric devices are not locked to the motherboard, and so can be replaced, unlike Apple’s fingerprint/face tools.
- The USB charging port is often part of a discrete, replaceable component.
It often feels like Samsung’s philosophy is that their devices don’t need to be convenient to repair, because they are sealed and durable. But that ignores the simple fact that most of their flagship phones are made of glass, front and back. And every Samsung phone has a battery inside, a consumable component that should be replaced, rather than have the whole phone traded in.
What did we miss? What’s a typical trait of Samsung devices you’ve found while repairing them? Comment below, tag us on social media (Twitter, Facebook, Instagram), or let me know directly: kevin at ifixit dot com.


10 Yorum
This also doubles as excellent marriage advice.
FeRD - Yanıt
Good advice, I find after 20 minute or so I loose the need to continue !!
Walter Poole -
LMFAO‼‼‼😀😃😄😆😅😂🤣🙃😳😎😎🤯🥳🤡👹👺👽👻👾🙈🙉🙊. Doubles as a marriage advice... 2 funny still LMAO 😅😂🤣🙃👽👻
Gus Zaporta -
No one is actually singing SamSUNG praises — Not even Neil Diamond https://www.youtube.com/watch?v=ighSddnn...
Andrew Koala - Yanıt
I did attempt to replace my s8+ screen and back cover on my beloved phone. Screen cost me $210CAD. When arrived I test it and and was working fine. When I glue it to the frame I noticed that the screen connector was not in line with the socket and would not fit! When I tried to remove the new sceen I accidently placed the pick in-between the glass and an oled and it cracked! I was furies! The provider refused to honor the complaint and I was left with broken screen. I’m still looking for Canadian supplier who would offer quality screen in reasonable price :(
mariuszdydo - Yanıt