Ana içeriğe geç

Neye ihtiyacın var

Bu teardown bir tamir kılavuzu değildir. Acer Windows Mixed Reality Headset Developer Edition cihazınızı onarmak için, servis kılavuzumuzu kullanın.

  1. Acer Windows Mixed Reality Headset Developer Edition Teardown, Overview: adım 1, 2 resimden 1. Acer Windows Mixed Reality Headset Developer Edition Teardown, Overview: adım 1, 2 resimden 2.
    • Acer Windows Mixed Reality Headset Developer Edition Specs:

    • Two high-resolution liquid crystal displays at 1440 x 1440

    • 2.89” diagonal display size (x2)

    • Front hinged display

    • 4.00m cable

    • Built-in audio out and microphone support through 3.5mm jack

    • Single cable with HDMI 2.0 (display) and USB 3.0 (data) for connectivity
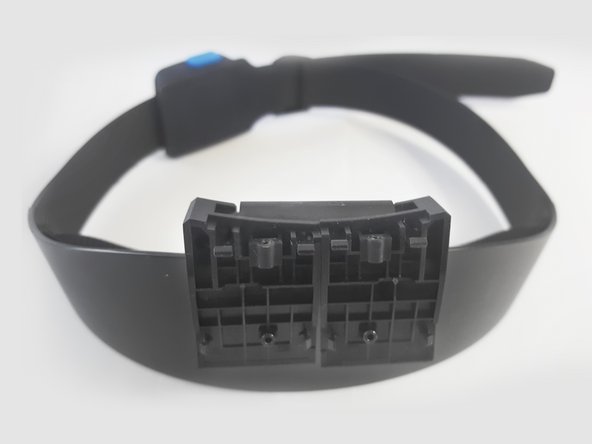
  2. Acer Windows Mixed Reality Headset Developer Edition Teardown, Remove Nose Clip and Foam: adım 2, 3 resimden 1. Acer Windows Mixed Reality Headset Developer Edition Teardown, Remove Nose Clip and Foam: adım 2, 3 resimden 2. Acer Windows Mixed Reality Headset Developer Edition Teardown, Remove Nose Clip and Foam: adım 2, 3 resimden 3.
    • Remove nose clip

    • Pull the foam from the velcro on the headset

  3. Acer Windows Mixed Reality Headset Developer Edition Teardown, Remove Face Mold: adım 3, 3 resimden 1. Acer Windows Mixed Reality Headset Developer Edition Teardown, Remove Face Mold: adım 3, 3 resimden 2. Acer Windows Mixed Reality Headset Developer Edition Teardown, Remove Face Mold: adım 3, 3 resimden 3.
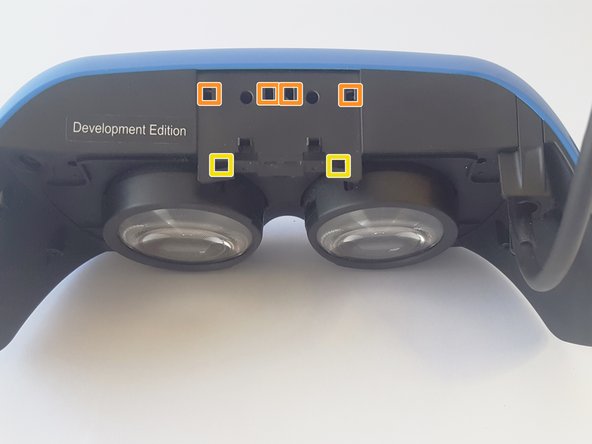
    • Remove the 8 Screws holding the mold to the headset

    • Pop 4 clips on the bottom of the headset with the spudger and begin to spread the mold from the headset.

    • 4 more clips are on the top side to fully pull off the mold

  4. Acer Windows Mixed Reality Headset Developer Edition Teardown, Remove Headband: adım 4, 3 resimden 1. Acer Windows Mixed Reality Headset Developer Edition Teardown, Remove Headband: adım 4, 3 resimden 2. Acer Windows Mixed Reality Headset Developer Edition Teardown, Remove Headband: adım 4, 3 resimden 3.
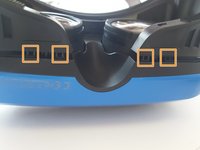
    • Pop the top clips up with the plastic spreader.

    • there are two clips along the front edge

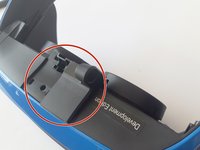
    • There is one more clip in the back corner near the lenses

  5. Acer Windows Mixed Reality Headset Developer Edition Teardown, Lens Caps: adım 5, 2 resimden 1. Acer Windows Mixed Reality Headset Developer Edition Teardown, Lens Caps: adım 5, 2 resimden 2.
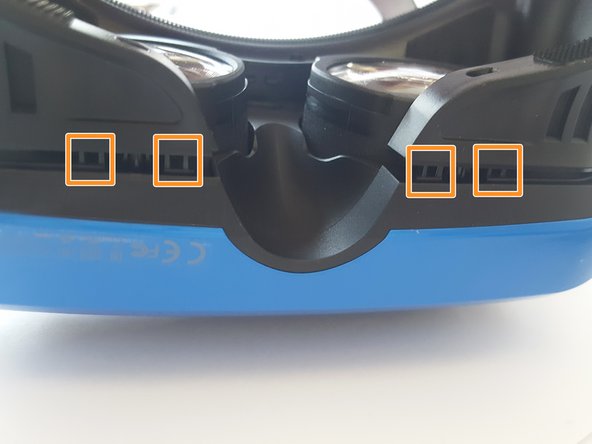
    • Release the clip along the bottom edge with the spudger. There is an opening in the side of the wall of the clip that allows room for the spudger to help separate the lens cap from the carriage

  6. Acer Windows Mixed Reality Headset Developer Edition Teardown, Removing Back Cover: adım 6, 3 resimden 1. Acer Windows Mixed Reality Headset Developer Edition Teardown, Removing Back Cover: adım 6, 3 resimden 2. Acer Windows Mixed Reality Headset Developer Edition Teardown, Removing Back Cover: adım 6, 3 resimden 3.
    • It was easier splitting the cover on the side arms open with the spudger and work your way towards the front

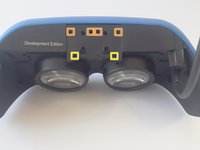
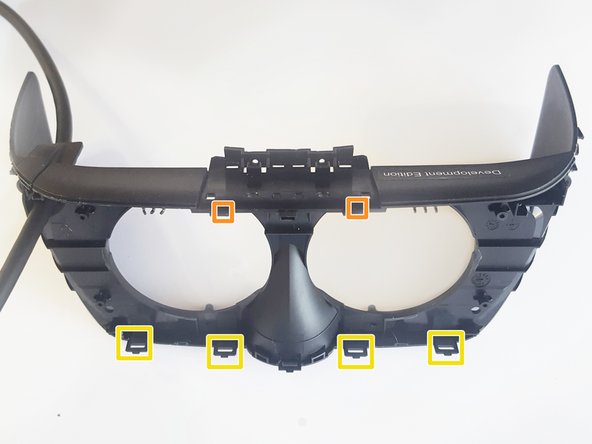
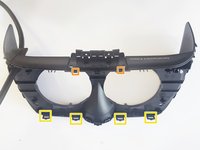
    • Pop the nine clips on the top of the headset

    • Release the bottom five clips on the headset

  7. Acer Windows Mixed Reality Headset Developer Edition Teardown, Removing the Lens: adım 7, 3 resimden 1. Acer Windows Mixed Reality Headset Developer Edition Teardown, Removing the Lens: adım 7, 3 resimden 2. Acer Windows Mixed Reality Headset Developer Edition Teardown, Removing the Lens: adım 7, 3 resimden 3.
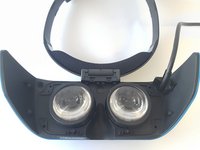
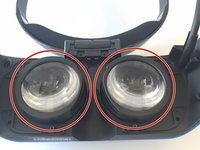
    • Remove the four screws in the corners of the lens

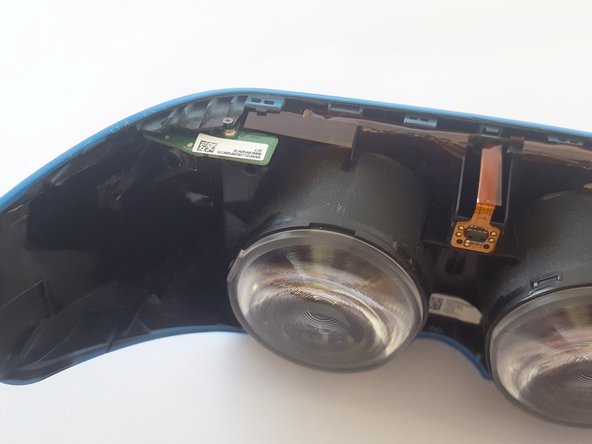
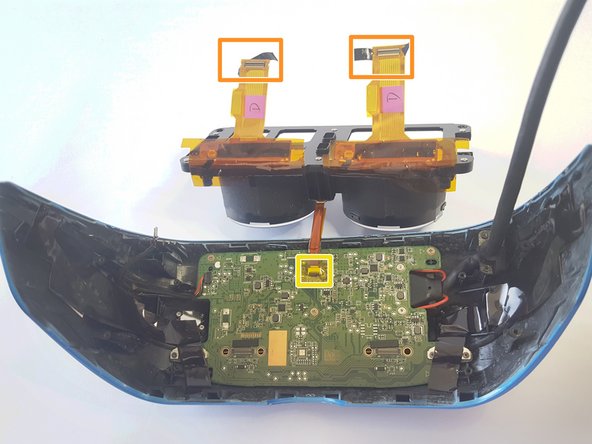
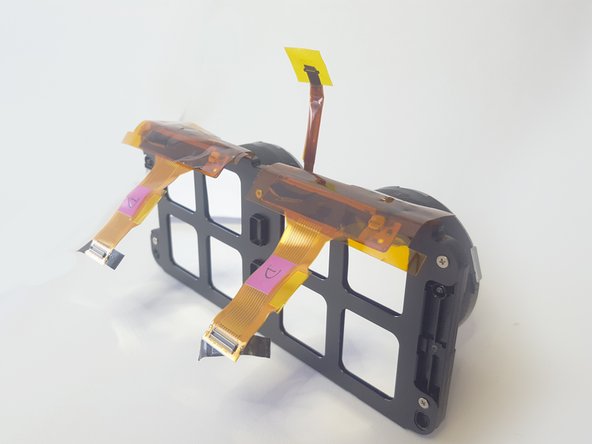
    • Remove tape connecting the ribbon cables to the PCB

    • Unplug the lens from the PCB

  8. Acer Windows Mixed Reality Headset Developer Edition Teardown, Removing the PCB: adım 8, 3 resimden 1. Acer Windows Mixed Reality Headset Developer Edition Teardown, Removing the PCB: adım 8, 3 resimden 2. Acer Windows Mixed Reality Headset Developer Edition Teardown, Removing the PCB: adım 8, 3 resimden 3.
    • Remove the four screws for the camera cable connector

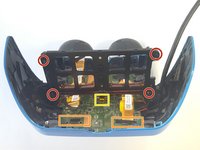
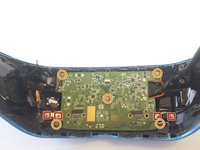
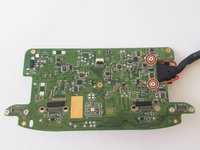
    • Remove the five screws on the PCB

  9. Acer Windows Mixed Reality Headset Developer Edition Teardown, PCB: adım 9, 3 resimden 1. Acer Windows Mixed Reality Headset Developer Edition Teardown, PCB: adım 9, 3 resimden 2. Acer Windows Mixed Reality Headset Developer Edition Teardown, PCB: adım 9, 3 resimden 3.
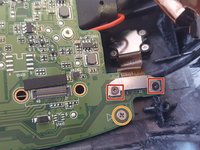
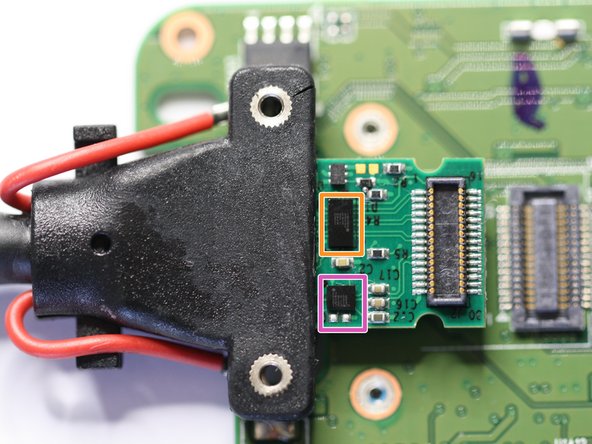
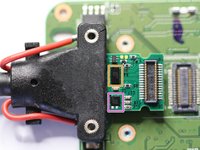
    • Unscrew the two screws connecting the cable to the PCB

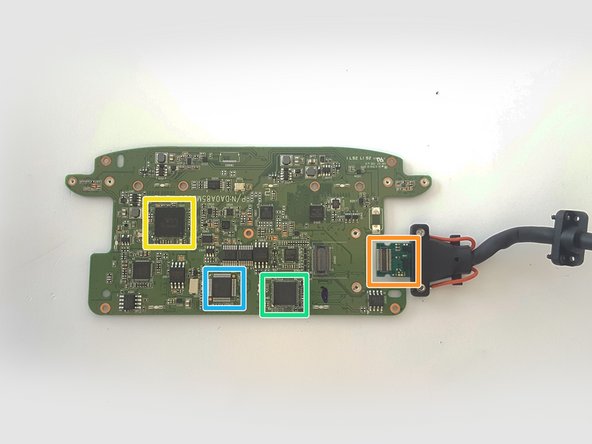
    • Cypress CYUSB3064-BZXC SuperSpeed USB Bridge Controller

    • Cypress CYUSB3304-68LTXI HX3 USB 3.0 Hub

    • STMicroelectronics medium-density STM32F103C8 performance line microcontroller.

    • Spectra7 VR8050 USB 3.0 Cable Equalizer

    • Spectra7 HT8181 HDMI 2.0 Cable Equalizer

  10. Acer Windows Mixed Reality Headset Developer Edition Teardown, Removing the Front Cameras: adım 10, 3 resimden 1. Acer Windows Mixed Reality Headset Developer Edition Teardown, Removing the Front Cameras: adım 10, 3 resimden 2. Acer Windows Mixed Reality Headset Developer Edition Teardown, Removing the Front Cameras: adım 10, 3 resimden 3.
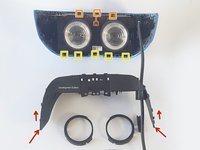
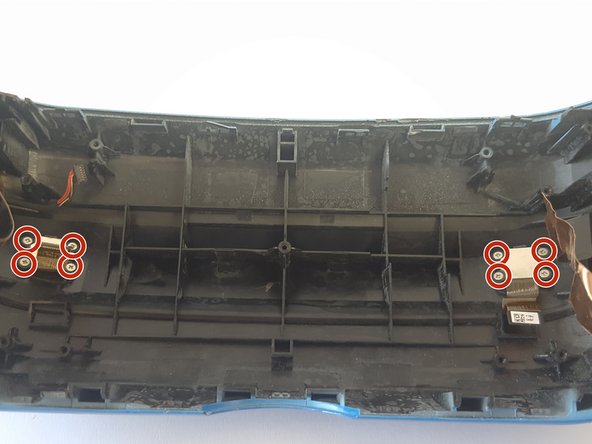
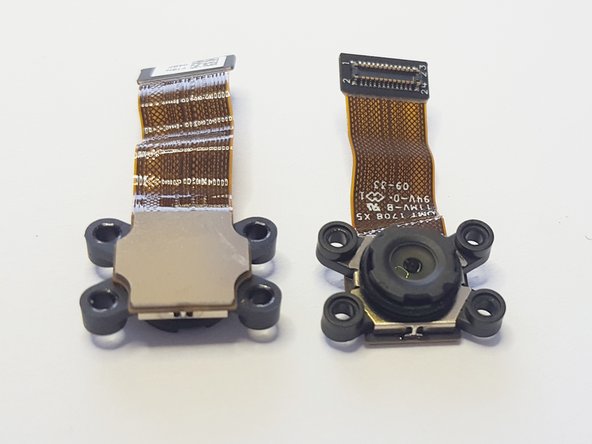
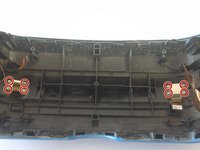
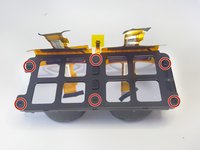
    • Unscrew the 8 camera screws in the corners

    • Cameras were not easily identifiable, however, they looked identical to the cameras we found in our HP MR HMD teardown. Also had similar part numbers to the the Microsoft Surface 3 rear camera.
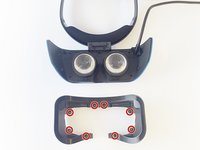
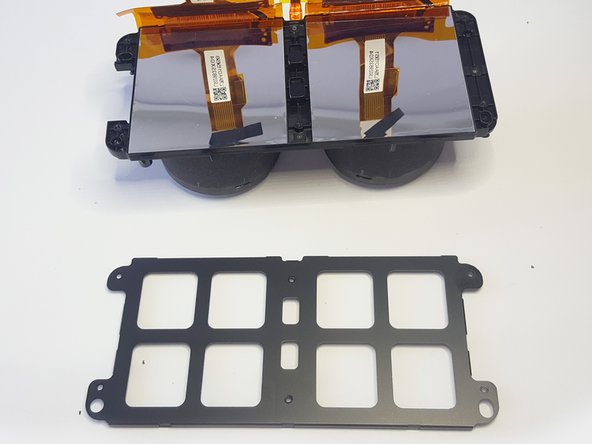
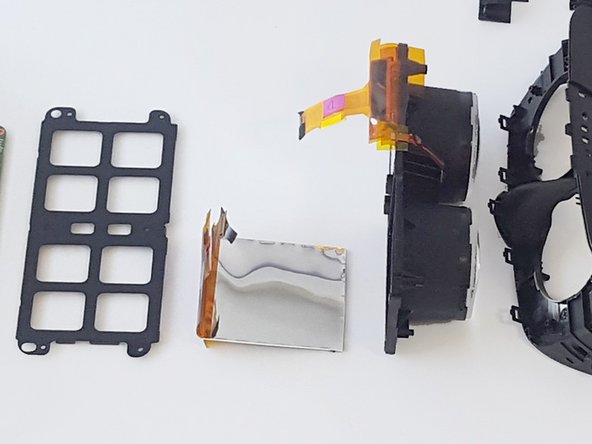
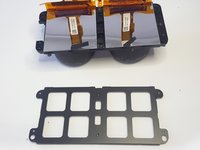
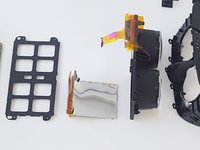
  11. Acer Windows Mixed Reality Headset Developer Edition Teardown, Inside the Lens: adım 11, 3 resimden 1. Acer Windows Mixed Reality Headset Developer Edition Teardown, Inside the Lens: adım 11, 3 resimden 2. Acer Windows Mixed Reality Headset Developer Edition Teardown, Inside the Lens: adım 11, 3 resimden 3.
    • Remove 6 screws

    • Peal tape on the top of the films and pull back the films

    • You can then remove the 2 high-resolution 1440x1440 liquid crystal displays.

    • Lenses: The lenses appear to be fresnel on the inside but smooth on the outside.

Super_All_In_One

Üyelik tarihi: 08/23/17

201 İtibar

2 adet Kılavuz yazıldı

7 Yorum

This is fantastic thank you! Any plans on tearing down the other four MR headsets from Microsoft?

Connor Dolan - Yanıt

I’m curious, where are the the eye displays? And are they purchasable? I want to replace the eye display, because one in the left eye is glitching out.

Sheldon Mead - Yanıt

Hi there,

I am wondering if anyone knows the components I have highlighted.

[IMG]http://i63.tinypic.com/2hxsz1f.jpg[/IMG]

[IMG]http://i66.tinypic.com/2mm5zyu.jpg[/IMG]

[IMG]http://i63.tinypic.com/33w8hop.jpg[/IMG]

My HP WMR unit had a power surge and has burnt out most of these components.

A good electrical engineer friend of mine has cast a close eye over all the other components on the board, showing no physical damage (which I know doesn’t mean that they all ok).

I live in hope that I will be able to repair my WMR headset, as I have myself had plenty of experience with SM components.

Just identifying the values of these components is proving to be mighty tricky!

I believe (A) 6 pin “EDVGA” are voltage regulators - SOT23-6?

(B) Transistor? - “NA ID9” ?

Appreciate any help :)

Paul

Paul Slater - Yanıt

Hi !!! Led driver PAM2803

Роман Анатольевич -

Does anyone know where to buy the main cable cause I somehow broke mine pre good the cable with the USB and hdmi is the one I'm after thx

ARAA - Yanıt

Yorum Ekle

İstatistikleri Görüntüle:

Son 24 Saat: 4

Son 7 gün: 32

Son 30 gün: 85

Her zaman: 12,986