Ana içeriğe geç

Neye ihtiyacın var

Öne Çıkan Belge

Bu teardown bir tamir kılavuzu değildir. Breville BTA830 cihazınızı onarmak için, servis kılavuzumuzu kullanın.

  1. Breville BTA830 Teardown, Breville BTA830 Teardown: adım 1, 1 resimden 1.
    • Before Teardown

  2. Breville BTA830 Teardown: adım 2, 2 resimden 1. Breville BTA830 Teardown: adım 2, 2 resimden 2.
    • Turn the toaster upside down

    • Unscrew all 6 slotted spanner screws using the slotted spanner head screwdriver

    • Then unscrew all 4 slotted Phillips heads screws using a Phillips head screwdriver

  3. Breville BTA830 Teardown: adım 3, 1 resimden 1.
    • The slotted spanner screws hold 4 rubber feet in place

    • Rubber feet can now be detached

  4. Breville BTA830 Teardown: adım 4, 2 resimden 1. Breville BTA830 Teardown: adım 4, 2 resimden 2.
    • Detach timer knob using flat head screwdriver, insert screwdriver between knob and sliding hatch and apply slight pressure away from toaster

  5. Breville BTA830 Teardown: adım 5, 1 resimden 1.
    • Pulling out crumb tray from underneath, using handle

  6. Breville BTA830 Teardown: adım 6, 2 resimden 1. Breville BTA830 Teardown: adım 6, 2 resimden 2.
    • Lift top casing, being careful of the ribbon cable connected from the casing to the circuit board

    • Carefully rest the top casing on the side facing the ribbon cable

  7. Breville BTA830 Teardown: adım 7, 1 resimden 1.
    • Disconnect the cable connector by pulling away from the circuit board

    • Unscrew the Phillip head screw inside the top casing

    • Disconnecting the earth cable from the top casing, and disconnecting the Exterior casing and internal components

  8. Breville BTA830 Teardown: adım 8, 3 resimden 1. Breville BTA830 Teardown: adım 8, 3 resimden 2. Breville BTA830 Teardown: adım 8, 3 resimden 3.
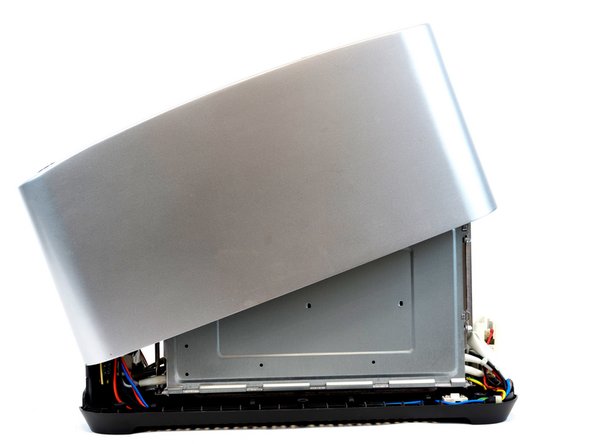
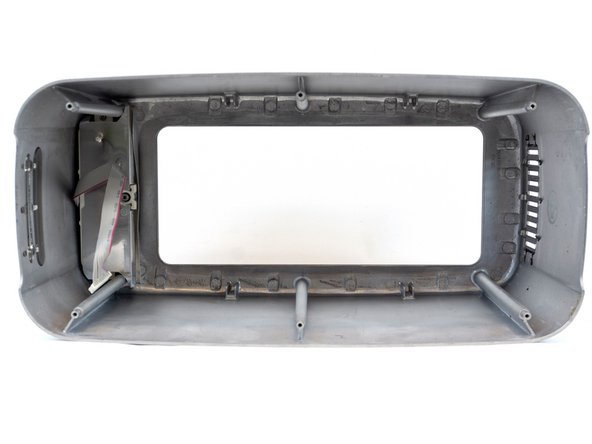
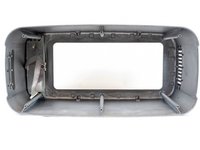
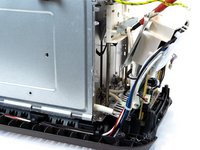
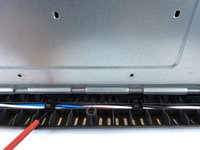
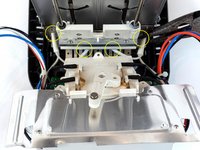
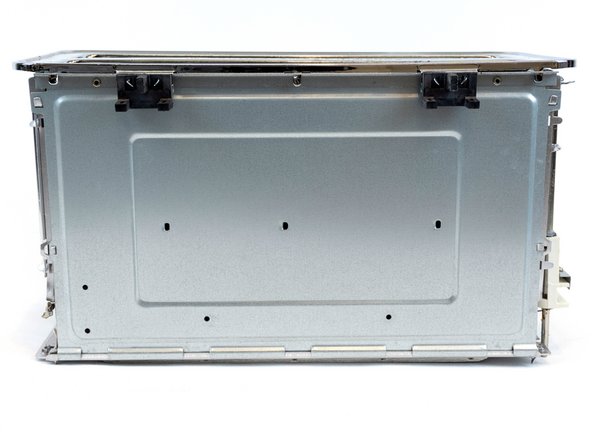
    • Place casing on the side, allowing for the removal of the Sliding mechanism frame, LED strip cover and a heat vent grill on the opposite side

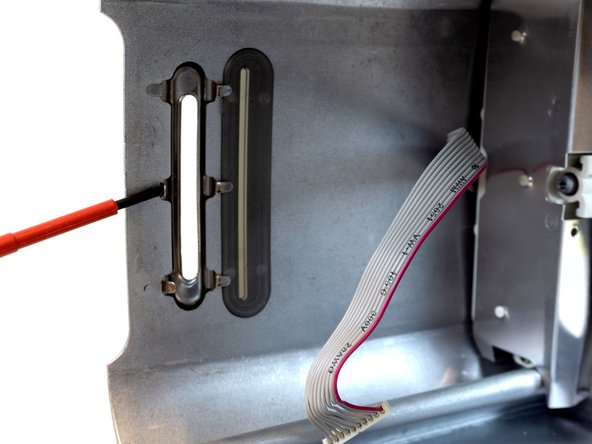
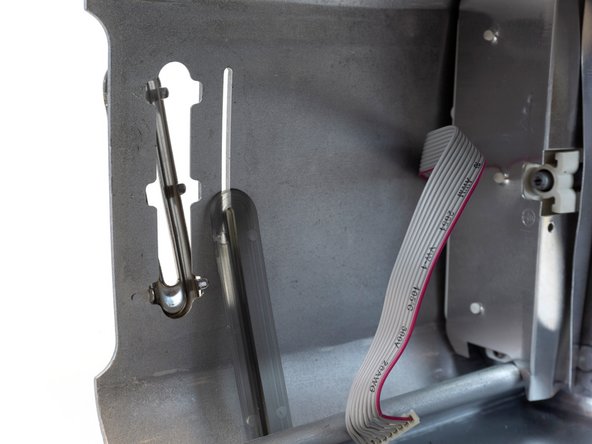
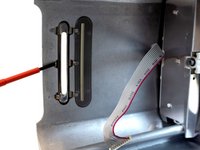
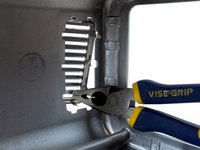
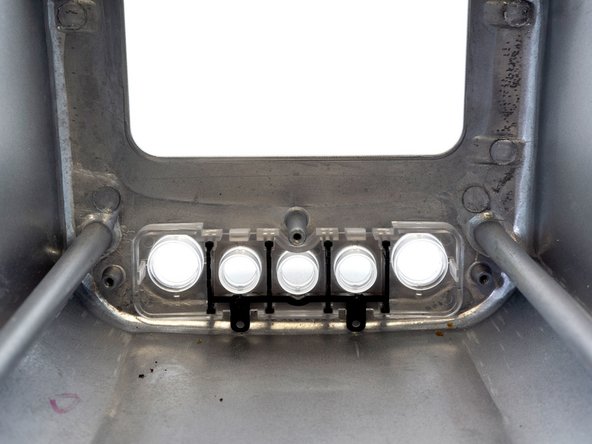
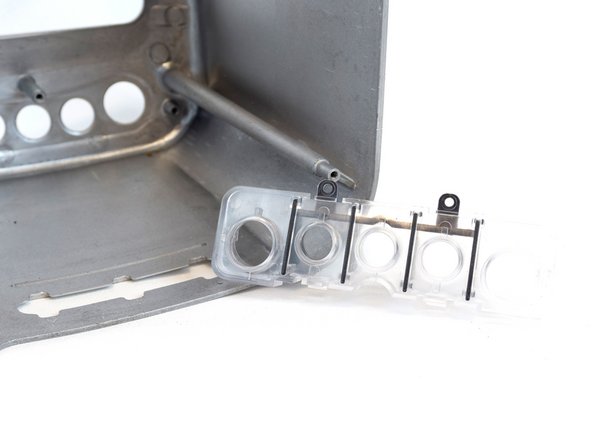
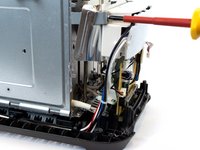
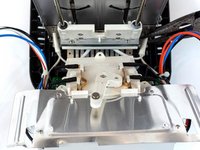
    • Detach sliding mechanism frame, by inserting a flat head screwdriver pulling towards the frame, unfolding the 6 metal pieces, releasing the sliding mechanism frame along with the LED strip cover. Which can be pulled out using the flat head screwdriver, with no pressure required

  9. Breville BTA830 Teardown: adım 9, 2 resimden 1. Breville BTA830 Teardown: adım 9, 2 resimden 2.
    • Using combined pliers, unfold the 10 metal edges holding the heat grill, pushing towards the outer side of the exterior

  10. Breville BTA830 Teardown: adım 10, 2 resimden 1. Breville BTA830 Teardown: adım 10, 2 resimden 2.
    • To access the buttons, remove the 2 Phillip head screws, pulling out the metal plate covering the module, unveiling the buttons

  11. Breville BTA830 Teardown: adım 11, 2 resimden 1. Breville BTA830 Teardown: adım 11, 2 resimden 2.
    • Clear plastic is easily pulled by hand

  12. Breville BTA830 Teardown: adım 12, 2 resimden 1. Breville BTA830 Teardown: adım 12, 2 resimden 2.
    • The interior housing holds 3 circuits boards

    • To access the heat controller circuit board, remove the 2 slotted Phillip head screws

    • Unclipping the 8-pin ribbon cable

    • Allowing for the removal of the heat controller circuit board, the housing along with the sliding mechanism

  13. Breville BTA830 Teardown: adım 13, 2 resimden 1. Breville BTA830 Teardown: adım 13, 2 resimden 2.
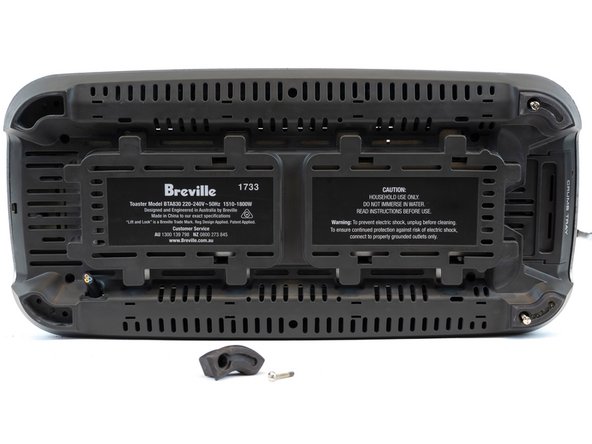
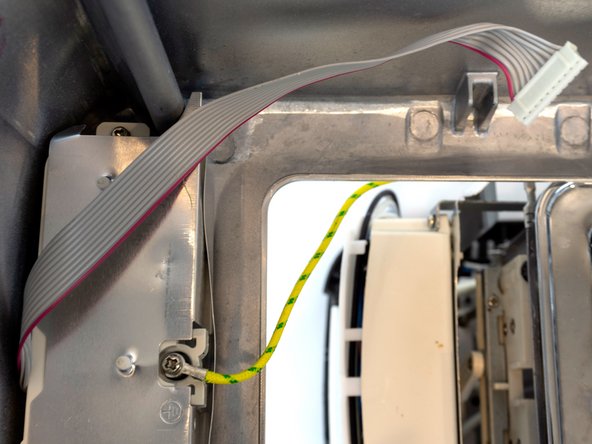
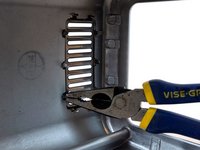
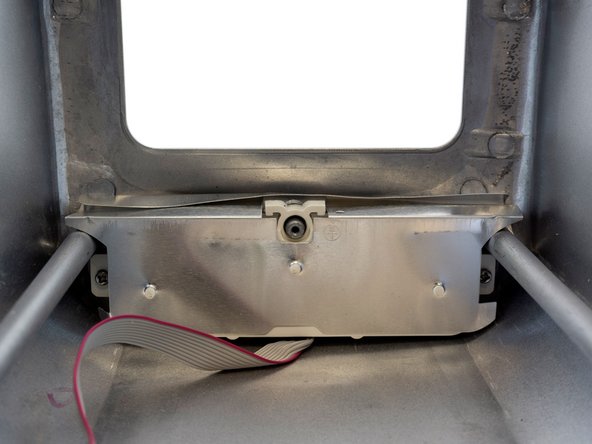
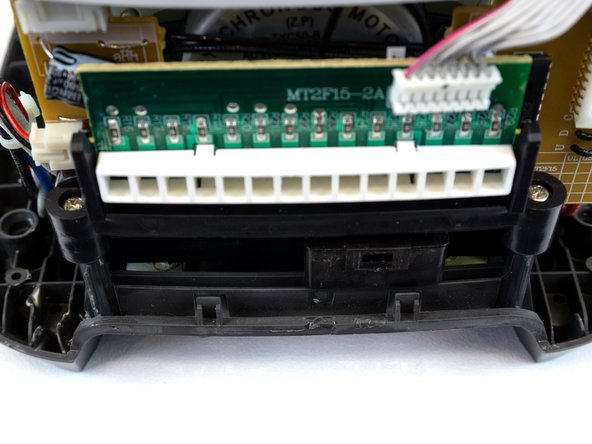
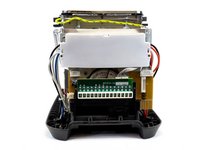
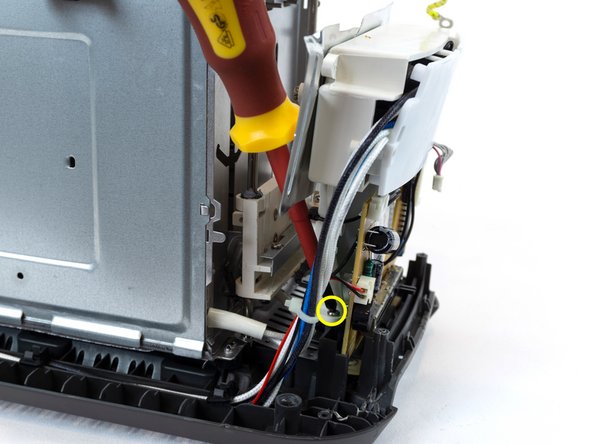
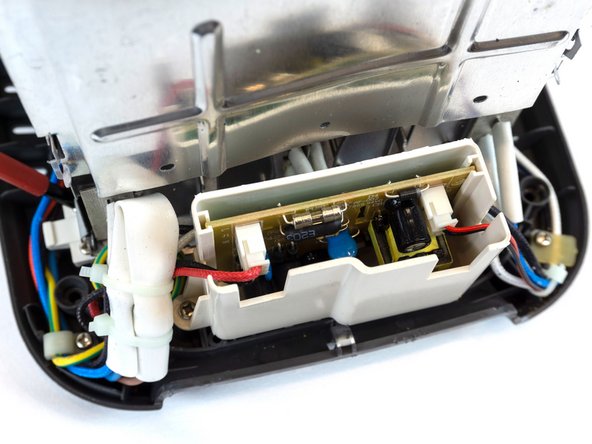
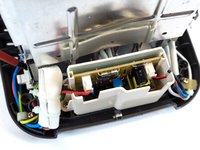
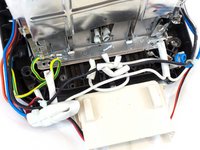
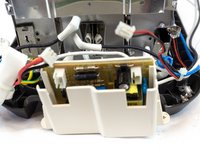
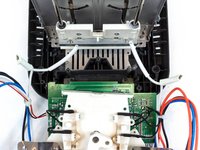
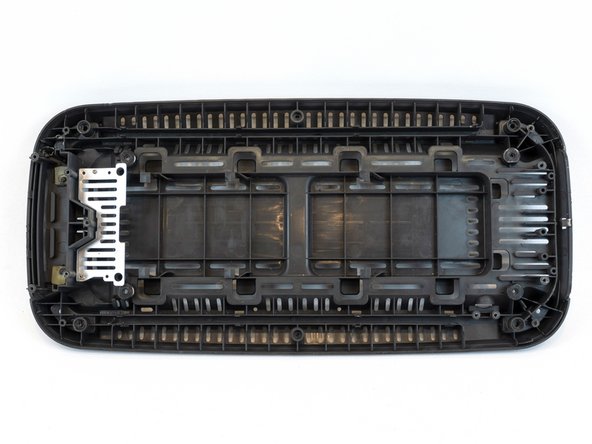
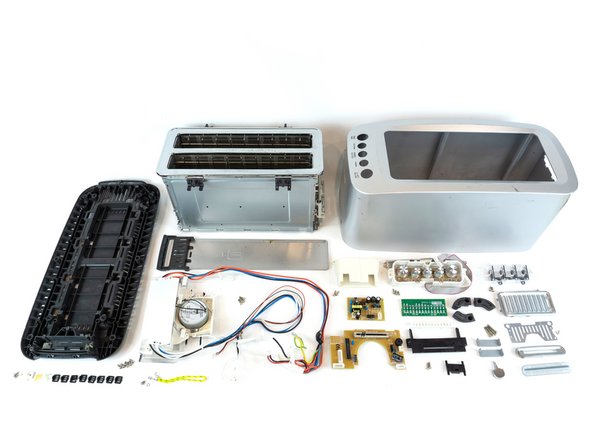
    • To access the second circuit board, and shielded electronic components, use a Phillips head screwdriver, to unscrew the two Philips head screws in place, holding the shielded electrical component module

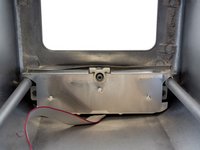
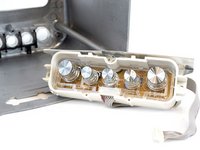
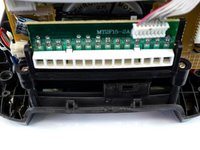
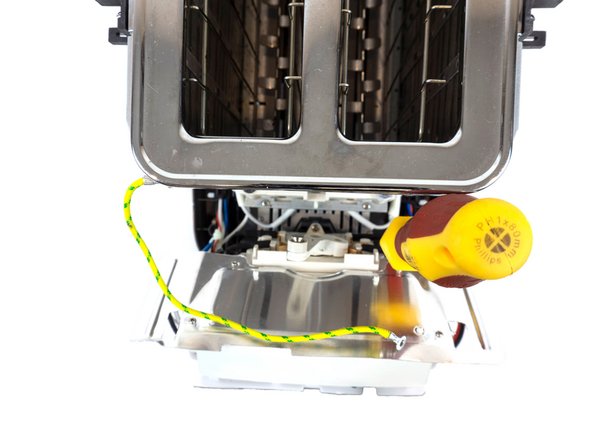
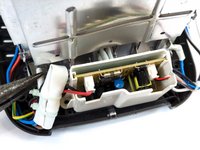
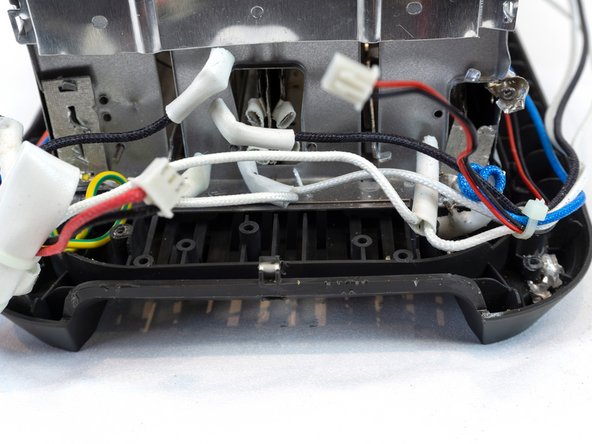
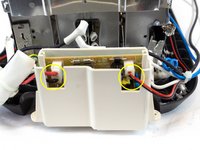
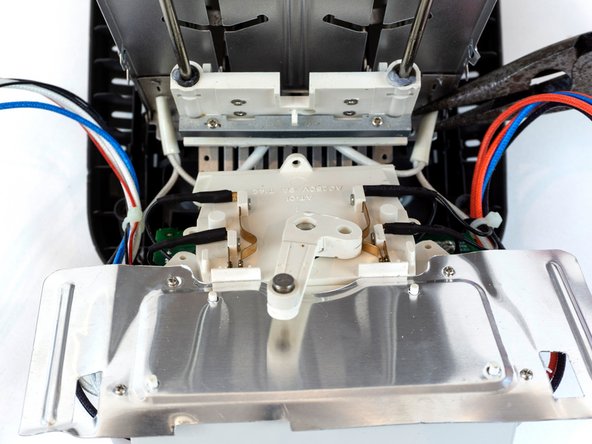
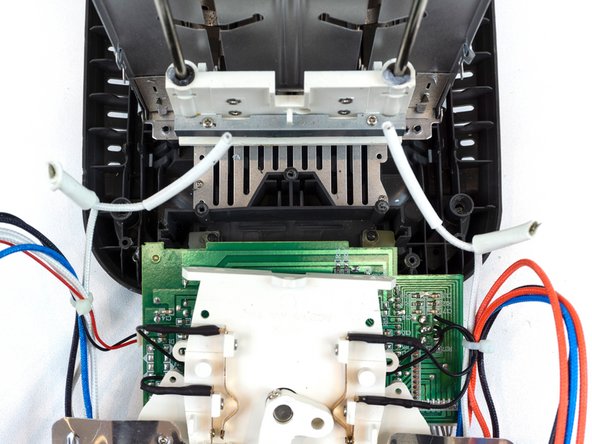
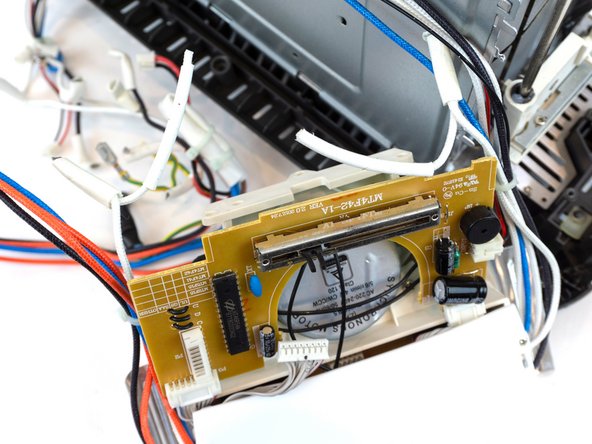
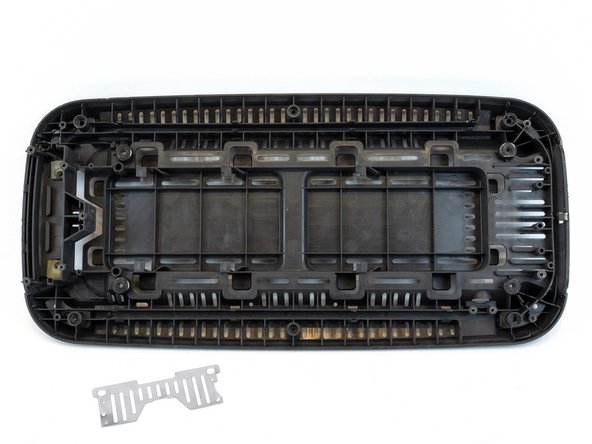
    • The shielded module housing will lean back away from the interior components, removing the one Philips head screw, will provide access to the screws on the bottom holding the components

  14. Breville BTA830 Teardown: adım 14, 2 resimden 1. Breville BTA830 Teardown: adım 14, 2 resimden 2.
    • Removing the 3 Phillip head screws at the bottom holding the housing will disconnect the top wire compartment, with the cables, allowing access to the components underneath

  15. Breville BTA830 Teardown: adım 15, 2 resimden 1. Breville BTA830 Teardown: adım 15, 2 resimden 2.
    • Pull out earth cable using combination pliers

    • Remove cable fasters by inserting a flat head screwdriver into clips, unclipping cables

  16. Breville BTA830 Teardown: adım 16, 1 resimden 1.
    • Remove the 8 Phillips head screws holding the heating controller compartment from the base

  17. Breville BTA830 Teardown: adım 17, 3 resimden 1. Breville BTA830 Teardown: adım 17, 3 resimden 2. Breville BTA830 Teardown: adım 17, 3 resimden 3.
    • Cut wires that are inaccessible, connected to the circuit casing

    • Pull out / cut any wires still attached to the internal body

  18. Breville BTA830 Teardown: adım 18, 3 resimden 1. Breville BTA830 Teardown: adım 18, 3 resimden 2. Breville BTA830 Teardown: adım 18, 3 resimden 3.
    • Disconnect the 2 pin connectors from the circuit board

    • Allowing for circuit board module to be removed

  19. Breville BTA830 Teardown: adım 19, 3 resimden 1. Breville BTA830 Teardown: adım 19, 3 resimden 2. Breville BTA830 Teardown: adım 19, 3 resimden 3.
    • Cut the wires connecting to the main wire shielded component to the interior body

    • Disconnecting the black cables connected to the electrical component

  20. Breville BTA830 Teardown: adım 20, 1 resimden 1.
    • Disconnect wires connecting to the circuit board on the back of the electrical component

  21. Breville BTA830 Teardown: adım 21, 1 resimden 1.
    • Electrical Components and Wires are separated from the internal body

    • White Wire Housing can be disassembled more by disconnecting / cutting all wires

  22. Breville BTA830 Teardown: adım 22, 2 resimden 1. Breville BTA830 Teardown: adım 22, 2 resimden 2.
    • Unscrew 2 Phillips head screws, separating the metal grill from the base

    • Leaving the bottom base by itself

  23. Breville BTA830 Teardown: adım 23, 1 resimden 1.
    • The internal component to its base, disconnected from the rest

  24. Breville BTA830 Teardown: adım 24, 1 resimden 1.
    • Final Teardown

Ekli Belgeler

Jeremy Moy

Üyelik tarihi: 04/11/20

349 İtibar

1 Kılavuz yazıldı

0Kılavuz Yorumları

Yorum Ekle

İstatistikleri Görüntüle:

Son 24 Saat: 1

Son 7 gün: 4

Son 30 gün: 37

Her zaman: 580