Ana içeriğe geç

Neye ihtiyacın var

Bu teardown bir tamir kılavuzu değildir. CANDY CON Wireless Controller cihazınızı onarmak için, servis kılavuzumuzu kullanın.

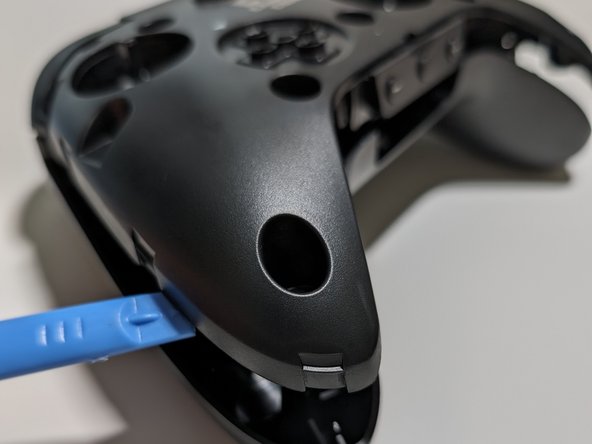
  1. CANDY CON Wireless Controller Teardown, Remove the faceplate: adım 1, 2 resimden 1. CANDY CON Wireless Controller Teardown, Remove the faceplate: adım 1, 2 resimden 2.
    • Locate the indentation on the bottom of the controller

    • Pull the faceplate off using a fingernail or spudger

  2. CANDY CON Wireless Controller Teardown, Remove Joysticks and D-pad: adım 2, 2 resimden 1. CANDY CON Wireless Controller Teardown, Remove Joysticks and D-pad: adım 2, 2 resimden 2.
    • Remove both joysticks and the D-pad by carefully pulling up

  3. CANDY CON Wireless Controller Teardown, Begin opening the base controller: adım 3, 3 resimden 1. CANDY CON Wireless Controller Teardown, Begin opening the base controller: adım 3, 3 resimden 2. CANDY CON Wireless Controller Teardown, Begin opening the base controller: adım 3, 3 resimden 3.
    • Remove 8 Phillips screws with a Philips #1 screwdriver

    • Pry open the two main pieces by pulling up on the edges of the controller

  4. CANDY CON Wireless Controller Teardown, Finish opening the base controller: adım 4, 2 resimden 1. CANDY CON Wireless Controller Teardown, Finish opening the base controller: adım 4, 2 resimden 2.
    • Separate the controller by flipping it on its face and then prying up near the bottom buttons

  5. CANDY CON Wireless Controller Teardown, Unplug the battery: adım 5, 1 resimden 1.
    • Unplug the battery using a spudger tool

  6. CANDY CON Wireless Controller Teardown, Unscrew the mainboard: adım 6, 1 resimden 1.
    • Unscrew the 2 Phillips #1 screws securing the mainboard to the controller housing

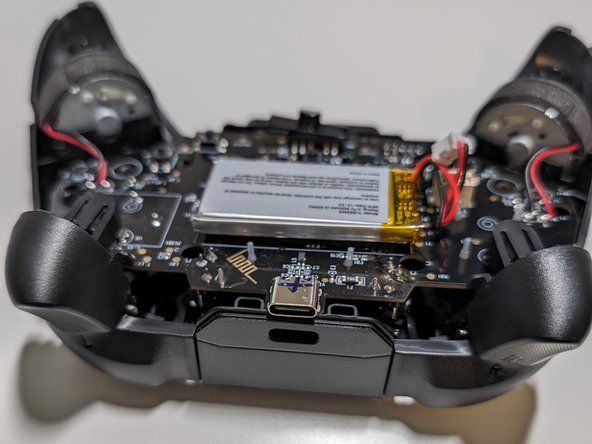
  7. CANDY CON Wireless Controller Teardown, Remove the mainboard and haptic motors: adım 7, 3 resimden 1. CANDY CON Wireless Controller Teardown, Remove the mainboard and haptic motors: adım 7, 3 resimden 2. CANDY CON Wireless Controller Teardown, Remove the mainboard and haptic motors: adım 7, 3 resimden 3.
    • Carefully remove the mainboard and attached haptic motors by pulling it up from the bottom and then top

    • Be careful removing the haptic motors to ensure the wires do not break

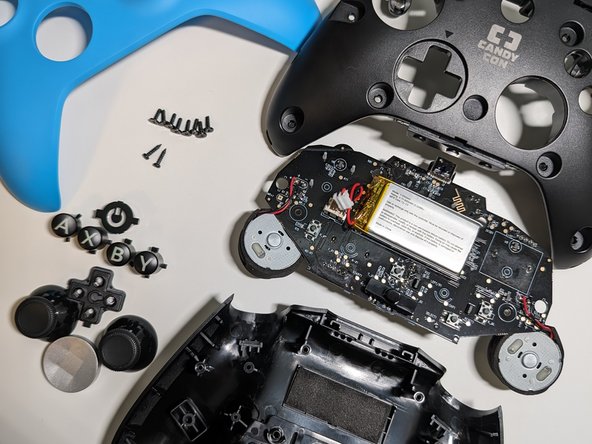
  8. CANDY CON Wireless Controller Teardown, Teardown Complete!: adım 8, 2 resimden 1. CANDY CON Wireless Controller Teardown, Teardown Complete!: adım 8, 2 resimden 2.
    • All buttons are keyed so they can only go in the exact spot they belong

  9. CANDY CON Wireless Controller Teardown, Reassembly tips: adım 9, 3 resimden 1. CANDY CON Wireless Controller Teardown, Reassembly tips: adım 9, 3 resimden 2. CANDY CON Wireless Controller Teardown, Reassembly tips: adım 9, 3 resimden 3.
    • Follow the teardown guide in reverse to reassemble the controller

    • When reassembling the controller align the bottom buttons first and then work on the charging port side

    • Test all the buttons before or right after screwing in the mainboard

    • The D-pad has an arrow on the top that should point up (towards the arrow on the base controller)

Roger

Üyelik tarihi: 04/23/24

229 İtibar

1 Kılavuz yazıldı

0 Yorum

Yorum Ekle

İstatistikleri Görüntüle:

Son 24 Saat: 1

Son 7 gün: 3

Son 30 gün: 40

Her zaman: 272