Ana içeriğe geç

Neye ihtiyacın var

Bu teardown bir tamir kılavuzu değildir. HP G61 cihazınızı onarmak için, servis kılavuzumuzu kullanın.

  1. HP G61-430SB Teardown, HP G61-430SB Teardown: adım 1, 1 resimden 1.
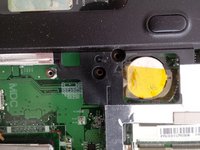
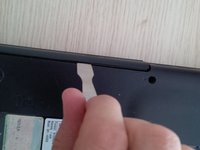
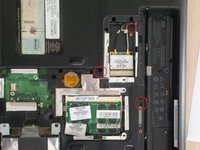
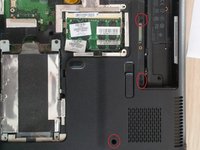
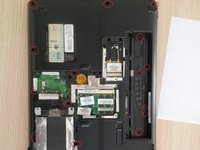
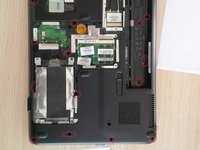
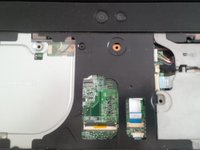
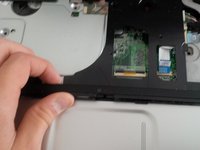
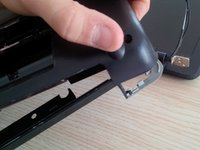
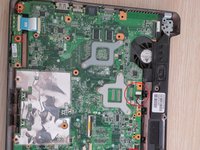
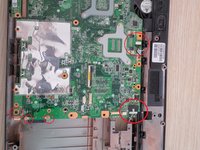
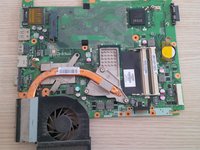
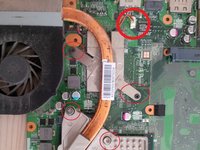
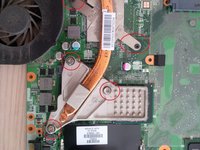
    • Turn the device over and remove the screws from the battery. Remove the black panels holding the HDD, ram, and wifi.

  2. HP G61-430SB Teardown: adım 2, 3 resimden 1. HP G61-430SB Teardown: adım 2, 3 resimden 2. HP G61-430SB Teardown: adım 2, 3 resimden 3.
    • Remove the RAM modules and the HDD as shown in the pictures.

  3. HP G61-430SB Teardown: adım 3, 2 resimden 1. HP G61-430SB Teardown: adım 3, 2 resimden 2.
    • Locate the screw for the DVD player and remove it. Then remove the DVD player with a thin spudger.

  4. HP G61-430SB Teardown: adım 4, 2 resimden 1. HP G61-430SB Teardown: adım 4, 2 resimden 2.
    • Remove the screws to remove the keyboard.

  5. HP G61-430SB Teardown: adım 5, 2 resimden 1. HP G61-430SB Teardown: adım 5, 2 resimden 2.
    • Remove the screws that are circled in the picture. These screws hold the case of the laptop.

  6. HP G61-430SB Teardown: adım 6, 1 resimden 1.
    • Remove the WIFI antenna cables from WIFI card.

    • Then remove the screws of the WIFI card and remove the card.

  7. HP G61-430SB Teardown: adım 7, 2 resimden 1. HP G61-430SB Teardown: adım 7, 2 resimden 2.
    • Flip the laptop around and gently remove the keyboard with your fingers.

    • Start with the corners of the keyboard.

    • Gently loosen the keyboard with a flat head screwdriver or a thin spudger.

  8. HP G61-430SB Teardown: adım 8, 2 resimden 1. HP G61-430SB Teardown: adım 8, 2 resimden 2.
    • After removing the keyboard, find the other screws located in the grey panel.

    • Remove the black plastic. Be careful with the white flat cable.

  9. HP G61-430SB Teardown: adım 9, 1 resimden 1.
    • Remove the black flat wire of the LCD screen from the motherboard.

  10. HP G61-430SB Teardown: adım 10, 1 resimden 1.
    • Remove the hinge screws with the screwdriver from the left side to the right side.

    • Under one of the two hinges, there is a hidden screw (case)

  11. HP G61-430SB Teardown: adım 11, 2 resimden 1. HP G61-430SB Teardown: adım 11, 2 resimden 2.
    • Remove the black plastic.

    • Remove the audio boxes.

    • Remove all the other wires and cables.

    • Then gently separate the screen from the case.

  12. HP G61-430SB Teardown: adım 12, 2 resimden 1. HP G61-430SB Teardown: adım 12, 2 resimden 2.
    • Use an iOpener to separate the grey case from the bottom case.

    • Careful: the battery compartment is together with the grey panel.

    • Tip: "slide" the iOpener while opening until you hear clicks. It is easy if you slide.

  13. HP G61-430SB Teardown: adım 13, 3 resimden 1. HP G61-430SB Teardown: adım 13, 3 resimden 2. HP G61-430SB Teardown: adım 13, 3 resimden 3.
    • Remove the motherboard by removing the screws first. Be careful with the cables and the wires.

    • Be careful with the connector of the DC power jack. You can replace the USB drivers on that side as well.

  14. HP G61-430SB Teardown: adım 14, 3 resimden 1. HP G61-430SB Teardown: adım 14, 3 resimden 2. HP G61-430SB Teardown: adım 14, 3 resimden 3.
    • Remove the cooler.

  15. HP G61-430SB Teardown: adım 15, 1 resimden 1.
    • To remove the Processor, unlock the processor socket with a flat screwdriver.

    • Then gently remove the Processor.

Kevin D

Üyelik tarihi: 05/02/14

7.294 İtibar

21 adet Kılavuz yazıldı

2 Yorum

Thanks a bunch this helped a whole lot!!!!

Teresa halley - Yanıt

Thank you very much. Very well explained :)

a.thorne.987 - Yanıt

Yorum Ekle

İstatistikleri Görüntüle:

Son 24 Saat: 1

Son 7 gün: 7

Son 30 gün: 18

Her zaman: 8,905