Giriş
Learn how to take apart the NVIDIA GTX 980 Founder's edition for a deep cleaning and repaste.
Neye ihtiyacın var
-
-
You need three different screwdriver bits to take apart this card - PH0 and 1.5/2.5 Hex Drivers.
-
All of these can be found in the iFixit Moray Precision Kit!
-
-
-
Before we can take the card apart, we need to remove the metal shield.
-
There are two DVI standoffs marked with red arrows - they can be removed manually with your fingers by rotating them counter-clockwise.
-
All of the other screws can be removed with the PH0 screwdriver. Please keep note of the arrow colors, the screws are all different sizes, make sure to separate them once removed.
-
-
-
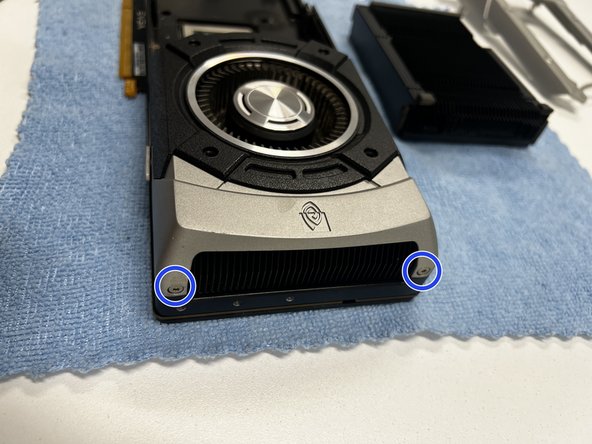
Once the metal plate is removed, you can remove the 8 screws on the front of the card to begin disassembly.
-
There are 8 screws on the front - 4 are marked in blue (2.5 hex), and 4 are marked in red (1.5 hex).
-
Make sure to separate these screws and keep track of them.
-
-
-
-
Continue disassembly by removing the top and bottom screws on the card.
-
The screws marked in blue are 1.5 hex, and the screws marked in red are 2.5 hex.
-
Be sure to separate these screws properly when you set them aside.
-
-
-
If you plan to repaste your card, you need to remove these 4 screws that secure the GPU heatsink in place.
-
If you don't plan to reapply thermal paste, and you just want to remove the front plate to clean the fans, leave these screws alone!
-
-
-
At this stage, the first front panel and acrylic window can be removed, as well as the heatsink if you removed the four back screws.
-
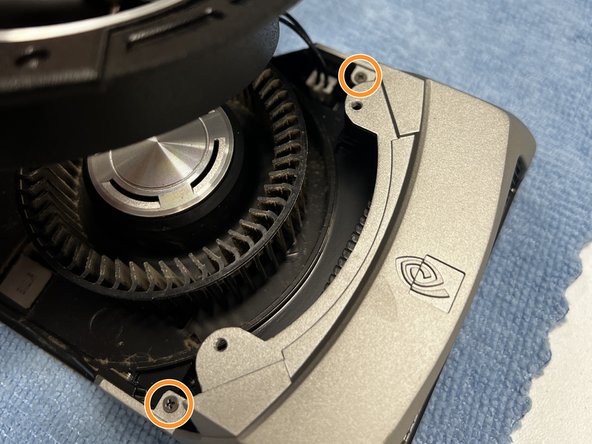
To continue, remove the four circled PH0 screws circled in red.
-
Afterward, remove the two 2.5 Hex screws on the front of the card circled in blue.
-
Carefully lift the fan cover and remove the JST connector (connector with two wires coming from it) by gently wiggling it out of the socket.
-
Lastly, remove the final two PH0 screws circled in orange.
-
Be sure to separate all of these screws when you set them aside!
-
-
-
This is just a partial disassembly in order to clean and repaste the GPU, so we wont be taking apart the entire back plate in this guide.
-
Once disassembled, you can use air and a soft paintbrush to clean up any dust in the fan or heatsinks.
-
If repasting, use 99% Isopropyl Alcohol and cotton swabs (qtips) to remove all of the old thermal paste from the GPU and copper plate on the back of the heatsink.
-
All done! Follow the steps in reverse order to reassemble.
-


Ekip
