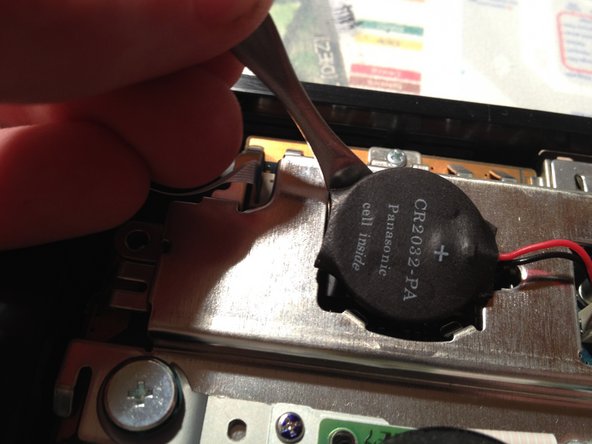
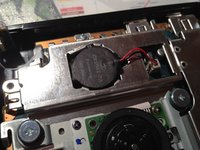
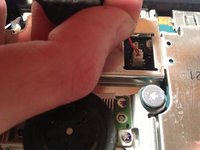
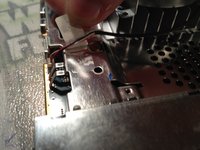
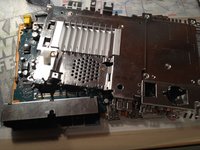
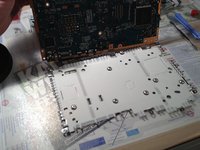
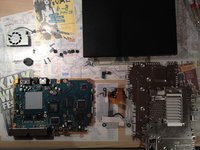
Ana içeriğe geç

Neye ihtiyacın var

Bu teardown bir tamir kılavuzu değildir. PlayStation 2 Slimline cihazınızı onarmak için, servis kılavuzumuzu kullanın.

  1. PlayStation 2 Slimline Teardown/Disassembly, PlayStation 2 Slimline Teardown/Disassembly: adım 1, 3 resimden 1. PlayStation 2 Slimline Teardown/Disassembly, PlayStation 2 Slimline Teardown/Disassembly: adım 1, 3 resimden 2. PlayStation 2 Slimline Teardown/Disassembly, PlayStation 2 Slimline Teardown/Disassembly: adım 1, 3 resimden 3.
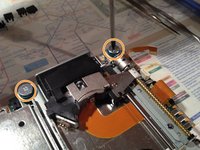
    • On a flat working surface, flip the PlayStation 2 Slimline so that the bottom side is facing up.

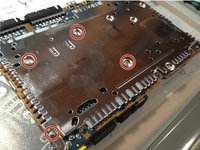
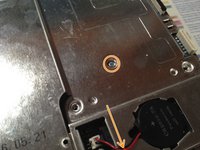
    • Remove the covers over the screws, circled in red on the second image.

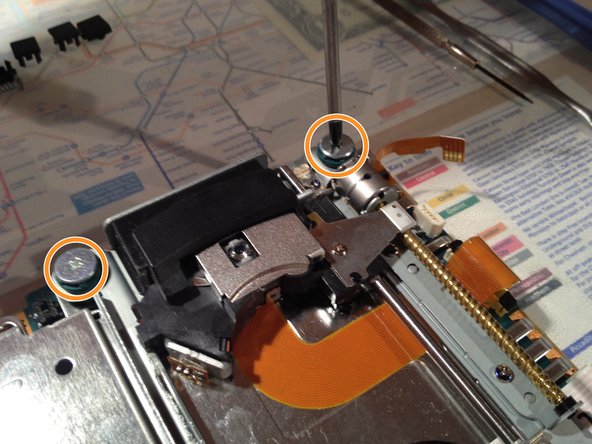
    • Take a Phillip's #1 screwdriver and remove the five screws circled in red on the second image.

    • You will have to remove the "Do Not Void" seal in order to remove the last screw.

  2. PlayStation 2 Slimline Teardown/Disassembly: adım 2, 2 resimden 1. PlayStation 2 Slimline Teardown/Disassembly: adım 2, 2 resimden 2.
    • Make sure you haven't forgotten the screw under the "Do Not Void" seal.

    • Take a metal spudger and separate the upper half of the chasis from the lower half.

    • For later models the DVD drive assembly is not screwed in and will fall off if you open it upside down.

  3. PlayStation 2 Slimline Teardown/Disassembly: adım 3, 3 resimden 1. PlayStation 2 Slimline Teardown/Disassembly: adım 3, 3 resimden 2. PlayStation 2 Slimline Teardown/Disassembly: adım 3, 3 resimden 3.
    • With the chassis open you can see the motherboard and its attachments.

    • Identify the battery, then use a spudger to pry it out. Disconnect the battery from the motherboard with your hands.

  4. PlayStation 2 Slimline Teardown/Disassembly: adım 4, 3 resimden 1. PlayStation 2 Slimline Teardown/Disassembly: adım 4, 3 resimden 2. PlayStation 2 Slimline Teardown/Disassembly: adım 4, 3 resimden 3.
    • Gently disconnect the three ribbon cables.

    • Take a Phillips #1 screwdriver and remove the four screws on the optical drive.

    • Two of the screws can't be seen on the picture, they are located on the opisite side from the visable ones.

    • Pull up the optical drive and carefully peel the flex cable, attached underneath the drive, from the metal plate.

  5. PlayStation 2 Slimline Teardown/Disassembly: adım 5, 2 resimden 1. PlayStation 2 Slimline Teardown/Disassembly: adım 5, 2 resimden 2.
    • Remove the three PH00 screws from the fan's cover.

    • Then peel the duct tape back and remove the cable.

  6. PlayStation 2 Slimline Teardown/Disassembly: adım 6, 3 resimden 1. PlayStation 2 Slimline Teardown/Disassembly: adım 6, 3 resimden 2. PlayStation 2 Slimline Teardown/Disassembly: adım 6, 3 resimden 3.
    • Remove the four screws marked on the picture. These are located on the bottom side of the motherboard.

    • Then flip the motherboard back over and remove the two rating screws on the upside.

    • Now both metal plates should be ready to remove.

  7. PlayStation 2 Slimline Teardown/Disassembly: adım 7, 2 resimden 1. PlayStation 2 Slimline Teardown/Disassembly: adım 7, 2 resimden 2.
    • Remove the metal plate from the bottom side of the motherboard.

    • Now everything should be disconnected and you successfully torn your PlayStation 2 Slimline down.

    • To reassemble, follow these steps in reverse.

tlroesner

Üyelik tarihi: 05/13/12

1.864 İtibar

4 adet Kılavuz yazıldı

2 Yorum

not all slimlines are internally the same. as seen in the second picture, this teardown is for the 75004 model

Roman - Yanıt

Komponen kotak hitam kaki 4 itu apa gan, di dalemnya kaya jumperan gitu. Itu fungsinya buat apa ya? Posisinya sudut kiri bawah iptikal drive.

camxmovie - Yanıt

Yorum Ekle

İstatistikleri Görüntüle:

Son 24 Saat: 30

Son 7 gün: 173

Son 30 gün: 748

Her zaman: 76,545