Ana içeriğe geç

Neye ihtiyacın var

Bu teardown bir tamir kılavuzu değildir. Rowenta AC6221 cihazınızı onarmak için, servis kılavuzumuzu kullanın.

  1. Rowenta AC6221 Teardown, Rowenta AC6221 Teardown: adım 1, 3 resimden 1. Rowenta AC6221 Teardown, Rowenta AC6221 Teardown: adım 1, 3 resimden 2. Rowenta AC6221 Teardown, Rowenta AC6221 Teardown: adım 1, 3 resimden 3.
    • The 4.8 Rowenta vacuum can be used for a variety of purposes.

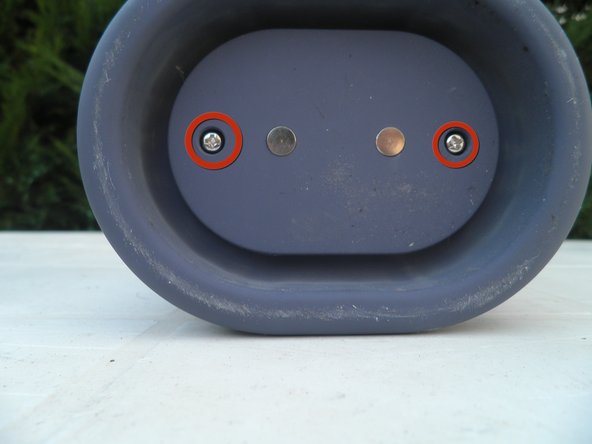
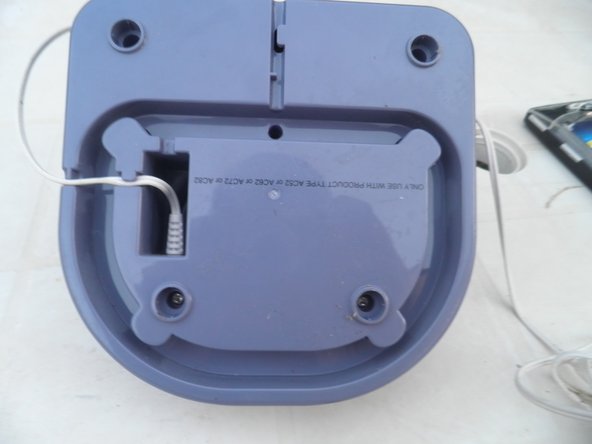
    • It is charged through its pedestal. The power of the pedestal is:

    • Input: 230V - 50 Hz - 7W (AC)

    • Output: 7.5V - 300 mA (DC)

  2. Rowenta AC6221 Teardown: adım 2, 3 resimden 1. Rowenta AC6221 Teardown: adım 2, 3 resimden 2. Rowenta AC6221 Teardown: adım 2, 3 resimden 3.
    • This vacuum has several parts:

    • The tip

    • The reservoir which holds the dust and debris

    • The engine (4.8V)

    • The pedestal

    • The power supply

    • From top to bottom, the reservoir contains 3 parts: the housing, container, and filter.

  3. Rowenta AC6221 Teardown: adım 3, 3 resimden 1. Rowenta AC6221 Teardown: adım 3, 3 resimden 2. Rowenta AC6221 Teardown: adım 3, 3 resimden 3.
    • Remove the two outer Philips #00 screws from the bottom of the engine.

    • The back of the circuit board will now be visible.

  4. Rowenta AC6221 Teardown: adım 4, 3 resimden 1. Rowenta AC6221 Teardown: adım 4, 3 resimden 2. Rowenta AC6221 Teardown: adım 4, 3 resimden 3.
    • Remove the two inner screws.

    • Insert a flat screwdriver between the cover and the base of the engine and remove the cover.

    • The wires of the vacuum are now visible.

  5. Rowenta AC6221 Teardown: adım 6, 2 resimden 1. Rowenta AC6221 Teardown: adım 6, 2 resimden 2.
    • The wires of the vacuum are now visible.

    • The wires connect the charger light, switch,engine, and power wires.

    • The green box labels the engine.

    • The orange box labels one of the four batteries (4*1.2V)

  6. Rowenta AC6221 Teardown: adım 7, 2 resimden 1. Rowenta AC6221 Teardown: adım 7, 2 resimden 2.
    • The top of the circuit board contains components including capacitors, resistors, wires, and a chip.

    • The bottom side shows the tracks that connect the components.

  7. Rowenta AC6221 Teardown: adım 8, 2 resimden 1. Rowenta AC6221 Teardown: adım 8, 2 resimden 2.
    • Remove the screw securing the handle with a screwdriver.

    • Open the handle to see the inside using the flat screwdriver.

    • Warning: The handle is difficult to open

    • Warning: In this procedure, the handle was not opened to keep the vacuum intact.

  8. Rowenta AC6221 Teardown: adım 9, 1 resimden 1.
    • This is the pedestal that will be torn down.

  9. Rowenta AC6221 Teardown: adım 10, 3 resimden 1. Rowenta AC6221 Teardown: adım 10, 3 resimden 2. Rowenta AC6221 Teardown: adım 10, 3 resimden 3.
    • At the bottom of the pedestal, remove the 4 rubber pieces.

    • Note: This step provides access to 4 Philips screws.

    • Remove screws using a screwdriver.

  10. Rowenta AC6221 Teardown: adım 11, 1 resimden 1.
    • Lift the plastic piece carefully from the bottom of the pedestal.

  11. Rowenta AC6221 Teardown: adım 12, 1 resimden 1.
    • Inside the pedestal, the power cable separates into 2 wires. Each wire is connected to a conductive piece.

    • This completes the vacum cleaner teardown

Bob

Üyelik tarihi: 04/17/10

760 İtibar

3 adet Kılavuz yazıldı

Bir Yorum

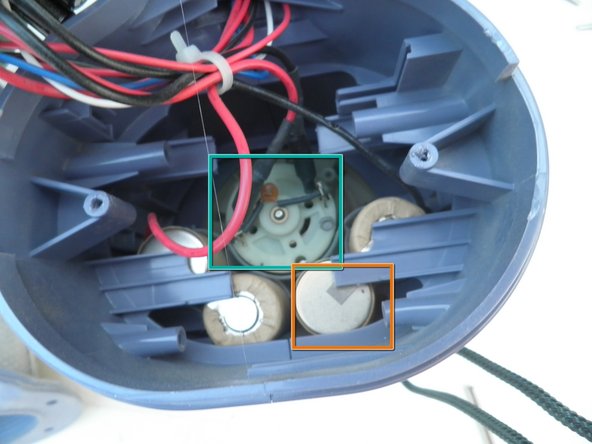
This could use some discussion of how to replace the rechargeable batteries used in portable vacuum cleaners.

Wayne Seltzer - Yanıt

Yorum Ekle

İstatistikleri Görüntüle:

Son 24 Saat: 2

Son 7 gün: 4

Son 30 gün: 17

Her zaman: 7,213