Giriş
Samsung's Connect Home is the one smart router to rule all your SmartThings. What sort of dark magic gives the Connect Home all this power? Let's tear it apart and take a look!
If you'd like to connect with us, check us out on Facebook, Instagram, and Twitter. If you'd like your teardown delivered, go ahead and sign up for our newsletter.
Neye ihtiyacın var
-
-
So what can this circuit-filled puck do?
-
Wi-Fi: 400 Mbps @ 2.4 GHz, 866 Mbps @ 5 GHz (AC1300).
-
Up to 1,500 square feet wireless coverage.
-
SmartThings connectivity via Bluetooth, Zigbee, and Z Wave.
-
Play hockey. -
If you opted for the shinier Connect Home Pro, you get upgraded Wi-Fi capability:
-
Wi-Fi: 800 Mbps @ 2.4 GHz, 1,733 Mbps @ 5 GHz (AC2600).
-
-
-
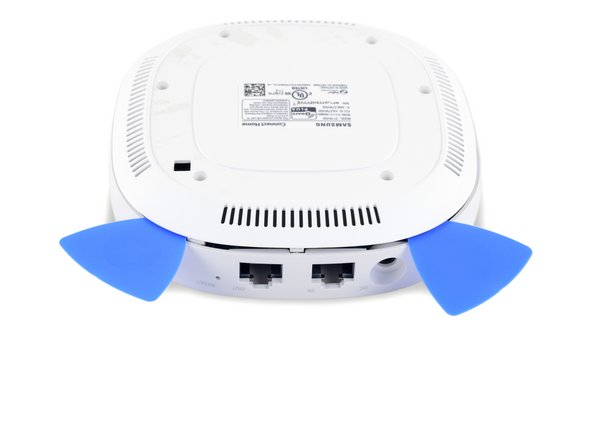
No, it's not a new probe droid—just the backside of the Connect!
-
Ever the minimalist, the Connect Home sports just three ports for power, WAN, and LAN, plus a reset pinhole.
-
Grill vents line all four sides of the bottom panel to keep the Connect cool.
-
-
-
We start our search for screws in one of their favorite hiding places—under a rubber foot.
-
These are not the screw holes we're looking for. Oh wait, yes they are! Standard Phillips #00 too—kudos to Samsung for using common screws.
-
Not only do these opening picks get us inside some stubborn cases, but they can also give any device some cute flippers.
-
-
-
-
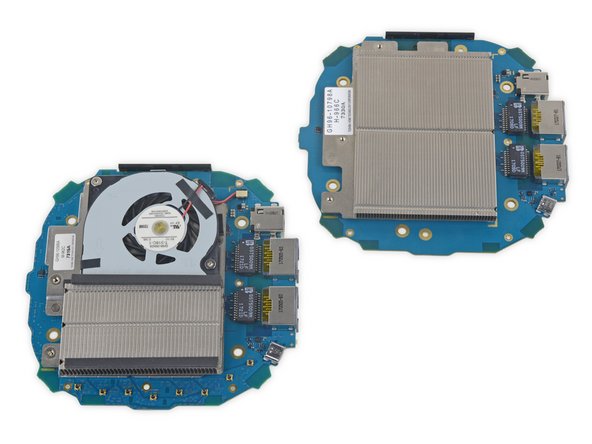
It must get really hot in here—the first thing we spy is a massive ducted heatsink! What could this be cooling?
-
And if we thought the Home had a big heatsink, the Connect Pro gets a fan too!
-
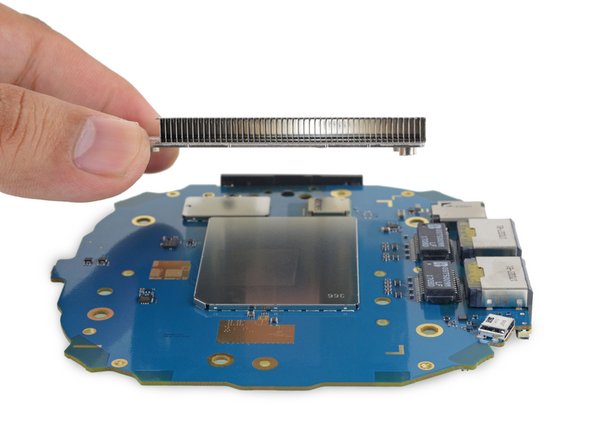
We take a look under the Connect's heatsink to find a large shielded area—just another barrier to our chip curiosity.
-
-
-
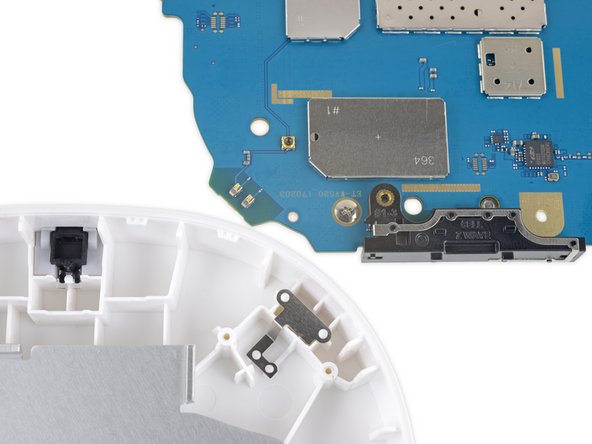
On the back of the board we spy the Z-wave antenna (the black rectangle on the left), and some metal contact clips mounted in the case.
-
The board has some coaxial connectors, but seems to be using spring contacts instead—a nice repair-friendly, low wear connection option.
-
And finally, a lone LED handles the task of communicating the Connect's status to the world. Stay strong little guy!
-
-
-
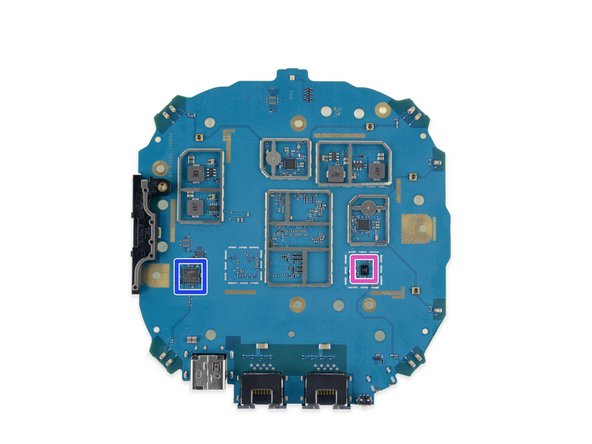
With the EMI shields unsealed, let's see what treasures lie revealed:
-
Qualcomm IPQ4019 SoC—the main brains of the device, and the reason for the giant heatsink
-
Qualcomm Atheros QCA8072 ethernet switch on a chip
-
Sigma Designs SD3503 serial interface modem SoC
-
Samsung K4B4G1646E-BYK0 512MB DDR3L SDRAM
-
Samsung KLM4G1FEPD-C031 4GB NAND Flash memory
-
Silicon Labs EFR32MG1B232F256GM48 Zigbee radio controller
-
Qualcomm (formerly Cambridge Silicon Radio) CSR8811 Bluetooth 4.1 radio
-
-
-
How does the Pro version compare? Here are the major differences:
-
CPU upgrade: Qualcomm IPQ8065 SoC quad-core network processor (vs. IPQ4019)
-
Ethernet switch upgrade: Qualcomm QCA8337 (vs. QCA8072)
-
RAM upgrade: Two Samsung K4B4G1646E-BYK0 512MB DDR3L SDRAM (instead of one)
-
Two Qualcomm QCA9984 802.11ac radio SoC's, which allows more devices to connect at faster speeds.
-
More power sources and converters to handle the added load.
-
- The case is held together with standard screws and reusable plastic clips.
- All antennas easily detach from the main board thanks to spring contacts.
- While they're not likely to need replacement, the ports are soldered onto the main board, complicating repair.


Son Düşünceler
Onarılabilirlik Puanı


(10 en kolay onarılabileni)
5 Yorum
Is that a hidden USB port at the lower left of the first images of Step 6 and 7? If so, does it work?
Yes! It is a hidden micro-USB port. We guess that it’s for debugging/programming purposes. No, we have not tried it yet.
Does the coexistence design applied in this router like PTA ? How was the zigbee performance while a big file is downloading through this router ?