Ana içeriğe geç

Neye ihtiyacın var

Bu teardown bir tamir kılavuzu değildir. Samsung Galaxy Note5 cihazınızı onarmak için, servis kılavuzumuzu kullanın.

  1. Samsung Galaxy Note5 Teardown, Samsung Galaxy Note5 Teardown: adım 1, 3 resimden 1. Samsung Galaxy Note5 Teardown, Samsung Galaxy Note5 Teardown: adım 1, 3 resimden 2. Samsung Galaxy Note5 Teardown, Samsung Galaxy Note5 Teardown: adım 1, 3 resimden 3.
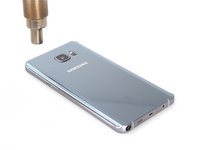
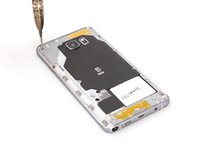
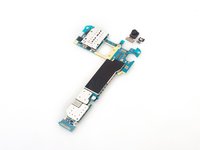
    • Remove SIM card tray at first. It's Samsung Galaxy Note 5 Duos, so there are two slots.

  2. Samsung Galaxy Note5 Teardown: adım 2, 3 resimden 1. Samsung Galaxy Note5 Teardown: adım 2, 3 resimden 2. Samsung Galaxy Note5 Teardown: adım 2, 3 resimden 3.
    • Remove S pen.

  3. Samsung Galaxy Note5 Teardown: adım 3, 3 resimden 1. Samsung Galaxy Note5 Teardown: adım 3, 3 resimden 2. Samsung Galaxy Note5 Teardown: adım 3, 3 resimden 3.
    • Heat the back cover and cut it sticker underneath. Really strong adhesive. Please be careful with the glass and edged back cover.

  4. Samsung Galaxy Note5 Teardown: adım 4, 1 resimden 1.
    • Remove the back cover. And the white strip is adhesive sticker.

  5. Samsung Galaxy Note5 Teardown: adım 5, 2 resimden 1. Samsung Galaxy Note5 Teardown: adım 5, 2 resimden 2.
    • Twist off all 20 screws together.

  6. Samsung Galaxy Note5 Teardown: adım 6, 3 resimden 1. Samsung Galaxy Note5 Teardown: adım 6, 3 resimden 2. Samsung Galaxy Note5 Teardown: adım 6, 3 resimden 3.
    • Push the front assembly out from middle housing. There are a little black adhesive sticker on every corners.

  7. Samsung Galaxy Note5 Teardown: adım 7, 3 resimden 1. Samsung Galaxy Note5 Teardown: adım 7, 3 resimden 2. Samsung Galaxy Note5 Teardown: adım 7, 3 resimden 3.
    • Release battery connector from motherboard and pry the battery up. Yes, there is also some adhesive underneath.

  8. Samsung Galaxy Note5 Teardown: adım 8, 2 resimden 1. Samsung Galaxy Note5 Teardown: adım 8, 2 resimden 2.
    • Remove two pieces of signal flex cables. And different versions Samsung Galaxy Note 5 may have only one piece signal cable.

  9. Samsung Galaxy Note5 Teardown: adım 9, 2 resimden 1. Samsung Galaxy Note5 Teardown: adım 9, 2 resimden 2.
    • Release LCD connector, digitizer connector, earpiece assembly connector, home button connector on the motherboard.

  10. Samsung Galaxy Note5 Teardown: adım 10, 3 resimden 1. Samsung Galaxy Note5 Teardown: adım 10, 3 resimden 2. Samsung Galaxy Note5 Teardown: adım 10, 3 resimden 3.
    • Release USB board connector on the back and remove the whole motherboard.

  11. Samsung Galaxy Note5 Teardown: adım 11, 3 resimden 1. Samsung Galaxy Note5 Teardown: adım 11, 3 resimden 2. Samsung Galaxy Note5 Teardown: adım 11, 3 resimden 3.
    • Remove the rear camera. There is a black plastic bracket around camera. So we have to remove them together. And there is a little adhesive underlying.

  12. Samsung Galaxy Note5 Teardown: adım 12, 2 resimden 1. Samsung Galaxy Note5 Teardown: adım 12, 2 resimden 2.
    • Remove front camera and noise-canceling mic.

  13. Samsung Galaxy Note5 Teardown: adım 13, 2 resimden 1. Samsung Galaxy Note5 Teardown: adım 13, 2 resimden 2.
    • Remove motor vibrator easily.

  14. Samsung Galaxy Note5 Teardown: adım 14, 3 resimden 1. Samsung Galaxy Note5 Teardown: adım 14, 3 resimden 2. Samsung Galaxy Note5 Teardown: adım 14, 3 resimden 3.
    • Remove earpiece speaker assembly.

  15. Samsung Galaxy Note5 Teardown: adım 15, 1 resimden 1.
    • That's Samsung Galaxy Note 5 earpiece assembly. It's integrated by speaker and sensors.

  16. Samsung Galaxy Note5 Teardown: adım 16, 2 resimden 1. Samsung Galaxy Note5 Teardown: adım 16, 2 resimden 2.
    • Now try to separate LCD screen from frame. The difficulty and risk to remove screen alone are getting nearly 5 stars (5 scores all together)respectively. The screen is weak and the adhesive are strong as well too much.

  17. Samsung Galaxy Note5 Teardown: adım 17, 2 resimden 1. Samsung Galaxy Note5 Teardown: adım 17, 2 resimden 2.
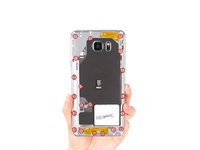
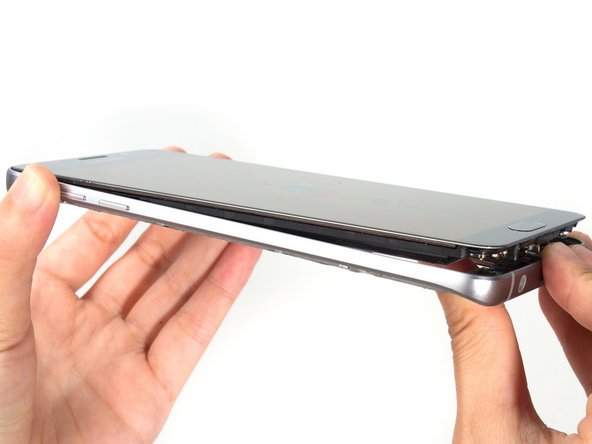
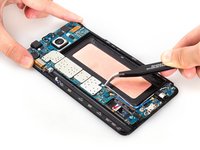
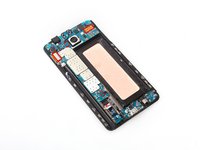
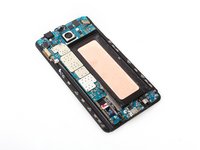
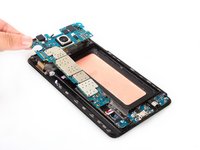
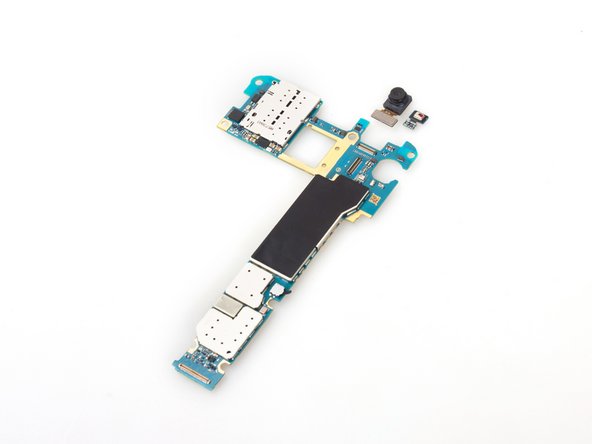
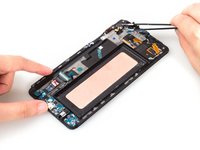
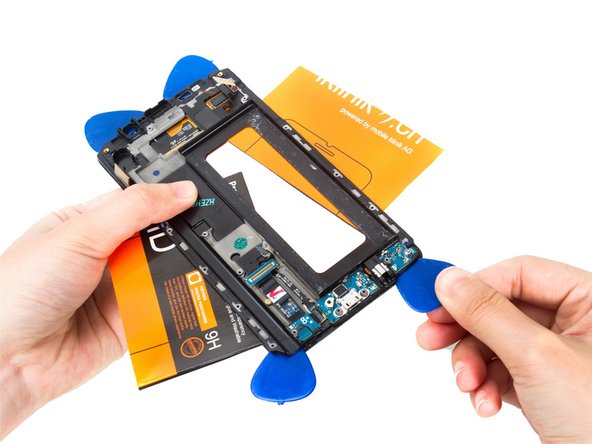
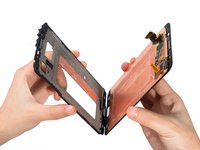
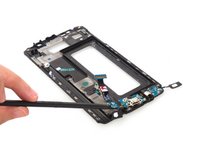
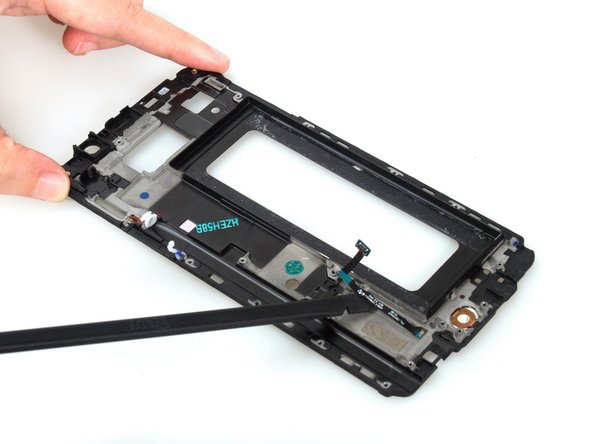
    • Since Samsung applied the design that the USB board come with soft keys together, DIY replace USB board and LCD screen alone become much more difficult.

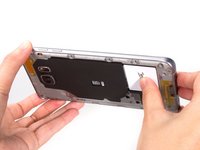
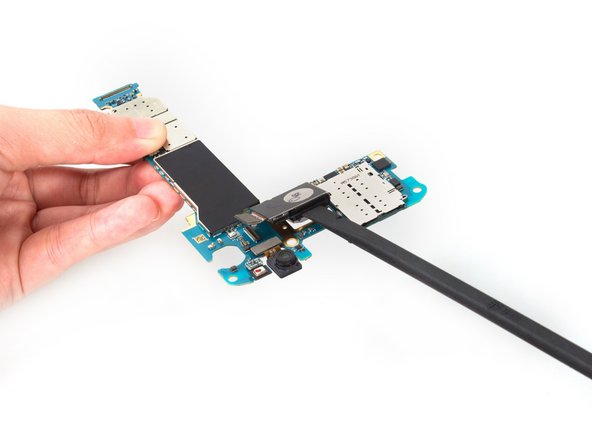
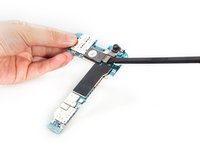
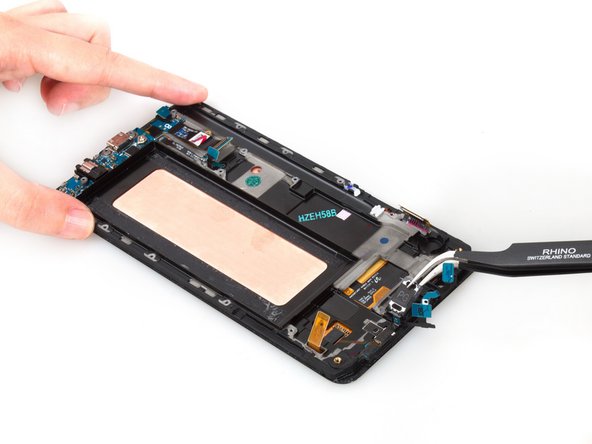
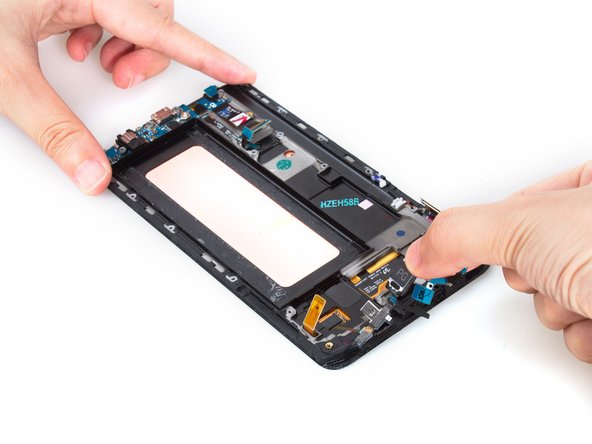
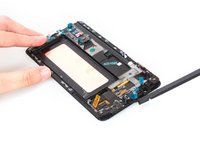
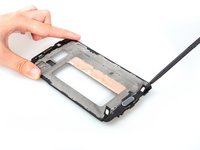
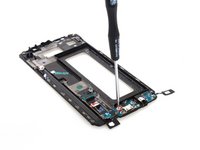
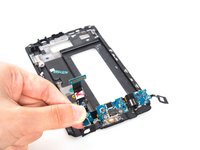
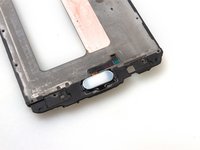
    • Be careful with the soft sensor keys on the bottom especially the flex.

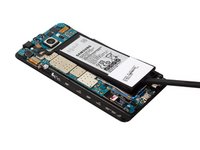
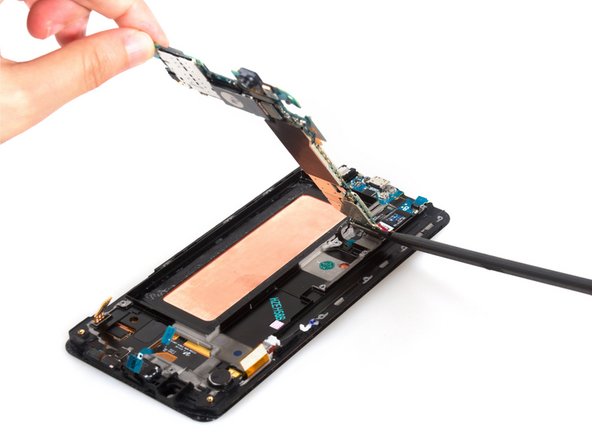
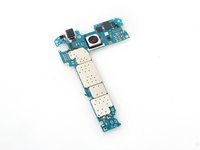
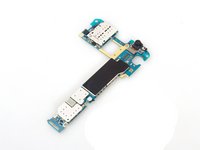
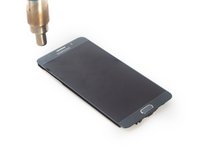
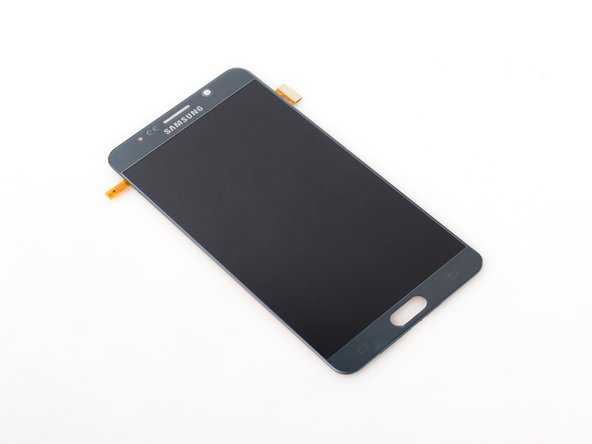
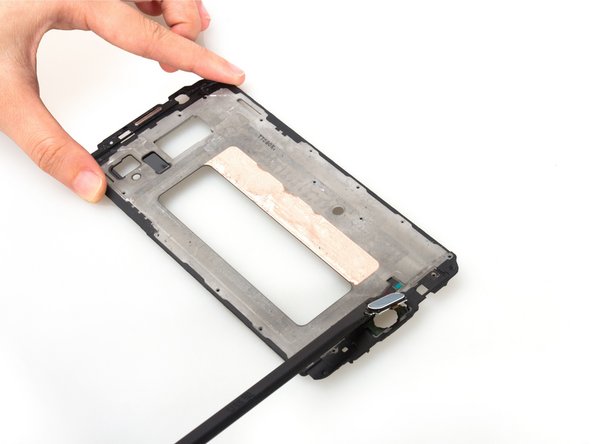
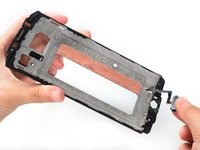
    • In fact, the replacement of Samsung Galaxy Note 5 LCD screen, USB board or home button nearly the same with that teardown.

  18. Samsung Galaxy Note5 Teardown: adım 18, 2 resimden 1. Samsung Galaxy Note5 Teardown: adım 18, 2 resimden 2.
    • Loosen two soft sensor keys from frame carefully. And remove the last securing screw on USB board.

  19. Samsung Galaxy Note5 Teardown: adım 19, 2 resimden 1. Samsung Galaxy Note5 Teardown: adım 19, 2 resimden 2.
    • Remove the USB board finally.

  20. Samsung Galaxy Note5 Teardown: adım 20, 3 resimden 1. Samsung Galaxy Note5 Teardown: adım 20, 3 resimden 2. Samsung Galaxy Note5 Teardown: adım 20, 3 resimden 3.
    • Could you see the mark on the right of the home button? Push the button as its direction and can loosen it from securing slot easily. And then cut the adhesive sticker under the flex.

  21. Samsung Galaxy Note5 Teardown: adım 21, 2 resimden 1. Samsung Galaxy Note5 Teardown: adım 21, 2 resimden 2.
    • Remove home button flex. Though it's a small component, it's really complicated and difficult to replace, even at the risk to break the screen.

  22. Samsung Galaxy Note5 Teardown: adım 22, 1 resimden 1.
    • Done.

Sophia

Üyelik tarihi: 03/25/14

43.810 İtibar

62 adet Kılavuz yazıldı

24 Yorum

the SIM reader can be changed. the SIM is external or integrated in the motherboard

hammadi - Yanıt

Can the s pen be opened too? I wanna know because my s pen clicking mechanism gets stuck and doesn't click.

Alex akerez - Yanıt

Yes it separates at the seam where the darker section with the Samsung text meets the light gray part. Here is a decent youtube video some guy made: https://youtu.be/ixNXUh2fnZo I would recommend trying plastic tools to open instead of a razor blade, also graphite is quite messy so I would probably use a small dab of light silicone grease. I buy it at the hardware store in the plumbing section (used for faucet seals). It's a good lightweight grease for rubber & plastic parts and anything sensitive to petroleum base grease. Good luck!

Andrew Kauffman -

Is the memeory stored on the motherboard? Or elsewhere?

ziefern n - Yanıt

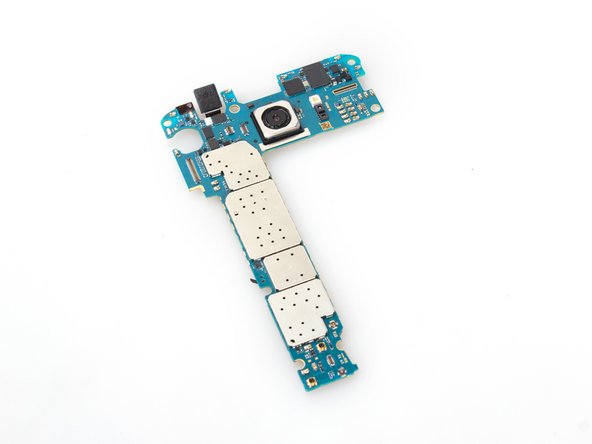
So did you find out where is the memory stored? My Note 5 dropped in water and circuit on the motherboard is fried. Is there a way i can still recover my data???

parag_oberoi30 -

Yorum Ekle

İstatistikleri Görüntüle:

Son 24 Saat: 5

Son 7 gün: 29

Son 30 gün: 113

Her zaman: 148,653