Neye ihtiyacın var
-
Bu adım çevrilmemiş. Çevrilmesine yardım edin
-
Apply heat to weaken adhesive. If using a heat gun, use a higher temperature such as 150℃ for a minute because the waterproof adhesive sticker is strong.
-
Place the suction cup and pull to create a gap. Insert a guitar pick to cut the sticker and remove the back cover.
-
-
Bu adım çevrilmemiş. Çevrilmesine yardım edin
-
Sony Xperia Z3 Compact NFC is stuck to the battery and connected with the motherboard by metal springs, so free the connector at first.
-
Remove all five screws from the rear frame.
-
Starting from the left corner, pry up the rear frame. There is no adhesive, so it's not difficult.
-
-
Bu adım çevrilmemiş. Çevrilmesine yardım edin
-
Release rear camera connector and take it away easily.
-
-
Bu adım çevrilmemiş. Çevrilmesine yardım edin
-
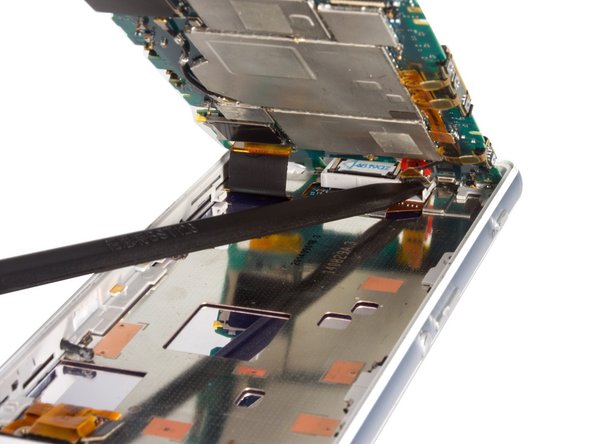
Release all the connectors connecting with motherboard including the LCD screen connector and headphone jack connector. Undo the only screw on the motherboard.
-
-
Bu adım çevrilmemiş. Çevrilmesine yardım edin
-
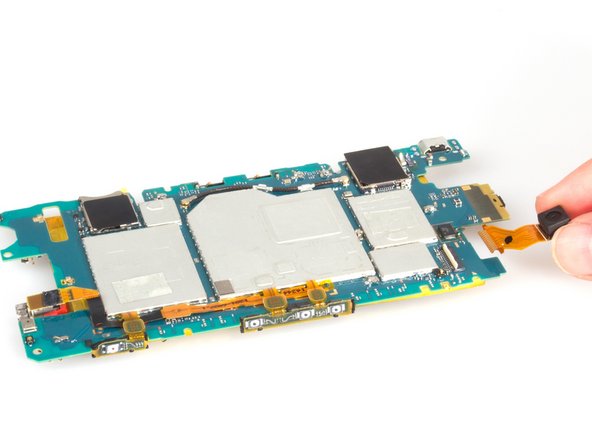
Pry up the motherboard from left side but avoid side buttons. It should come off easily since there is no adhesive sticker underneath.
-
-
-
Bu adım çevrilmemiş. Çevrilmesine yardım edin
-
Before removing the whole motherboard assembly, we need to get the motor vibration free from it's sticker. It's not strong and easy to handle.
-
There are front camera, main flex, signal cable and battery come with the motherboard.
-
-
Bu adım çevrilmemiş. Çevrilmesine yardım edin
-
The side buttons are fastened by clasps, which are easily freed. Release the connector and remove the main flex.
-
The main flex is smaller than other Xperia Z series devices.
-
-
Bu adım çevrilmemiş. Çevrilmesine yardım edin
-
Detach the connector to the motherboard.
-
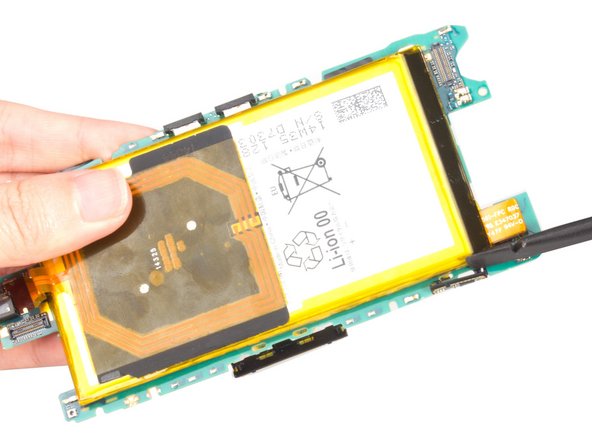
Next pull firmly on the two small black tabs protruding from underneath the battery. This stretches the adhesive strip and separates it from the battery and the motherboard.
-
CAUTION: This strip is easily ripped when under tension.
-
If it does rip then a sharp flat piece of metal or a knife should be used to cut through the remaining strip.
-
WARNING: This adhesive is very strong. Too much effort, prying or careless cutting may break the motherboard. The torn cover of the battery in the picture shows how strong the sticker is.
-
-
Bu adım çevrilmemiş. Çevrilmesine yardım edin
-
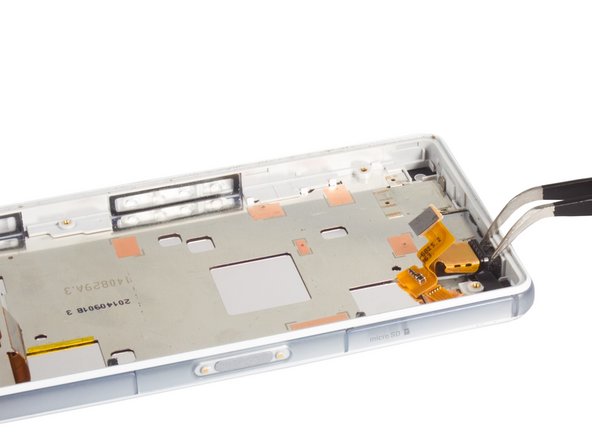
Cut the adhesive under the flex and between headphone jack and midframe. And then pry up the sensors gently and remove the assembly finally.
-
-
Bu adım çevrilmemiş. Çevrilmesine yardım edin
-
Heat, cut the sticker and remove it. Notice where the earpiece is and be careful not to separate them when using the guitar pick. It's easy to break the earpiece.
-
-
Bu adım çevrilmemiş. Çevrilmesine yardım edin
-
The earpiece is affixed to the touch panel directly, which is why it not recommended to separate it when disassembling the screen.
-


20 Yorum
I LOVE your work Sophia!
PLEASE also do a TOP VIEW shot as it would help me beter to look straight down. With or without tweezers is fine. JUST LOOKING Straight down would be better for so many reasons.
YOU ROCK!
P.S. Or just do a single TOP VIEW at the END like this one from Dillon ! Pretty Please!
Awesome! Very neat, carefully explained with tips. Keep up the good work, you might save so many amateurs/experts & their devices!!!
May I know, what is the size of the 5 screws used on the back frame?
can u guys tell me where i can find rear camera securing bracket cause something happend when i remove it and now my wireless range is a 1 step far from router or i canot connetc to the router ...