Neye ihtiyacın var
-
-
Apply a heated iOpener all around the edge of the screen to loosen the adhesive under the display.
-
Lift the display with a suction cup and insert a thin object to separate the screen from the frame.
-
Slide the fine object along the entire edge to cut the adhesive.
-
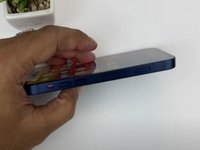
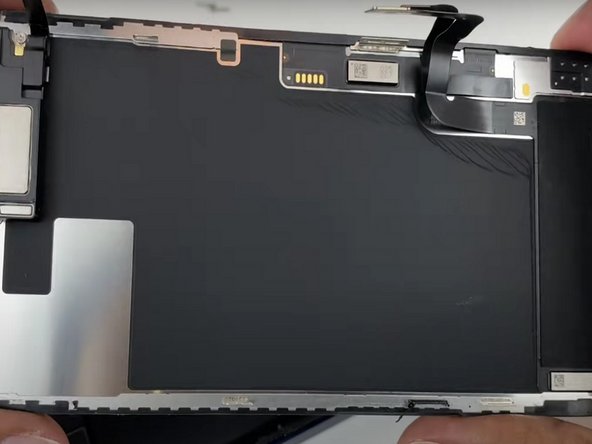
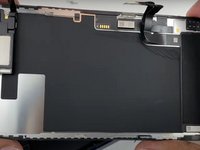
Raise the display.
-
-
-
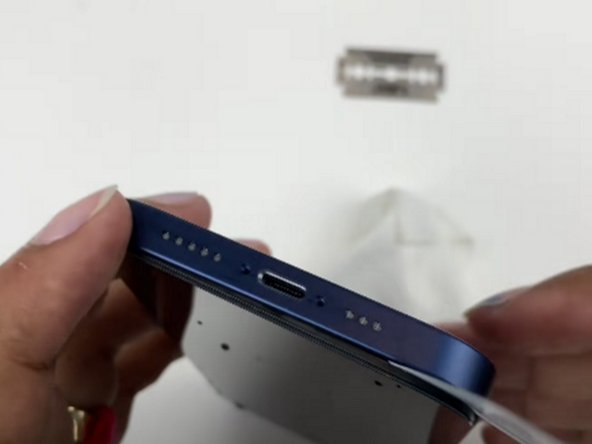
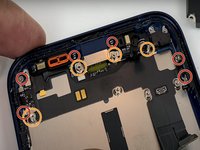
Remove the 6 Phillips # 00 screws.
-
With a spudger or with your fingernails, lift the two connectors.
-
Lift the connector underneath.
-
Disconnect the display connector.
-
Raise the display.
-
-
-
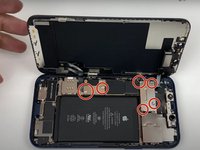
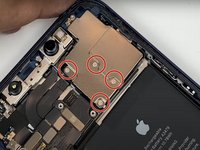
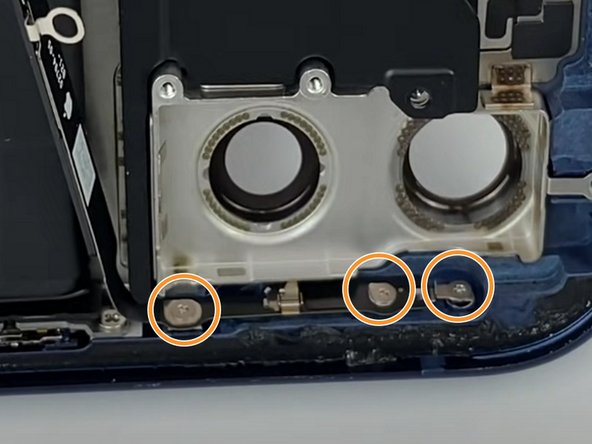
Unscrew the 4 Phillips # 00 screws.
-
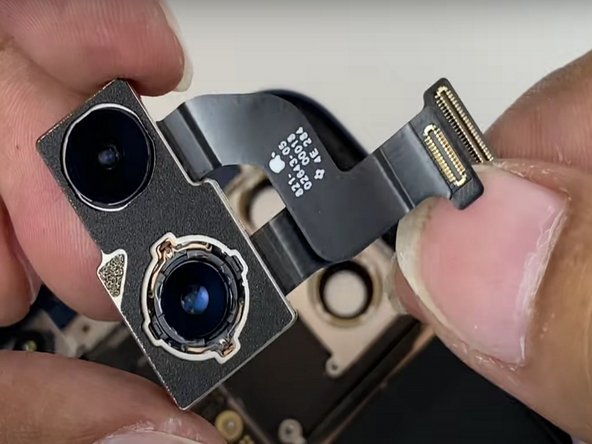
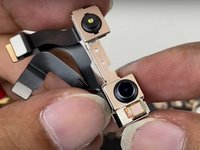
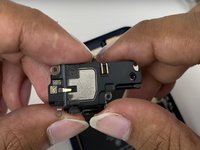
With a spudger or fingernails disconnect the two rear camera connectors.
-
Remove the rear camera.
-
-
-
-
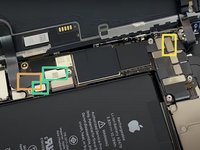
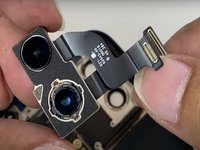
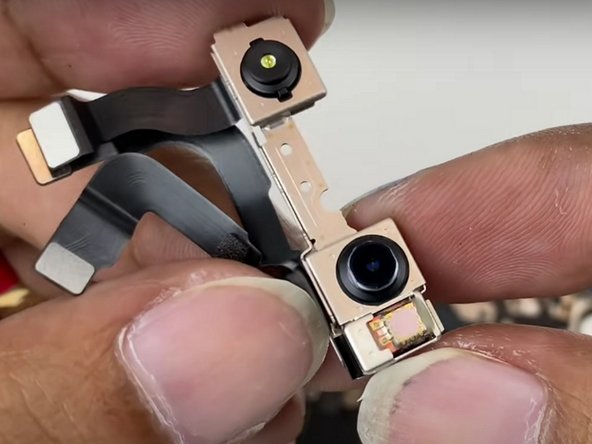
With a spudger or fingernails to disconnect the three connectors that connect the front camera.
-
Remove the front camera.
-
-
-
With a spudger or fingernails disconnect the battery holder connector.
-
Unscrew the 3 Phillips # 00 screws.
-
Remove the battery holder.
-
-
-
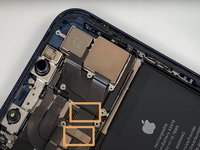
With a spudger or fingernails disconnect the rear camera flash connector.
-
Unscrew the 3 Phillips # 00 screws.
-
Unscrew the 2 Phillips # 00 screws.
-
Remove the rear camera flash.
-
-
-
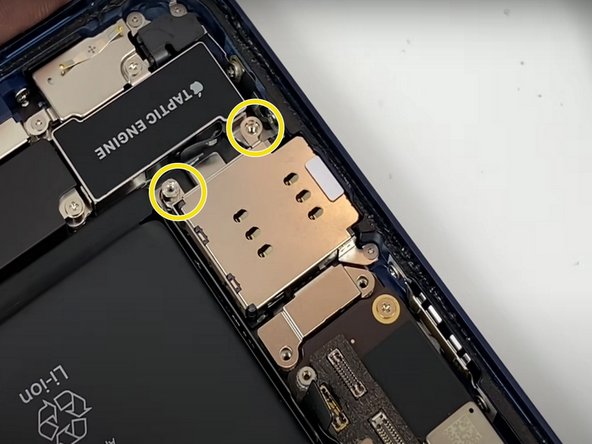
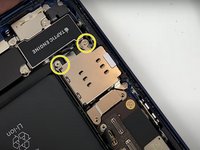
Unscrew the 4 Phillips # 00 screws.
-
Unscrew the 2 screw holders with the suitable screwdriver.
-
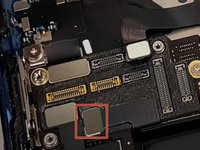
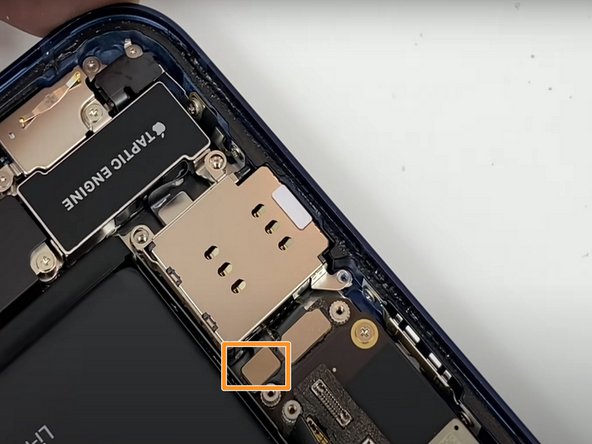
With a spudger or fingernails to disconnect the SIM card holder connector.
-
Remove the SIM card holder.
-
-
-
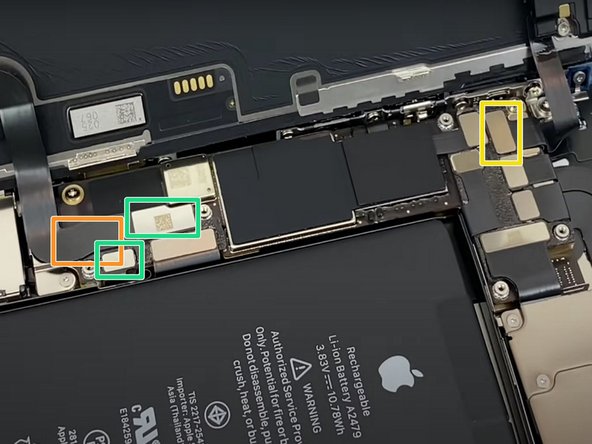
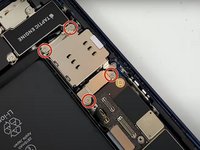
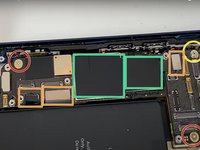
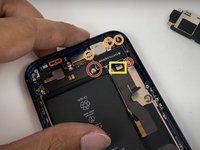
Remove the 2 Phillips # 00 screws.
-
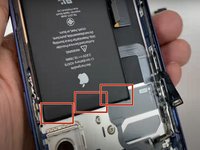
With a spudger or fingernails disconnect the 3 battery connectors.
-
Unscrew the screw holder with a standoff screwdriver for iphone.
-
Remove the film with a spudger.
-
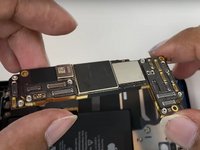
Remove the logic board.
-
-
-
Remove the 2 screw holders with a standoff screwdriver for iphone
-
Unscrew the 3 Phillips # 00 screws.
-
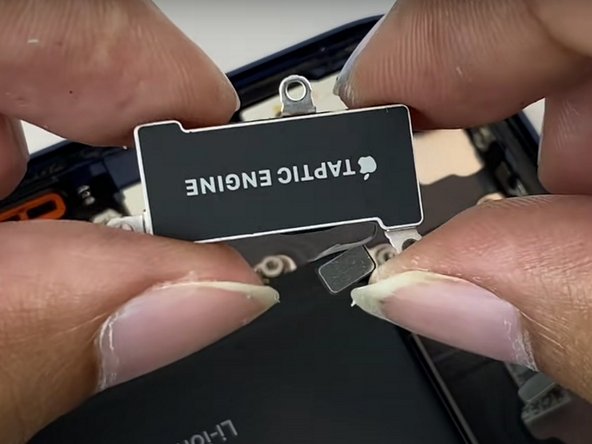
Remove the taptic engine connector with a spudger or fingernail.
-
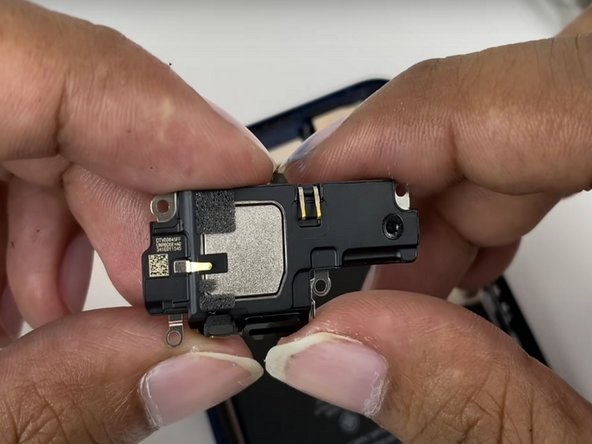
Remove the taptic engine.
-
-
-
Unscrew 6 Phillips # 00 screws.
-
Remove the 4 screw holders with an iPhone standoff screwdriver.
-
Remove the film with a spudger.
-
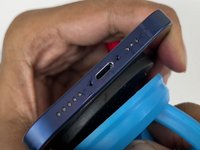
Remove the charging port.
-


Bu çevirmenlere özel teşekkürler:
100%


Bu çevirmenler dünyayı onarmamıza yardım ediyor! Katkıda bulunmak ister misiniz?
Çeviriye Başlayın ›

Ekip

7Kılavuz Yorumları
I don't see any mentioning of the microphone, Is the Microphone an integral part of the charging port harnes?
This guide is missing A LOT of steps
This is definitely not a US iPhone 12! e careful as the antenna can tear easily and potentially ruin a motherboard.
>disconnect battery connector
>disconnetct 3 battery connectors
wtf?)) why do you call any FPC "battery connector"? so NPC