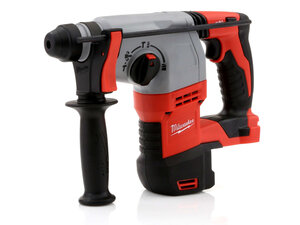
Öğrenci Katkılı Viki
Bu vikiyi, eğitim programımızdan harika bir öğrenci ekibi yaptı.
No Spin/Won’t Turn On/Trigger Unresponsive
When pressing on the trigger, the drill is not responding/spinning.
Battery is Dead
If the drill is not operating, there may be issues with the battery. Press the release buttons at the bottom of the drill by the battery pack to allow the battery to be removed. Remove the battery and connect it to the charger. If the charger shows that the battery is low, allow the battery to charge fully before operating the drill again.
Charger is Damaged
Charging issues can also be the fault of the charger. Inspect your charger for any wear and tear that may lead to charging issues. Use a multimeter to confirm that the charger is delivering a reasonable voltage.
Object Obstructing Trigger
First, check to see if the control switch is not set to ‘Lock’, which is in the center position. The control switch is right above the handle. Then, check to see if any object/debris is blocking the trigger from pressing all the way through. To do so, open the outer casing of the drill and inspect the space around the trigger for any debris. If you find anything, clean it with a soft brush.
Debris is Blocking the Sleeve from Spinning
The drill may not spin if it is too clogged with dust, dirt, and grime. Firstly, use a soft brush to clean out the drill sleeve and knock out dirt. You can also use a can of compressed air to clean the drill’s interior. Clean areas such as vents, contacts, and other components that may be clogged. Avoid using water to enter the drill’s interior, as this can cause further damage. If the drill is still not spinning, there may be issues with the dust cap that is allowing the drill to become obstructed by dust. For a guide on taking apart the gear assembly and replacing your dust cap, see our replacement guide.
Damaged Trigger Switch/Electrical Issue
If none of the above has solved the issue, the problem may be caused by the trigger switch. With the battery removed, press the trigger and evaluate if the trigger does not move or has little to no resistance. To replace the trigger switch, see our Servo kit replacement guide.
Chuck Not Holding Bits
When loading drill bits into the drill, the chuck will not allow loading, or bits fall out once the drill is spinning.
The Bit is Not Properly Secured
Sometimes, the way a bit is placed can cause issues. Remove the bit and inspect both the chuck and the bit for any damage. If there’s no damage found, reinstall the bit and properly tighten the chuck.
Chuck or Bit is Worn Out
Sometimes, damage on the chuck or the bit can cause issues. If there is damage found on the bit, specifically the part that attaches to the chuck, then replace the bit. If the chuck jaws are worn out or damaged, consider replacing the chuck altogether.
Chuck Has No Tension
If the chuck’s grip on the bit gets loosened upon use, then there is likely an issue with the conical spring. The conical spring is the part that provides the tension needed to hold the chuck in place. See our gasket replacement guide for guidance on opening up the drill and ensuring that the spring is still in place.
Loose/Faulty Dust Cap
If none of the above has solved your issue, inspect the dust cap. If the dust cap is faulty or damaged, replace the dust cap. If the dust cap is not secured properly, inspect the locking sleeve. If the locking sleeve is not locking, replace the C-ring. If the locking sleeve itself is faulty or damaged, replace the locking sleeve. The dust cap and locking sleeve replacements are shown in our replacement guide.
Inconsistent Speed/Motor Noises
The drill is slowing down and/or the motor sounds like the drill is resisting spinning.
Battery is Low
The drill may slow down if the battery is running low. Allow the battery to recharge before resuming use. If the battery loses charge too quickly, consider replacing the battery.
Motor Parts Need Oiling
If there are noises coming from the motor, there may be too much friction inside the moving components. Open the drill and lightly oil the motor components.
Worn Gears and Bearings
If a grinding sound is coming from the motor, it may be due to the gears and bearings being worn from extended use. Open the gear case assembly and inspect the device for worn parts that may require replacement.
Inconsistent Speed
If there seems to be an inconsistency in the speed of the drill, there may be a faulty connection in the motor wiring; debris caught in the drill sleeve, or a bad battery. First, disassemble the casing of the drill to expose the motor assembly. Inspect the contact points of the wires to check if any connections are loose. If loose connections are present, remove the motor assembly from the casing and resolder the wire onto its appropriate solder joint. If the wire connections are secure, then inspect the drill sleeve for any debris. Refer to our “Debris is Blocking the Sleeve from Spinning” troubleshooting section to properly clean it. If the issue remains, then a replacement battery is needed.
Motor Overheating
The drill may start slowing down if the motor is overheating. Check the vent slots for blockages and clean them out with a soft brush. With the drill not contacting any material, start the motor to allow air to travel through it. Then, let the motor sit for a while to allow it to cool down. If problems persist, inspect the motor for any damage.
Not Hitting Hard Enough
The drill is not hitting hard enough, or not doing significant work.
Not Set to Appropriate Orientation
If the drill is set in the wrong rotation direction, the drill will not strike properly. If the drill needs to move forward, confirm the orientation is set to FWD, or clockwise. If the drill needs to move backward, confirm that the drill is set to REV, or counterclockwise. If the drill shuttle needs to be replaced, see this guide for instructions on replacement.
Dull Drill Bit
If the drill is not striking the surface hard enough, the problem can also be found with the drill bits. Inspect your drill bit to make sure it is not worn and dull. Replace the drill bit and test if the drill hits harder after replacement. Also note that when drilling on harder surfaces, drill bits should be lubricated to reduce friction as much as possible.
Battery is Low/Faulty Battery
If the battery is low or damaged, the drill will not hit hard enough. Use a corded drill with the same drill bit to create a pilot hall. If the drill strikes properly, the battery is likely causing the problem. Recharge the battery and/or inspect it for damage. Replace the battery if necessary.
Chuck Not Locked
Open the drill by removing the barrel from the drill and removing the piston. Inspect the O-ring for damage. If the O-ring is worn or broken and requires replacement, it will not be locked into position; it will look like it’s moving around or getting caught in other moving components.
Faulty/Broken Piston
The drill will also not deliver a hard punch if the piston is damaged. Remove the barrel and inspect the piston. If it is damaged, it will need replacement.
Bad Vibration
The drill vibrates so that it is hard to hold and control.
Too Much Friction
The drill may be vibrating too much if there are a lot of worn parts. Firstly, confirm that the moving components are nicely lubricated. If friction is uncontrolled, consider replacing the 7 mm ball.
Damaged Dust Cap
The drill may have a bad vibration because of too much debris. If the vibration is accompanied by loud noises, it may be due to worn out parts in the assembly. Clean out the drill with a brush and inspect the gears and bearings for wear that may require replacement. Inspect the dust cap for damage and consider replacing this part using our replacement guide.
Oil Leaks
Oil/grease is leaking from the tip of the of the drill.
Chuck Grease Liquefied
If the drill has been sitting for a long time or has gotten overheated, it is possible that the grease has turned into liquid and started leaking. Clean out the chuck with cotton swabs and add grease to the chucks. Remember that the drill performs best when the chuck is lightly greased before each use.
Worn Down/Faulty Seals
The dust cap may be damaged from hard use of the drill. Inspect the drill interior to determine if the dust cap is unsecured or damaged. Replace the dust cap, located inside the gear case assembly. See our replacement guide for instructions on replacement.
Ekip

University of Memphis, Team 3-3, Sneed Spring 2024 University of Memphis, Team 3-3, Sneed Spring 2024 üyesi
UM-SNEED-S24S3G3
4 Üyeler
8 adet Kılavuz yazıldı
0 Yorum