Ana içeriğe geç

A tablet released by Hisense in 2014, identified by model number E2281.

36 Soru Tümünü görüntüle

How do I replace the broken digitizer on my Hisesnse Sero 8?

(I'm a first-timer here).

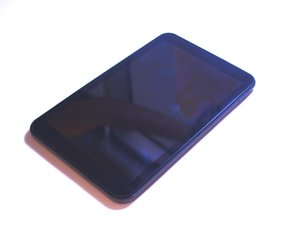
Hello everyone, I dropped my Sero 8 tablet from desk height (cracking the digitizer in the process). When I turn it on, I can see my lock screen clearly (therefore the LCD must be fine), but the digitizer doesn't pick up input anywhere on the screen.

I think I know how to remove the broken digitizer, but how do I put on a new one?

And could someone provide a summary of removing the digitizer for the Sero 8 just so I can be sure I know how to do it?

What tools do I need? What tools would be useful but not essential? I know I need a blow dryer, and dinky little screwdrivers (what kind/size though?), some things to pry the screen off (and some things to put between the digitizer and the LCD prevent the adhesive from re-adhering)...

Anyone have recommendations for what I buy?

Thanks,

-Charlie

Bu soruyu yanıtla Ben de bu sorunu yaşıyorum

Bu iyi bir soru mu?

Puan 2
5 Yorum

Someone please help me! I don't know what to do!

tarafından

Hi,

I can't find any info about a Sero 8 digitizer replacement procedure. Here is a link which shows how to do a Sero 7 Pro digitizer replacement. It may be of some help, no guarantees that the Sero 8 will be the same. The disclaimer states that it is NOT an easy repair. Your decision.

https://www.youtube.com/watch?v=JtMyKmvD...

tarafından

anyone else got some info?

tarafından

Alright, I'm buying another tablet.

tarafından

Well, I’ll be planning on repairing this same device in the future and show details in years.

tarafından

Yorum Ekle

2 Cevap

Filtre ölçütü:
En Yararlı Yanıt

It would be great if you could contribute a screen replacement to the existing guides for this model. The current guides serve as a good reference point and the several youtuve videos for the Sero 7 can supplement any areas you may be concerned about.

Hisense Sero 7 Pro glass only screen repair as recommended by @jayeff

Hisense E270BSA - Digiter / Front Glass Replacement - Instructional Video

Hisense Sero 7 Pro Tablet Part 2 Taken Apart

As far as the tools you would need, those shown in the first video were:

Set of Picks

[bağlı ürün eksik veya kapalı: IF145-000]

Spudgers

Tweezers - Pro / ESD / Blunt

Double-sided adhesive tape

Philips and flat head screw drivers

The links for the tools are those on iFixit for easy reference, but you can source these locally as well.

Since your current digitizer is broken, I recommend that you use packaging tape over the existing cracked digitizer to minimize small parts from breaking off. This may make it possible to remove it as one piece.

Spudger Görseli

Ürün

Spudger

$3.99

Tweezers Görseli

Ürün

Tweezers

$4.99

iFixit Opening Picks (Set of 6) Görseli

Ürün

iFixit Opening Picks (Set of 6)

$4.99

Bu yanıt yardımcı oldu mu?

Puan 2
Yorum Ekle

Look on google it normally gives a dismantle process of most things

Bu yanıt yardımcı oldu mu?

Puan 0
Yorum Ekle

Yanıtını ekle

Charlie sonsuza kadar minnettar olacak.
İstatistikleri Görüntüle:

Son 24 Saat: 0

Son 7 gün: 1

Son 30 gün: 1

Her zaman: 1,103