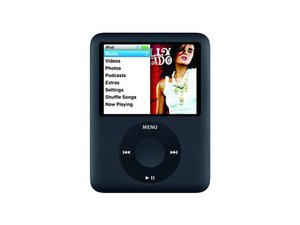
try starting the iPod Diagnostic Mode and see under the backlight check to see if it comes on. If it does not I am certain that you are having at least LCD problems that you can only fix by replacing theLCD or main board problem by having shortened out the coils. Try to replace the LCD first since it is the cheapest way. iPod Nano 3rd Generation Display Replacement Good luck. I attached the diagnostic menu for your test, just in case.
In order to access the inbuilt Diagnostic menu on the Nano, you need to press a combination of keys immediately after restarting it.
1. Toggle the Hold switch to Hold, the off again.
2. Press and hold Menu and Select (the centre button) for at least 6 secs, or until the Apple logo appears! – for iPod 1G to 3G press Menu and Play – hereafter referred to as the ‘Reset Method’
3. As soon as the Apple Logo appears, press and hold |<< and Select – For iPod 1G to 3G press |<<, >>| and Select
Navigating the Diagnostic Menu
Once you are in Diagnostic Mode, use the >>| and |<< buttons to navigate the menus. In most cases Menu will go back one menu, and Select will select the menu option. You can exit the menu at any time by selecting Power, Reset or by pressing Menu and Select (Menu and Play for 1G to 3G) to reset it.
Note: The menu’s shown below are from my iPod Nano 3G, and may vary to the menus you see.
iPod Diagnostics BuildID: d002
SVC Sep 10 2007 v.0072
—————————————————–
>Power
Sleep
Audio
Video
LCD
IO
Memory
TouchWheel
About
Power:
Within here you have;
1. ACC_Identify – Shows ACC = 2.497V
2. BatteryA2D – Shows 4.062V Ref=255
3. HighPower – Puts the screen on full brightness and shows a start time, Voltage (3.982V) and current (100mA)
4. ChargeCurrent – Shows Cur=100mA Battery = 4.046V
5. Reset – Resets the iPod
Sleep:
Sends the iPod to “DeepSleep” – you’ll need to do the Reset method above to restart it.
Audio:
Allows you to test the Headphone detection and play test tone. Interestingly there is an option to record from ‘Line In’ – Watch out for the Test Tone, its *VERY* loud!!
Video:
Has one option “TVPattern” that didn’t seem to do much, and needed me to do the reset method above to get out of it.
LCD:
Within here you have;
1. ColorPattern: Shows a series of patterns on the LCD. |<< turns off the backlight, >>| sets it to dim, Select goes to next pattern. You have to look at all 25 before you can exit.
2. Backlight: This allows you to check the back light, using the |<<, >>|, Play and Action buttons. Menu exits this screen.
3. ReadLCMID: Reads vendor info about the LCD. Mine Shows Vendor ID: 38 PanelID: 55 BuildID: 71 Read ID: OK
IO: (Input Output)
1. ACC_Switchtest: Not sure what this is… Accessories detector?
2. IOStatuses: Mine shows; HP_DETECT: 1 LCD_ID1:0 LCD_ID2:1 USB_DETECT:0 FW_DETECT:0 ACC_DETECT:0 HOLD_SWITCH:1
Memory:
1. SdramQScan: Does a very quick SDRAM Test
2. NANDSPEC: Mine Shows; NandLBA=991232 NAND SIZE:3.819200
Touch Wheel:
1. TouchWheelID: Mine Shows; 0:9045003a, 1:c609013a, 2:8000023a, 3:8000033a, 4:8066043a, 5:8001053a
2. WheelAndKey: Lets you test the touch wheel and all the keys (interesting that this is the only place the wheel works!)
About:
This shows various information and the iPod’s serial number, as show below
About Information
SrNum: 6U73xxxxxx (Obscured on purpose here!)
Mod#: MA978
Regn: 1 0 2 0 37 0 1
Fwld:
01000000
1a1b9639
000a2700
00000000
HwVr: 00140010
vrsn: 1.32.f.2
Bu yanıt yardımcı oldu mu?
Oy verildi
Geri al
Puan
3
İptal
Bu yoruma uygun yeri bulmak için bu konuyu kaydırın. Ardından, taşımak için "Bu yazıya yorum ekle"ye tıklayın.

 3
3  1
1 
 2,4b
2,4b
5 Yorum
Hello,
I followed the procedure described. The screen is more readable and the unit is operating normally. Unfortunately the backlight of the screen does not work.
The backlight is it included in the screen?
Does replacing the screen would solve the problem?
Thank you in advance for your help.
Cordially
paturel tarafından
paturel, I am most certainly not the expert on the Nano's but on all the ipod's I have (to many :)) the backlight is part of the logic board. I know there are coil issues on later models of the Nano that get shortened out and thus prevent the backlight from working. I would think that you have to replace the main logic board to get your backlight back. Sorry, good luck to you.
oldturkey03 tarafından
Too bad, I could try a screen change. Thank you céry much for your reply.
paturel tarafından
Does this make your ipod wiped clean of the music stored on it?
kjmcphee tarafından
Backlights are always on the LCD. Whatever you have they are attached by two separate connections on the ribbon cable. Try touching up a dry joint first, it might do the trick. I don't think you can disassemble the nano screen to change the backlight.
Chris Conlon tarafından