Thanks to your clear instructions, I managed to repair my camera! :-D
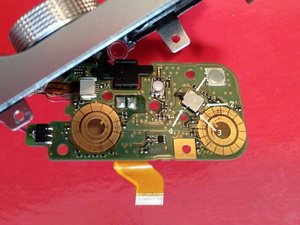
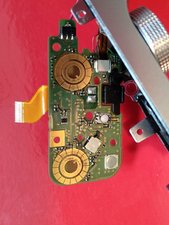
I soldered pins 1 and 4 together with a thin cable scavenged from another dead electronic device (pin 3 is very close to the golden "ring", I didn't want to take the risk).
It's important to note that the cable size and position is crucial, because it can become difficult to reassemble the top part circuitry.
While it's been years since the ask, I recently had the same switch break on me and I ended up finding a replacement switch. It is a Panasonic ESE-18L11D and you can get them from digikey for about 50 cents. I am ordering one today so my camera should be back up and running soon, all you need to do is desolder the 4 connections and carefully solder on the new switch
Thanks to the community I was able to buy the Panasonic switch and repaired my camera. It took a bit of time as the parts were very small but I was able to solder the switch in the end.
Hi, very happy to let you know I managed to fix my power switch for the X-M1 by replacing the switch with the earlier mentioned Panasonic ESE-18L11D. Only €0,61 at Mouser or Digikey.
I have an extra one, so if you need one and want to save shipping costs let me know.
The disassembly guide on this website is very useful, however a few shortcuts can be made.
You don’t have disassemble the camera completely.
Work safe, clean and in an ESD free environment. Remove lens, battery and memory card.
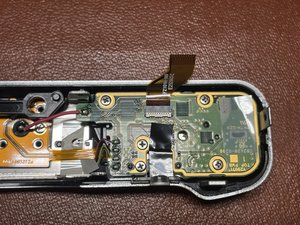
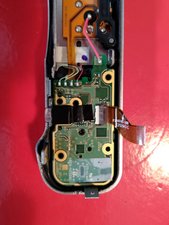
Take the 5 screws out
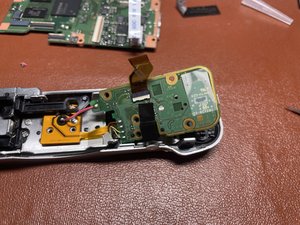
The pcb will remain connected to the top assembly
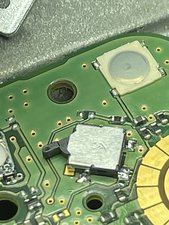
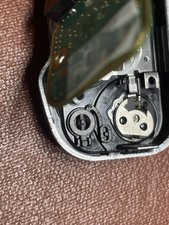
This is “the switch” Panasonic ESE-18L11D
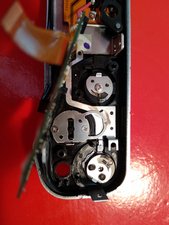
Please note this plastic part might fall out. Just a picture to remember where it belongs
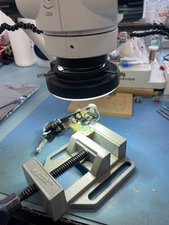
My setup. Yes, I use a microscope. Things are pretty tiny.
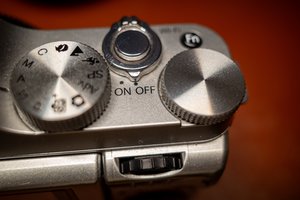
Don’t forget to put the camera switch to Off, before reassembling.
Bu yoruma uygun yeri bulmak için bu konuyu kaydırın. Ardından, taşımak için "Bu yazıya yorum ekle"ye tıklayın.
1 Yorum:
I see the main board on the table in the background of one of your photos... I'm assuming this absolutely needs to be removed? As far as I can tell from the disassembly guide this requires more soldering.
I've never soldered before and my X-A1 has the same issue. I'm wondering if it's worthwhile to buy a soldering iron and try the repair myself.
Of course I guess the part wasn't easily available... ;-)
2 solutions (which need to fully disassemble the camera. Thanks to ifixit for that)
First solution - locate the top plate circuitry (where is the faultive on/off switch) and solder carefully a very fine wire between the two terminals to make a short circuit and permanently set the state of the camera "ON".
Reassemble the camera, put a battery in it.
The camera turns on automatically and stays ON. (if it doesn't press the shutter button)
The camera goes automatically OFF after few minutes if you don't take photos.
To wake it, just press the shutter button few seconds.
It could be the best solution.
Second solution, slightly different : if you have a stock of electronic parts and have the chance to find a very tiny on/off switch, connect it (solder...) on the two terminals of the broken switch. With 2 long and very fine cables, you can easily have an "external" switch (for exemple on the bottom plate).
This is what I did.
It works fine. Not very elegant, but at least the camera is not in the recycle bin and is still working.
I have the same problem, so I sent my camera to pm2s (maintenance partner for Fujifilm in France), and after 5 months, they answered that the spare part will never be available (should have come directly from Japan).
FYI the part is CB2428A200 - Y29971TOP_ASSY and would have cost me around 200$ to repair...
Instead, they "offered" to replace the camera with an X-A5 at 500$ ^_^


 3
3  1
1