Giriş
The factory springs can be replaced for several reasons, they might be broken or uneven from years of uneven load. You can also replace the factory springs with higher or lower ones.
Since replacing the spring involves the disassembly of the strut, if you’re replacing the entire strut, you can also use this guide.
Neye ihtiyacın var
-
-
Put the jack under the rear frame hook and jack up the back of the car until the jack stands can be put under the jack supports.
-
Put jack stands under the rear jack supports. Slowly lower the weight of the car onto them by lowering the jack.
-
Put the jack under the front sub frame and jack up the front of the car until the jack stands can be put under the jack supports.
-
Put jack stands under the front jack supports. Slowly lower the weight of the car onto them by lowering the jack.
-
-
-
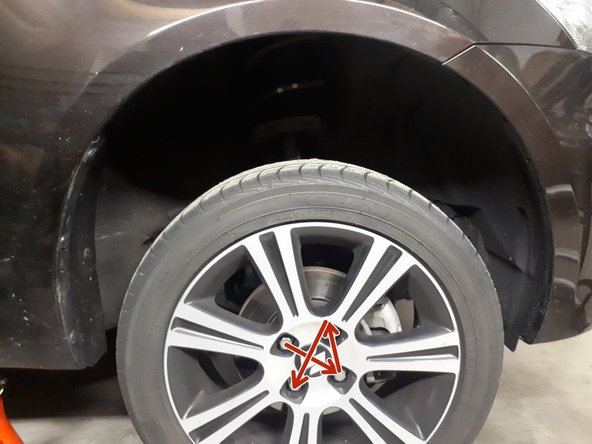
Using the 17mm socket, unbolt the wheel nuts and remove the tire from the hub.
-
-
-
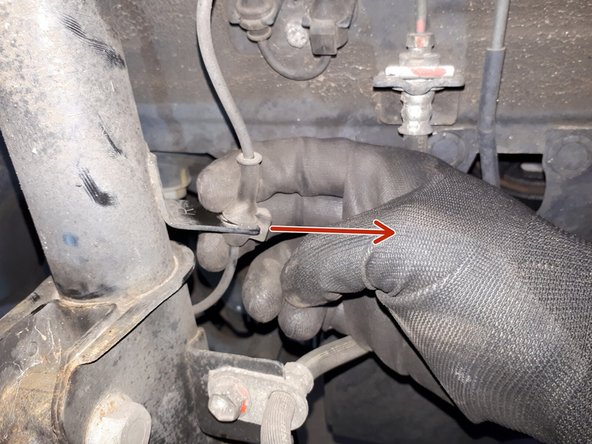
Pull the top sensor attachment from the mount.
-
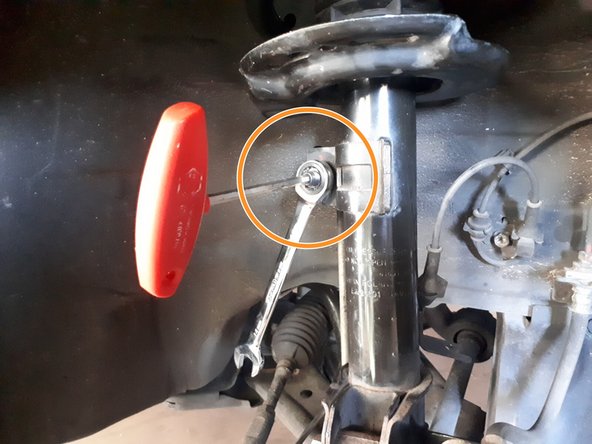
Use the 12mm to disconnect the brake cable bracket.
-
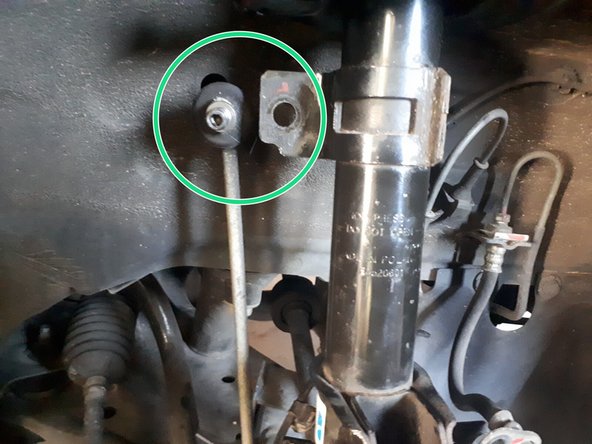
Unclip the lower sensor attachment from the mount. Use the plyers to compress the locking part and pull out the clip.
-
-
-
Use the 5mm hex to hold the bolt in place, while loosing the nut with the 14mm wrench.
-
Pull out the stabilizer bar link from the strut assembly mount.
-
-
-
-
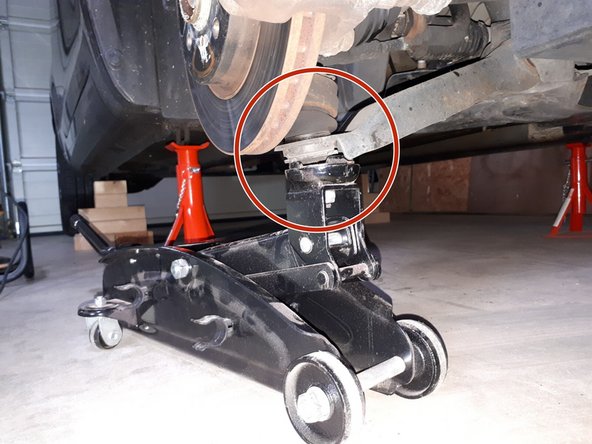
Put the jack under the wheel arm and let the jack bear the weight of the arm but not lift the arm.
-
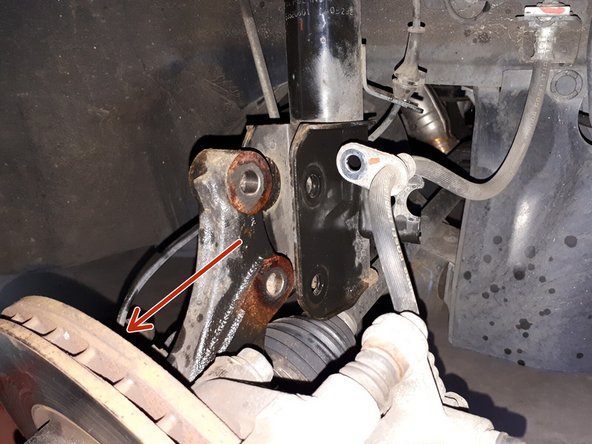
Using the 17mm socket, unscrew the nuts from the strut bracket bolts.
-
Use the punch and hammer to punch out the bolts.
-
-
-
Lower the jack and pull the wheel arm from the bottom strut assembly.
-
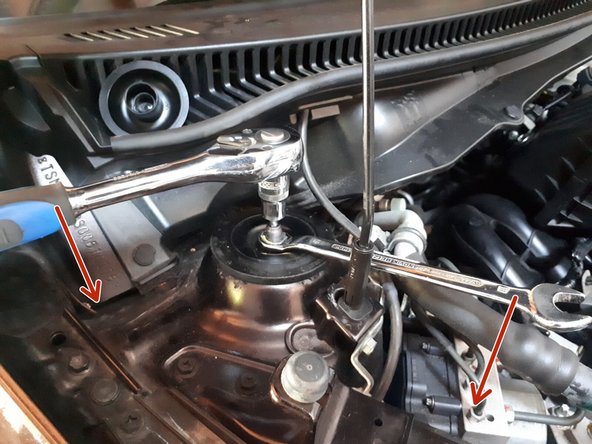
Open the hood and remove the plastic cap protecting the upper strut mount.
-
Use the 6mm hex to hold the bolt in place, while loosing the nut with the 17mm wrench. When freeing the nut, hold the strut assembly to prevent it from falling.
-
Remove the strut assembly from the wheel-well while ensuring the cables are not damaged.
-
-
-
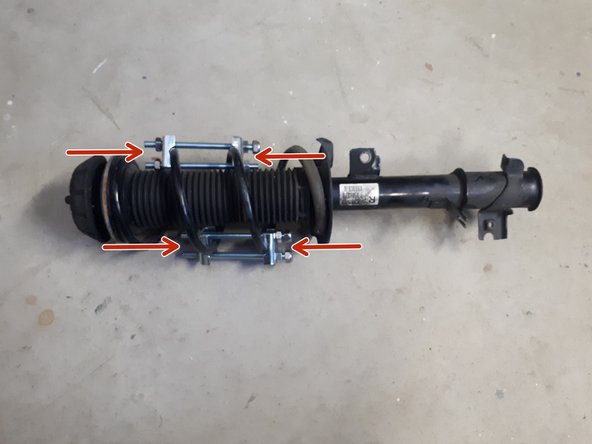
Use the coil spring compressors to release the tension on the strut assembly head.
-
Use the vise to hold the bottom part of the assembly. Wrap it with some cloth to prevent damage from the grips.
-
Use the 6mm hex to hold the bolt in place, while loosing the nut with the 19mm wrench.
-
Release the strut assembly from the vise and take off all parts from the top and arrange them by order.
-
-
-
You can now take the spring off the strut assembly, together with the dust sleeve.
-
Put the strut assembly back into the vise.
-
Install the replacement spring together with the dust sleeve. Make sure the bottom of the spring fits in the mount indentation. Don't try to attach the bottom part of the sleeve at this point.
-
Put back the top parts in reverse order and use the 6mm hex and 19mm wrench to tighten the bolt to 50 N·m.
-
Wrap the dust sleeve bottom around the mounts.
-
-
-
Carefully put the strut back and while holding the bottom part, screw back the bolt.
-
Using the 6mm hex and 17mm wrench, tighten to 50 N·m and enclose with the plastic cover.
-
Push against the wheel hub to align the wheel arm with the strut bracket and insert the strut bracket bolts.
-
Apply thread locker and screw the bolts back on, tighten to 90 N·m.
-
-
-
Connect the stabilizer bar link. Tighten to 50 N·m.
-
Bolt the brake cable bracket back on to the strut assembly. Tighten to 25 N·m.
-
Attach the sensor cable to the mounts on the strut assembly.
-
-
-
Place the tire flat against the wheel hub and make sure the hub holes line up with the rim holes.
-
With the 17mm socket, screw the wheelnuts back in. Tighten to 85 N·m.
-


To replace the other front spring, repeat the process on the other side of the car. When you’re finished, lower the car with the jack.
To replace the other front spring, repeat the process on the other side of the car. When you’re finished, lower the car with the jack.
İptal et: Bu kılavuzu tamamlamadım.
3 farklı kişi bu kılavuzu tamamladı.
