
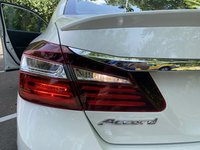
2017 Honda Accord Sedan Tail Light Replacement
Giriş
1. adıma gitTail lights are a key component of a vehicle that not only ensures safety of the driver, but also other drivers on the road. Broken tail lights become a hazard when its function of alerting other drivers fails to work.
Use this guide to help prevent a collision, unfortunate accidents, or even a police citation.
Neye ihtiyacın var
Aletler


Daha fazlasını göster…
-
-
On the driver's side of the car by the left foot-rest, pull the hood lever to release the car hood.
-
-
-
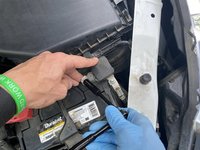
The battery is located on the right side of the engine bay when looking at it from the front.
-
Using a 10mm socket, disconnect the negative (—) terminal on the battery by loosening the clamp around the terminal.
-
Pull the clamp off the terminal once it is loose enough, and tuck it away to ensure that it does not come into contact with the battery terminal.
-
-
-
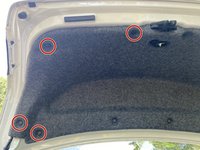
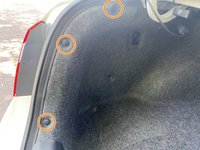
Pull back the covering and determine which bulb needs replacement.
-
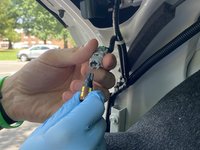
Remove it by twisting the connector and pulling the bulb from the connector. (This step shows replacement of the reverse light).
-
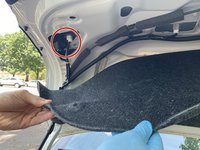
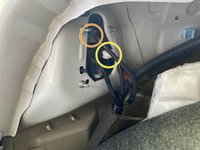
The third picture shows the backside of the taillight on the left side of the trunk. To replace the blinker light bulb, twist the connector in the orange circle and replace the bulb.
-
The connector in the yellow circle is the brake light bulb. If this bulb is burnt out, twist the connector from the housing and replace the bulb.
-


To reassemble your device, follow these instructions in reverse order.
To reassemble your device, follow these instructions in reverse order.
İptal et: Bu kılavuzu tamamlamadım.
Bir başkası bu kılavuzu tamamladı.
Ekip

University of Memphis, Team 1-4, Lane Summer 2022 University of Memphis, Team 1-4, Lane Summer 2022 üyesi
UM-LANE-SU22S1G4
3 Üyeler
1 Kılavuz yazıldı