Bu sürüm, hatalı düzenlemeler içerebilir. En son doğrulanmış bellek kopyası dönün.
Neye ihtiyacın var
-
Bu adım çevrilmemiş. Çevrilmesine yardım edin
-
Place the laptop upside down so that the bottom panel is facing upwards.
-
-
Bu adım çevrilmemiş. Çevrilmesine yardım edin
-
Unscrew the following 10 screws
-
Eight 5 mm Phillips head screws
-
Two 10 mm Phillips head screws
-
-
Bu adım çevrilmemiş. Çevrilmesine yardım edin
-
Carefully peel the panel off of the bottom of the laptop.
-
-
-
Bu adım çevrilmemiş. Çevrilmesine yardım edin
-
Remove the following 6 screws:
-
Two 5 mm screws holding the fan down.
-
Four 3 mm screws holding the heat sink down
-
-
Bu adım çevrilmemiş. Çevrilmesine yardım edin
-
Carefully disconnect the only sliding connector by using a plastic opening tool to pry the connector out.
-
-
Bu adım çevrilmemiş. Çevrilmesine yardım edin
-
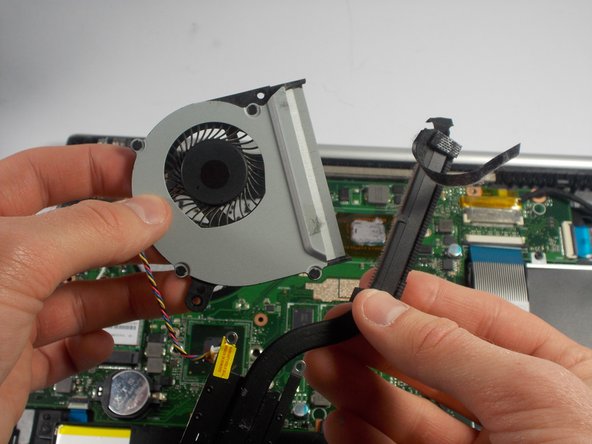
Remove the tape holding the fan and heat sink together.
-


Ekip

UMass Dartmouth, Team 3-4, Bhusal Spring 2016 UMass Dartmouth, Team 3-4, Bhusal Spring 2016 üyesi
UMASSD-BHUSAL-S16S3G4
2 Üyeler
5 adet Kılavuz yazıldı