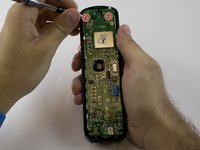
Ana içeriğe geç

ATT EL52300 LCD Screen on Handset Replacement

Neye ihtiyacın var

  1. ATT EL52300 LCD Screen on Handset Replacement, Battery: adım 1, 2 resimden 1. ATT EL52300 LCD Screen on Handset Replacement, Battery: adım 1, 2 resimden 2.
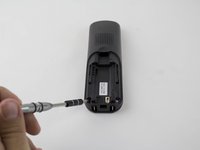
    • Find the bump where the battery cover meets the phone. Put your thumb here, and push and slide the cover down.

  2. ATT EL52300 LCD Screen on Handset Replacement: adım 2, 1 resimden 1.
    • Unplug the battery by squeezing your hands on the small white plug and lifting it up.

    • Do not pull on the wire itself because you might damage the wire!

    • The battery is now detached and ready to be removed by lifting it out.

  3. ATT EL52300 LCD Screen on Handset Replacement, Motherboard: adım 3, 2 resimden 1. ATT EL52300 LCD Screen on Handset Replacement, Motherboard: adım 3, 2 resimden 2.
    • Remove the two 3.75 mm screws with a PH1 screwdriver.

  4. ATT EL52300 LCD Screen on Handset Replacement: adım 4, 2 resimden 1. ATT EL52300 LCD Screen on Handset Replacement: adım 4, 2 resimden 2.
    • Use a plastic opening tool to remove the handset case.

    • Be careful to not lift the case too far as the ringer cable is attached to the case.

  5. ATT EL52300 LCD Screen on Handset Replacement: adım 5, 2 resimden 1. ATT EL52300 LCD Screen on Handset Replacement: adım 5, 2 resimden 2.
    Bu adımda kullanılan alet:
    Anti-Static Wrist Strap
    $7.95
    • Remove the two 3.65 mm screws on the motherboard with a PH1 screwdriver.

    • Use an anti-static wrist strap to prevent damage to the motherboard.

  6. ATT EL52300 LCD Screen on Handset Replacement, LCD Screen on Handset: adım 6, 2 resimden 1. ATT EL52300 LCD Screen on Handset Replacement, LCD Screen on Handset: adım 6, 2 resimden 2.
    • The motherboard is connected to the ringer, which is clipped on to the back plate of your handset.

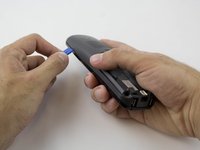
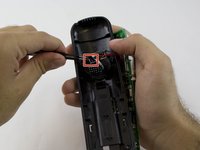
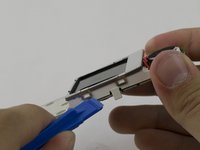
    • Pop off the indicated clip using a pointed tweezer.

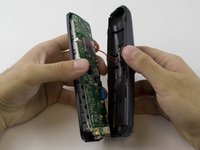
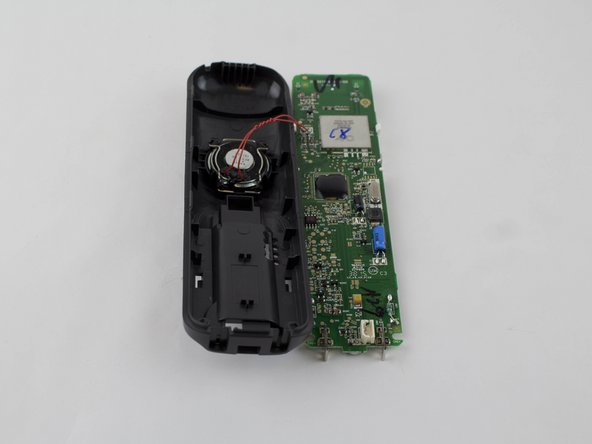
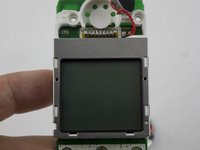
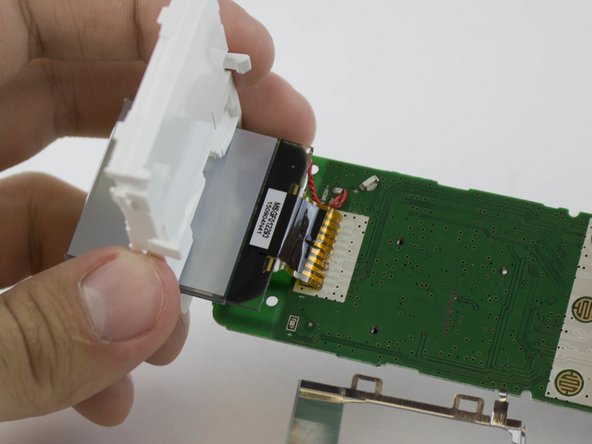
    • With the motherboard disconnected from the back plate, turn it over so that the screen is facing you.

  7. ATT EL52300 LCD Screen on Handset Replacement: adım 7, 3 resimden 1. ATT EL52300 LCD Screen on Handset Replacement: adım 7, 3 resimden 2. ATT EL52300 LCD Screen on Handset Replacement: adım 7, 3 resimden 3.
    • To get to the connection between the display and the motherboard, remove the casing for the display using a plastic opening tool.

    • The white casing has a hole cut into it. You are going to slide the display and the speaker through this hole.

  8. ATT EL52300 LCD Screen on Handset Replacement: adım 8, 1 resimden 1.
    • The display has a line of soldered connections to the motherboard. These all need to be undone with a soldering tool, so the screen can be removed.

    • Please refer to the How To Solder and Desolder Connections for soldering help.

Sonuç

To reassemble your device, follow these instructions in reverse order.

Bir başkası bu kılavuzu tamamladı.

Katty

Üyelik tarihi: 08/27/15

340 İtibar

3 adet Kılavuz yazıldı

Ekip

USF Tampa, Team 1-1, Sullivan Spring 2016 USF Tampa, Team 1-1, Sullivan Spring 2016 üyesi

USFT-SULLIVAN-S16S1G1

4 Üyeler

10 adet Kılavuz yazıldı

0Kılavuz Yorumları

Yorum Ekle

İstatistikleri Görüntüle:

Son 24 Saat: 0

Son 7 gün: 2

Son 30 gün: 27

Her zaman: 507