
Acer Aspire 5253 Hard Drive Replacement
Giriş
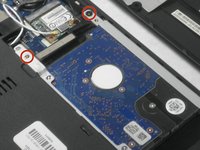
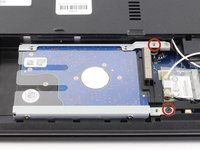
1. adıma gitAfter you remove the back cover panel its not too difficult to slide the ram out of the laptop.
Neye ihtiyacın var


-
-
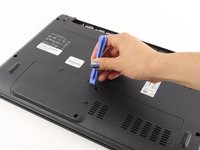
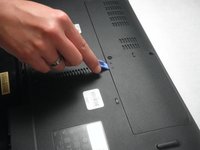
Now, locate the two screws that hold the back cover panel onto the laptop.
-


To reassemble your device, follow these instructions in reverse order.
To reassemble your device, follow these instructions in reverse order.
İptal et: Bu kılavuzu tamamlamadım.
10 farklı kişi bu kılavuzu tamamladı.
Ekip

Cal Poly, Team 8-11, Regan Spring 2014 Cal Poly, Team 8-11, Regan Spring 2014 üyesi
CPSU-REGAN-S14S8G11
4 Üyeler
15 adet Kılavuz yazıldı