Ana içeriğe geç

Bu kılavuzda güncel değişiklikler var. En son onaylanmamış sürüme geçin.

Acer Chromebook C720-2848 Motherboard Replacement

Neye ihtiyacın var

  1. Acer Chromebook C720-2848  Motherboard Replacement, Back Cover: adım 1, 2 resimden 1. Acer Chromebook C720-2848  Motherboard Replacement, Back Cover: adım 1, 2 resimden 2.
    • Use a Phillips head screw driver to remove the 13 screws in these locations.

  2. Acer Chromebook C720-2848  Motherboard Replacement: adım 2, 3 resimden 1. Acer Chromebook C720-2848  Motherboard Replacement: adım 2, 3 resimden 2. Acer Chromebook C720-2848  Motherboard Replacement: adım 2, 3 resimden 3.
    • Use a plastic spudger to pry up the bottom cover and remove it.

    • Be sure to pry along other edges if necessary to avoid damaging the back cover.

  3. Acer Chromebook C720-2848  Motherboard Replacement, Battery: adım 3, 3 resimden 1. Acer Chromebook C720-2848  Motherboard Replacement, Battery: adım 3, 3 resimden 2. Acer Chromebook C720-2848  Motherboard Replacement, Battery: adım 3, 3 resimden 3.
    • Unscrew the 2 battery screws.

    • Make sure you keep these screws separate from the back cover screws; they are different!

  4. Acer Chromebook C720-2848  Motherboard Replacement: adım 4, 2 resimden 1. Acer Chromebook C720-2848  Motherboard Replacement: adım 4, 2 resimden 2.
    • Use two fingers to unplug the battery-to-motherboard connection.

  5. Acer Chromebook C720-2848  Motherboard Replacement: adım 5, 1 resimden 1.
    • Take out battery by lifting it up in the manner pictured.

  6. Acer Chromebook C720-2848  Motherboard Replacement, SSD: adım 6, 2 resimden 1. Acer Chromebook C720-2848  Motherboard Replacement, SSD: adım 6, 2 resimden 2.
    • Unscrew screw holding SSD card in place.

    • Slide out the SSD card towards you to remove it.

    • The SSD card is the blue chip on the right connected to the motherboard.

    • Be sure to store this screw apart from the others as it is a different length.

  7. Acer Chromebook C720-2848  Motherboard Replacement, Motherboard: adım 7, 3 resimden 1. Acer Chromebook C720-2848  Motherboard Replacement, Motherboard: adım 7, 3 resimden 2. Acer Chromebook C720-2848  Motherboard Replacement, Motherboard: adım 7, 3 resimden 3.
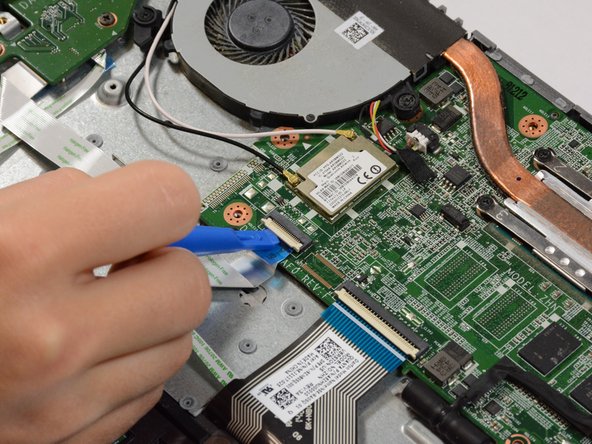
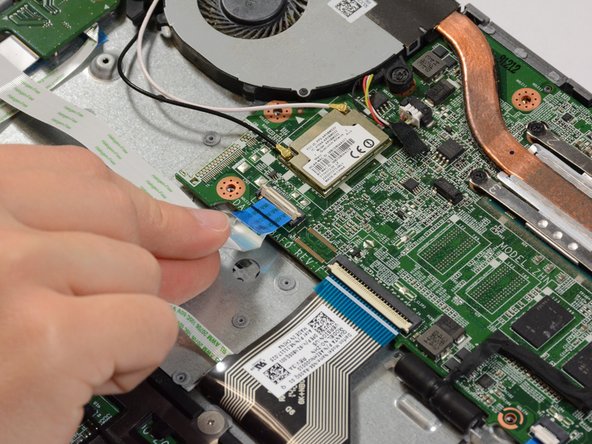
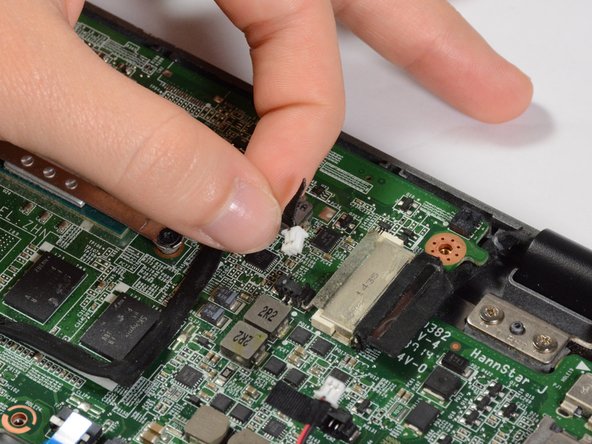
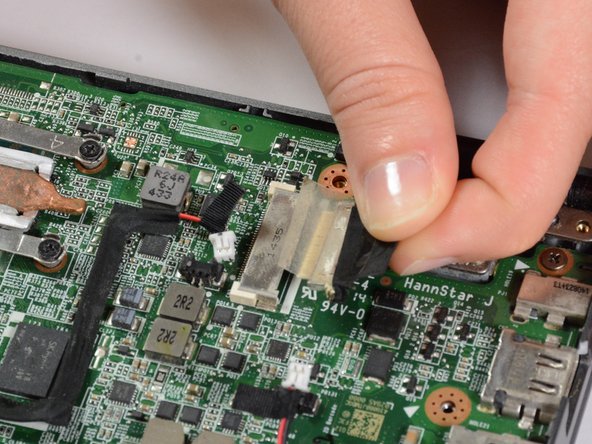
    • Remove the three ribbon cables connected to the bottom of the motherboard.

    • Use the plastic spudger to lift the white hinges from on top of the ribbon cables.

    • Then gently pull the cables out.

  8. Acer Chromebook C720-2848  Motherboard Replacement: adım 8, 3 resimden 1. Acer Chromebook C720-2848  Motherboard Replacement: adım 8, 3 resimden 2. Acer Chromebook C720-2848  Motherboard Replacement: adım 8, 3 resimden 3.
    • Remove 4 connectors from the right side of the motherboard.

    • All of these connectors release by simply pulling back.

    • To disconnect the connector shown in the third picture, you will need to peel back some tape first.

  9. Acer Chromebook C720-2848  Motherboard Replacement: adım 9, 3 resimden 1. Acer Chromebook C720-2848  Motherboard Replacement: adım 9, 3 resimden 2. Acer Chromebook C720-2848  Motherboard Replacement: adım 9, 3 resimden 3.
    • On the left side of the motherboard, remove one more connector and two cables.

    • To remove the cables, lift them up with a plastic spudger.

    • Take note of which cable connects where.

  10. Acer Chromebook C720-2848  Motherboard Replacement: adım 10, 3 resimden 1. Acer Chromebook C720-2848  Motherboard Replacement: adım 10, 3 resimden 2. Acer Chromebook C720-2848  Motherboard Replacement: adım 10, 3 resimden 3.
    • Remove the 2 fan screws and the 4 heat sink screws.

    • The screws don't necessarily need to be removed from the component, but rather just loosened enough to remove the component from the motherboard.

    • Now remove the fan/heat sink component.

    • Once again, make sure to keep these screws separate from all others.

  11. Acer Chromebook C720-2848  Motherboard Replacement: adım 11, 2 resimden 1. Acer Chromebook C720-2848  Motherboard Replacement: adım 11, 2 resimden 2.
    • Remove the 2 motherboard screws.

    • Now you can remove the motherboard.

    • Be careful not to damage any of the loose connectors and cables you disconnected in the previous steps.

Sonuç

To reassemble your device, follow these instructions in reverse order.

Bir başkası bu kılavuzu tamamladı.

Robert Escobio

Üyelik tarihi: 09/27/17

597 İtibar

4 adet Kılavuz yazıldı

Ekip

USF Tampa, Team S9-G3, Remmell Fall 2017 USF Tampa, Team S9-G3, Remmell Fall 2017 üyesi

USFT-REMMELL-F17S9G3

4 Üyeler

9 adet Kılavuz yazıldı

0 Yorum

Yorum Ekle

İstatistikleri Görüntüle:

Son 24 Saat: 0

Son 7 gün: 1

Son 30 gün: 7

Her zaman: 373