Ana içeriğe geç

Alienware Aurora M9700 Screen Replacement

Neye ihtiyacın var

  1. Alienware Aurora M9700 Screen Replacement, Screen display: adım 1, 2 resimden 1. Alienware Aurora M9700 Screen Replacement, Screen display: adım 1, 2 resimden 2.
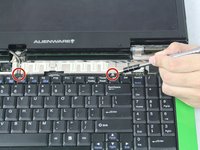
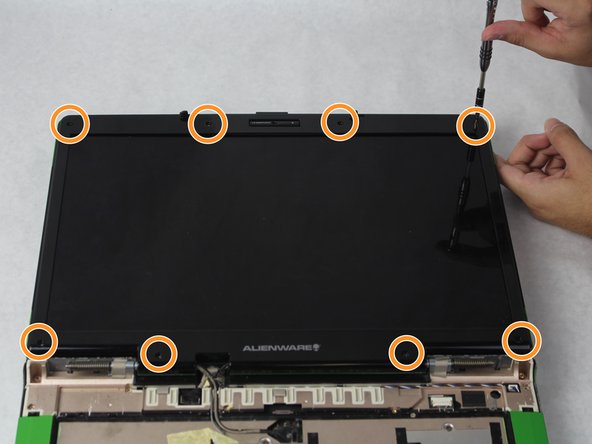
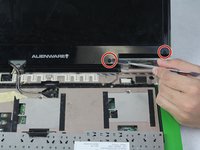
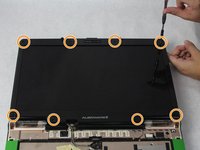
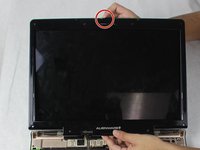
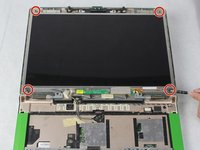
    • Remove the main outer screws from the back portion of the laptop.

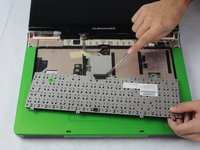
    • Remove the battery from the back.

  2. Alienware Aurora M9700 Screen Replacement: adım 2, 3 resimden 1. Alienware Aurora M9700 Screen Replacement: adım 2, 3 resimden 2. Alienware Aurora M9700 Screen Replacement: adım 2, 3 resimden 3.
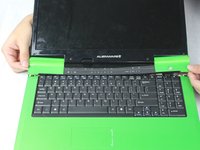
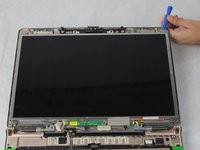
    • Open the laptop facing towards you.

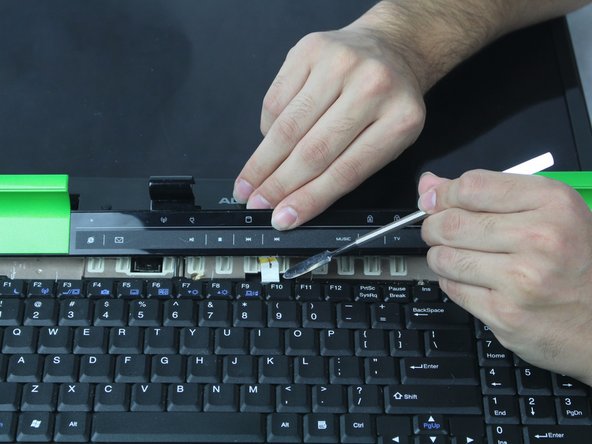
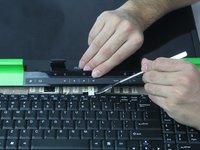
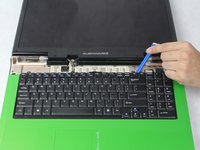
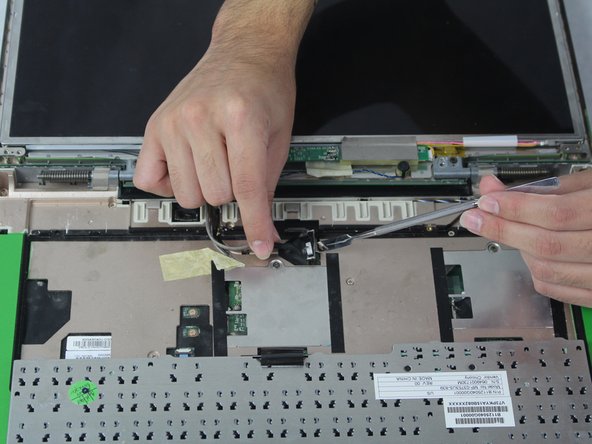
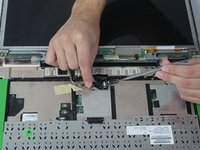
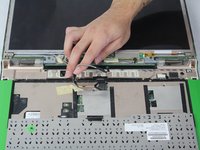
    • On the right side where the power button is located, place the spudger to pry open the center panel as you slide it to the left.

    • Close the laptop and face the back portion towards you.

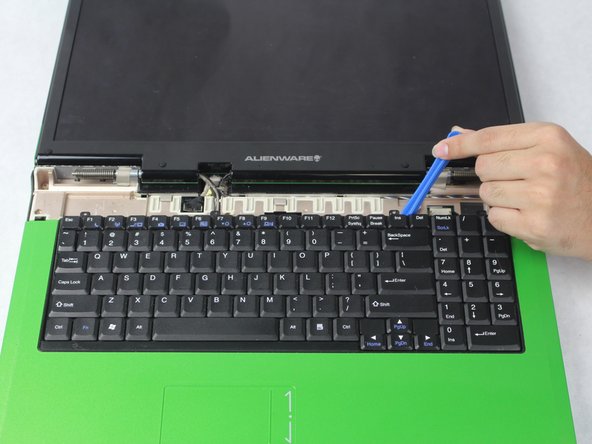
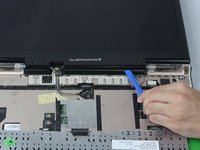
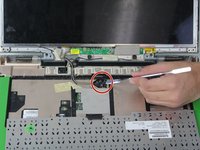
    • Between the green frame and the black panel insert the spudger to pry open the center panel. (Do this for both sides of the computer.)

  3. Alienware Aurora M9700 Screen Replacement: adım 3, 2 resimden 1. Alienware Aurora M9700 Screen Replacement: adım 3, 2 resimden 2.
    • Now, open the computer and face it towards you.

    • Carefully, fold the panel towards you and disconnect the cable connected to the motherboard.

  4. Alienware Aurora M9700 Screen Replacement: adım 4, 3 resimden 1. Alienware Aurora M9700 Screen Replacement: adım 4, 3 resimden 2. Alienware Aurora M9700 Screen Replacement: adım 4, 3 resimden 3.
    • At the top of the keyboard, near the right corner, remove the screw that holds down the keyboard.

    • Insert a plastic opening tool and pry to lift up the keyboard.

    • Fold the keyboard towards you.

  5. Alienware Aurora M9700 Screen Replacement: adım 5, 2 resimden 1. Alienware Aurora M9700 Screen Replacement: adım 5, 2 resimden 2.
    • Locate the rubber buttons around the bezel of the display.

    • With the metal spudger remove them to expose the screws underneath.

    • Remove all of the 8 screws. Put them together. Those will be needed when putting a new screen back.

  6. Alienware Aurora M9700 Screen Replacement: adım 6, 2 resimden 1. Alienware Aurora M9700 Screen Replacement: adım 6, 2 resimden 2.
    • At the bottom of the display insert the plastic opening tool between the black and green frames to remove the display frame.

    • When removing the display frame, slide the lock to the right.

    • Remove the display.

  7. Alienware Aurora M9700 Screen Replacement: adım 7, 2 resimden 1. Alienware Aurora M9700 Screen Replacement: adım 7, 2 resimden 2.
    • Locate and remove the 4 screws located on each corner of the display.

    • From the top of the display use the plastic opening tool to separate the screen display from the top of the laptop.

  8. Alienware Aurora M9700 Screen Replacement: adım 8, 3 resimden 1. Alienware Aurora M9700 Screen Replacement: adım 8, 3 resimden 2. Alienware Aurora M9700 Screen Replacement: adım 8, 3 resimden 3.
    • At the center, locate the cable that is connected to the display.

    • Pull the black tab upwards with the metal spudger to disconnect the cable from the display.

  9. Alienware Aurora M9700 Screen Replacement: adım 9, 3 resimden 1. Alienware Aurora M9700 Screen Replacement: adım 9, 3 resimden 2. Alienware Aurora M9700 Screen Replacement: adım 9, 3 resimden 3.
    • On the left of the display, remove the four screws located on the side of the display to remove the metal frame from the display. (Do the same for the right side.)

Sonuç

To reassemble your device, follow these instructions in reverse order.

Bir başkası bu kılavuzu tamamladı.

Jasmine Anchondo

Üyelik tarihi: 10/09/18

679 İtibar

5 adet Kılavuz yazıldı

Ekip

0 Yorum

Yorum Ekle

İstatistikleri Görüntüle:

Son 24 Saat: 0

Son 7 gün: 2

Son 30 gün: 14

Her zaman: 513