Giriş
This guide serves to illustrate how to replace the speakers in this device. It is demonstrated in a few, moderate level steps that can be replicated using a couple different screwdrivers.
Neye ihtiyacın var
-
-
Unscrew the white case using the TR1 screwdriver bit to remove the 4mm screws.
-
Pull on the top until the case becomes fully dislodged.
-
-
-
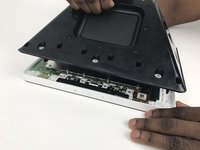
Pull out the two white plugs by firmly grasping them and pulling in a downward motion until they become disconnected.
Each of these steps should be their own step so that you can include helpful pictures demonstrating you doing these things. Make sure all steps are written as commands.
-
-
-
-
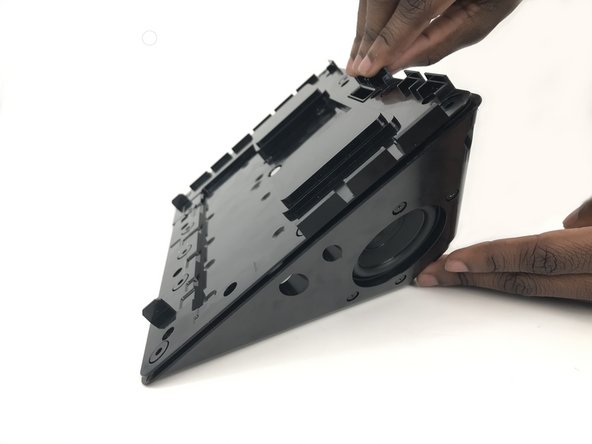
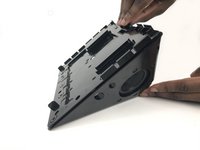
Firmly grasp the white trim of the front piece with one hand while the other pulls back on the black back portion of the device.
Since you just told them to remove the sound card, you can remove the first part from the first step. How should they remove the back plate from the screen? These directions are confusing to me.
-
-
-
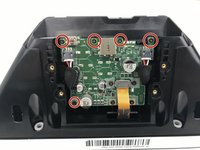
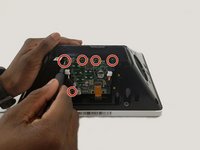
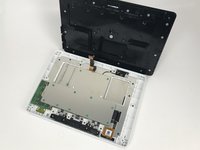
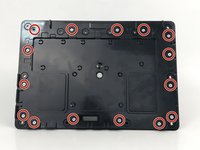
Unscrew all the indicated screws with the screwdriver.
-
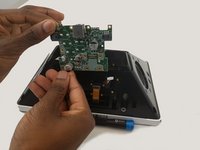
Carefully remove the plate from the device.
Make sure all steps are indicating an action. The black bullet can be deleted. Instead of referring to the pictures, indicate what the screws do. I also think “sound wafer” may not be the appropriate term. I couldn’t find it used this way while Googling.
-
-
-
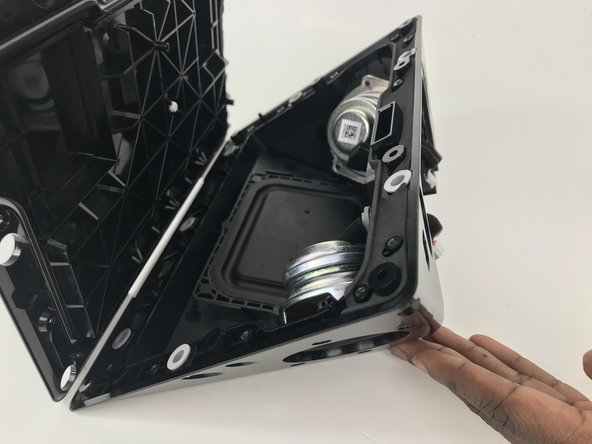
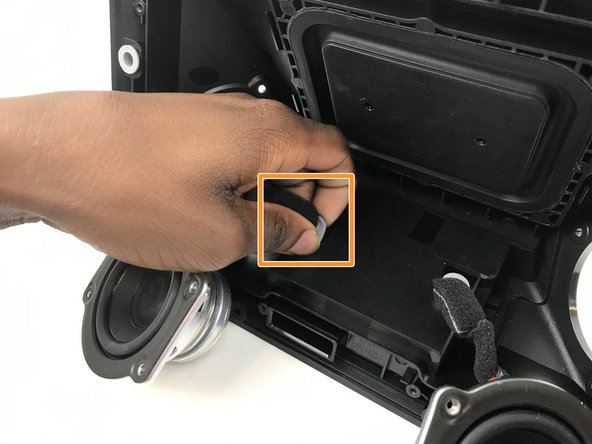
After unscrewing the speakers, gently pull out the foam covered attachment indicated in the orange box.
Here, your hand is obstructing what is happening. Do you have another before and after shot, from a different angle?
-
-
-
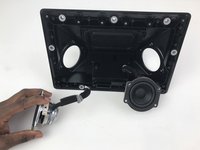
Insert the white circuit box into the back plate the old speaker was removed from as indicated in he orange box.
-
Repeat on the other speaker if needed.
The orange bullet is unclear to me. The last step should be the speaker being removed.
-


To reassemble your device, follow these instructions in reverse order.
To reassemble your device, follow these instructions in reverse order.
İptal et: Bu kılavuzu tamamlamadım.
Bir başkası bu kılavuzu tamamladı.

Ekip

Embry-Riddle Aeronautical University, Team S3-G2, Watkins Spring 2020 Embry-Riddle Aeronautical University, Team S3-G2, Watkins Spring 2020 üyesi
ERAU-WATKINS-S20S3G2
4 Üyeler
5 adet Kılavuz yazıldı
2Kılavuz Yorumları
Where do I get replacement speakers at?
These instructions are missing one important step, at least on my version of the Echo Show 10 2nd gen. There are 8 Tr8 screws holding the big black backside with the speakers + sound card in place 4 at the top, 2 on each side and 2 at the bottom. Note the 2 screws at the bottom are behind the white cover removed in step 1.
These 8 screws need to be removed before separating the back from the front in Step 5 of this guide.
Note the white cover is not only attached with 6 tr1 screws there also is some double-sided tape holding it in place at the edge near the power-connector you can see the tape remains at the first Picture of step 3 of the Sound Card replacement guide.
Why is markup on the spudger? It should be used to highlight components of the device. Please demonstrate your hands completing the screwing and using the spudger. However, note that iFixit prefers you only use the metal spudger when absolutely necessary.
Alex Watkins - Yanıt