Giriş
If your Asus Q252U (model BI7T9) BIOS passwords reset, its drivers are not working properly, or you hear a low beeping sound, use this guide to replace the CMOS battery.
The CMOS battery powers the BIOS firmware in your laptop. A faulty CMOS battery will stop transmitting power to the BIOS firmware.
Before you begin the repair on your Asus Q525U (model BI7T9) CMOS battery, make sure the laptop is off, disconnected from the charger, and to wear cut-resistant ESD gloves, to avoid damaging the internal components.
Neye ihtiyacın var
-
-
Carefully remove the two longer 9.5 mm screws on the corners with a Phillips #1 screwdriver.
-
Remove the eight 7.5 mm Phillips #1 screws on the back of the device.
-
-
-
-
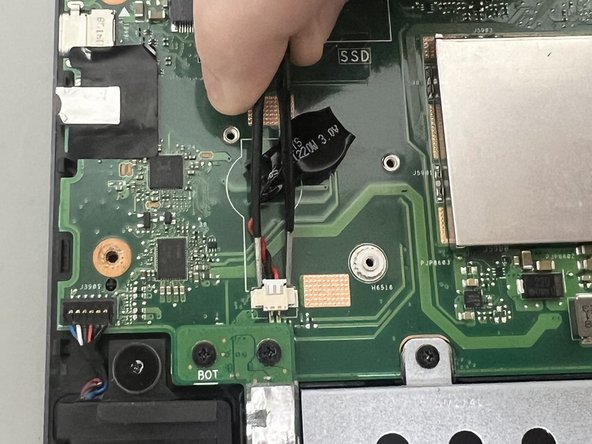
Use the point of a spudger to push on alternating sides of the CMOS connector to "walk" it out of its socket.
-
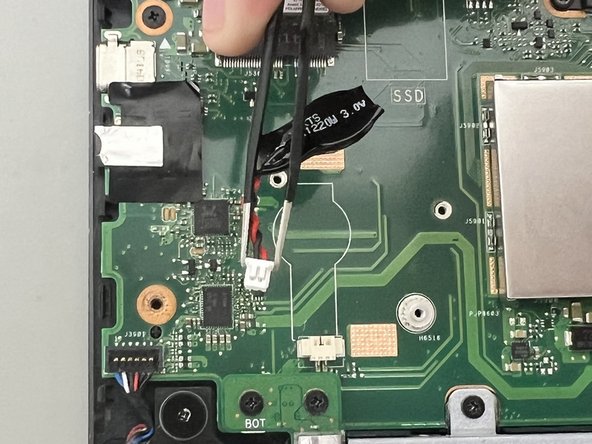
Pull out the CMOS battery cable by the tab using tweezers.
-
Remove the CMOS battery.
-


To reassemble your device, follow these instructions in reverse order. Take your e-waste to an R2 or e-Stewards certified recycler.
To reassemble your device, follow these instructions in reverse order. Take your e-waste to an R2 or e-Stewards certified recycler.
Ekip

University of North Texas, Team 1-4, Coppersmith Spring 2024 University of North Texas, Team 1-4, Coppersmith Spring 2024 üyesi
UNT-COPPERSMITH-S24S1G4
4 Üyeler
4 adet Kılavuz yazıldı