Giriş
This guide will teach you how to remove and replace your keyboard in the event of a missing or broken key. Special care must be taken, due to the delicate parts and ribbon cables needed to be removed during the repair.
Neye ihtiyacın var
-
-
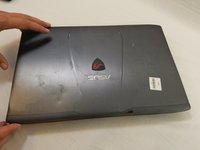
Flip the laptop over so the backside is facing upwards.
-
Using both hands, slide the lock mechanisms outwards and pull up to remove the battery.
 FixBot'a Sor
-
-
-
Remove the nine 15.4mm Phillips #00 screws.
-
Remove the four 8.7mm Phillips #00 screws from the hard drive mounting bracket.
-
Remove the hard drive bracket.
-
-
-
-
Flip laptop over and open the screen.
-
Wedge some plastic opening tools between the keyboard and case.
-
Work your way around with the plastic opening tools until the keyboard is separate from the case.
-
-
-
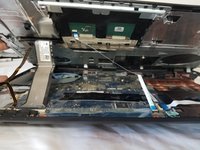
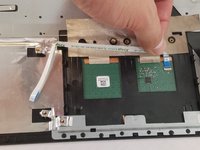
Remove the ZIF connected ribbon cables for the touchpad and keyboard by gently lifting the latch on the connector point, then slide the ribbon cable out. Repeat for each cable.
-
Verify all ribbon cables are disconnected and out of the way, and lift the keyboard out of the assembly.
-


To reassemble your device, follow these instructions in reverse order.
İptal et: Bu kılavuzu tamamlamadım.
9 farklı kişi bu kılavuzu tamamladı.
Ekip

USF Tampa, Team S1-G2, Nance Spring 2018 USF Tampa, Team S1-G2, Nance Spring 2018 üyesi
USFT-NANCE-S18S1G2
4 Üyeler
8 adet Kılavuz yazıldı
2Kılavuz Yorumları
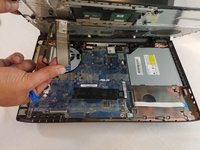
While I VERY MUCH appreciate this tutorial, and it helped me with some of the keyboard change, it misses several steps after the last one. After the keyboard assembly is lifted out, you still can’t get at the keyboard. There is a metal tray that holds it in place, and tape all over the place. The tape needs to be peeled back, and the metal tray needs to be removed by snapping all of the plastic rivets as carefully as possible. The new keyboard can then be placed, but ensure that all of the plastic alignment pins are correctly poking through the keyboard. Mine was missing some and I had to use a 1/8” drill bit and actually drill the holes through the keyboard where they were missing. NOW you simply reverse the procedure.
Cheers,
Stephen
Is there a good way to secure the keyboard in place? After popping all these plastic things off to remove the old keyboard I find my new keyboard sinks down to the point of making it hard to press the keys. The metal backplate seems to provide little support with just the screws holding it.