Bu sürüm, hatalı düzenlemeler içerebilir. En son doğrulanmış bellek kopyası dönün.
Neye ihtiyacın var
-
Bu adım çevrilmemiş. Çevrilmesine yardım edin
-
Flip the device over so that the back cover is facing you.
-
-
Bu adım çevrilmemiş. Çevrilmesine yardım edin
-
Remove the four 5mm Phillips #1 screws from the top of the laptop.
-
Remove the two 6mm Phillips #1 screws from the sides of the laptop.
-
Remove the four 2mm Phillips #1 screws from the bottom of the laptop.
-
-
Bu adım çevrilmemiş. Çevrilmesine yardım edin
-
Use a plastic opening tool to gently pry the bottom of the laptop up. Slowly slide it along the edges, twisting it every so often to pop the bottom of the laptop out of the clips holding it in place.
-
-
Bu adım çevrilmemiş. Çevrilmesine yardım edin
-
Lift off the cover and remove the back cover from the device.
-
-
Bu adım çevrilmemiş. Çevrilmesine yardım edin
-
Using a Phillips #1 Screwdriver remove the six 3 mm screws keeping the battery in place.
-
-
Bu adım çevrilmemiş. Çevrilmesine yardım edin
-
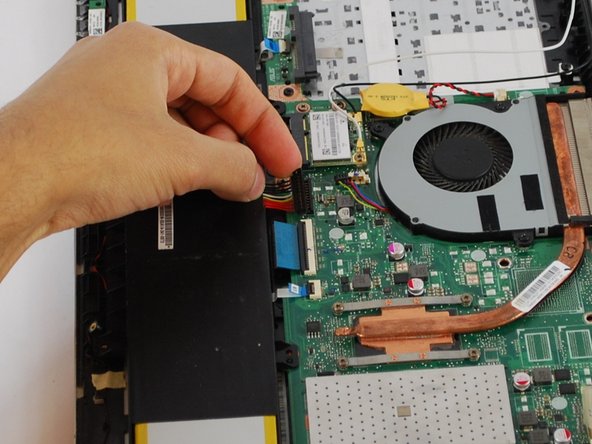
Unplug the two small cords connected to the wifi card.
-
-
-
Bu adım çevrilmemiş. Çevrilmesine yardım edin
-
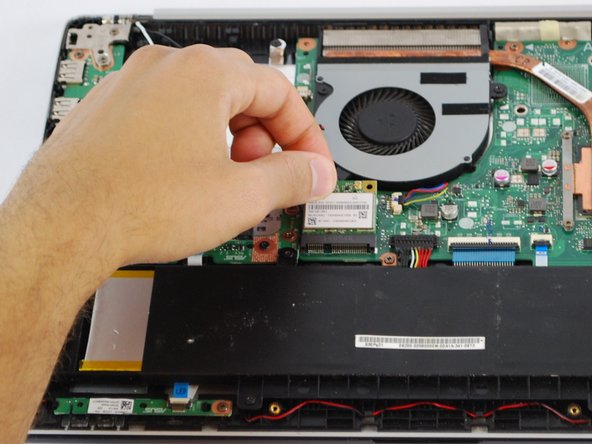
Using a Phillips #1 Screwdriver unscrew the 2 mm screw holding the wifi card in place.
-
-
Bu adım çevrilmemiş. Çevrilmesine yardım edin
-
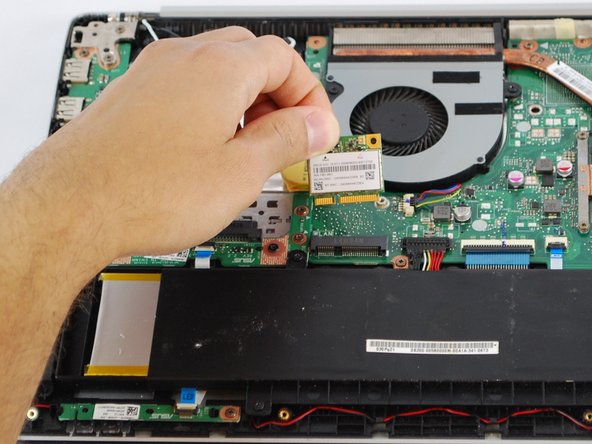
Unplug the Wi-Fi card from the motherboard and remove it from the device.
-
-
Bu adım çevrilmemiş. Çevrilmesine yardım edin
-
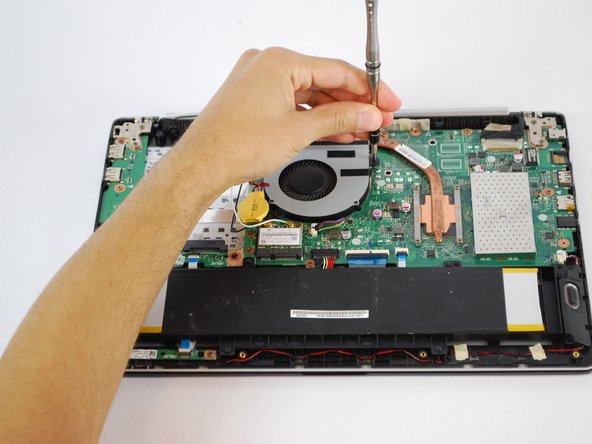
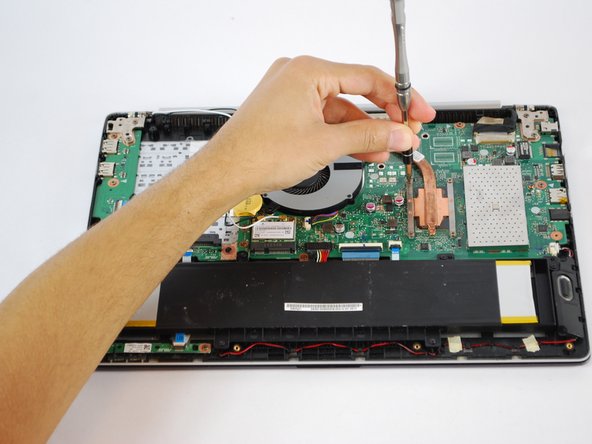
Using a Phillips #1 Screwdriver remove the three 3 mm black screws and four 2 mm copper screws holding the fan and heat sink in place.
-
-
Bu adım çevrilmemiş. Çevrilmesine yardım edin
-
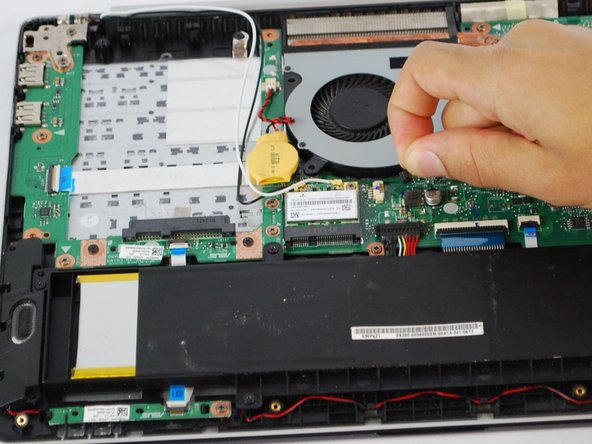
Remove the wire connecting the fan to the motherboard.
-
-
Bu adım çevrilmemiş. Çevrilmesine yardım edin
-
Gently remove the fan and heat sink from the motherboard.
-
-
Bu adım çevrilmemiş. Çevrilmesine yardım edin
-
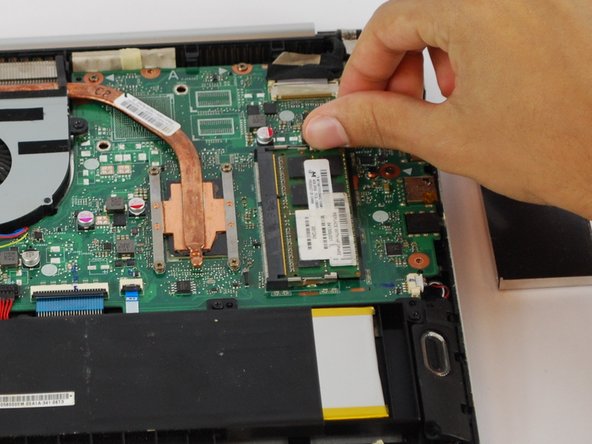
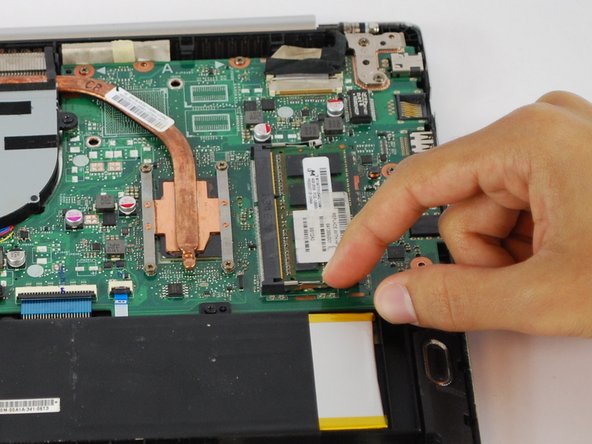
Remove the four 4.0 mm Phillips #1 screws shown.
-
Remove the two 5.0 mm Phillips #1 screws shown.
-
Remove the three 3.0 mm Phillips #1 screws shown.
-
-
Bu adım çevrilmemiş. Çevrilmesine yardım edin
-
Using a plastic opening tool, pry open the hinge shown until your fingers can fit under it.
-
Pull the hinge the rest of the way up.
-
-
Bu adım çevrilmemiş. Çevrilmesine yardım edin
-
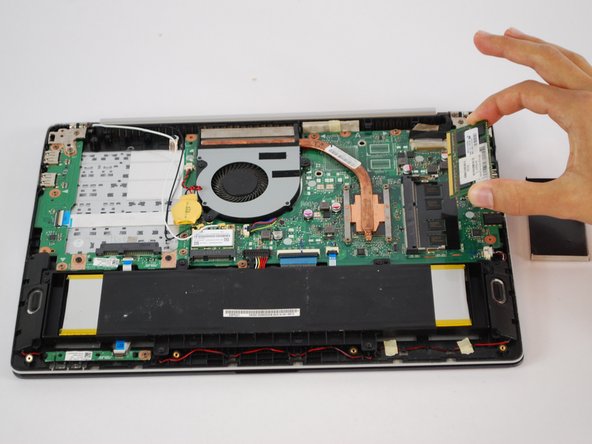
Disconnect the motherboard from the two connectors shown.
-
-
Bu adım çevrilmemiş. Çevrilmesine yardım edin
-
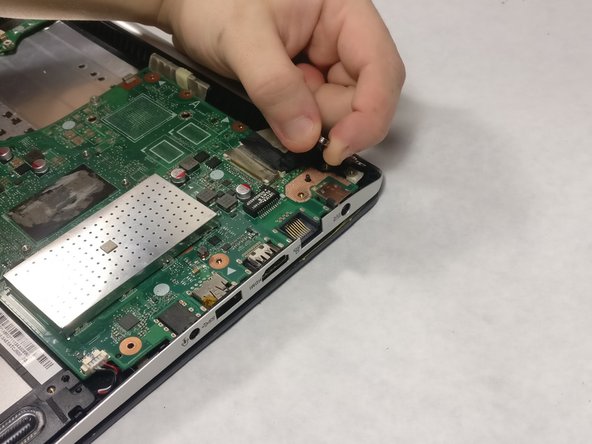
Disconnect the motherboard from the connector shown and it is now removed from your device.
-


Ekip

UMass Dartmouth, Team S5-G3, Gulbrandsen Fall 2018 UMass Dartmouth, Team S5-G3, Gulbrandsen Fall 2018 üyesi
UMASSD-GULBRANDSEN-F18S5G3
3 Üyeler
5 adet Kılavuz yazıldı