Ana içeriğe geç
Bracelet Clasp Replacement

Bracelet Clasp Replacement

Rachel Gauthier

Rachel Gauthier ve başka bir katkıda bulunan

En son February 20, 2025 tarihinde güncellendi

5 dakika
Kolay
Adım Kırpıcı

This guide will aid you in replacing the clasp to fix a broken bracelet. It will walk you through how to open and close a jump ring and then how to reattach the bracelet clasp. By doing so, you will be able to reattach a bracelet clasp on most types of bracelets for little to no cost.

Neye ihtiyacın var

Parçalar

Aletler

Daha fazlasını göster…

  1. Bracelet Clasp Replacement, Bracelet clasp: adım 1, 1 resimden 1.
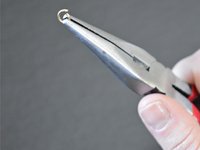
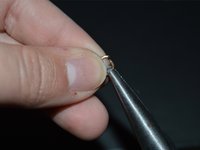
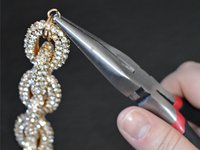
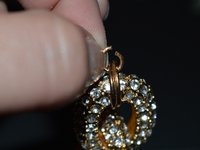
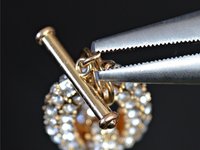
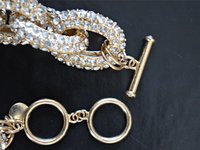
    • The clasp and metal ring (jump ring) need to be replaced.

    • Replace the jump ring first and then the clasp.

    • The correct size of a jump ring corresponds to the others on the bracelet.

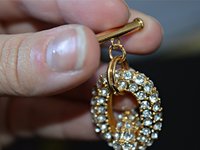
    • Be sure the correct clasp for the bracelet is present.

  2. Bracelet Clasp Replacement: adım 2, 2 resimden 1. Bracelet Clasp Replacement: adım 2, 2 resimden 2.
    • Use the needle-nose pliers to grasp the jump ring on its side, away from the break in the ring.

  3. Bracelet Clasp Replacement: adım 3, 2 resimden 1. Bracelet Clasp Replacement: adım 3, 2 resimden 2.
    • Open the jump ring with the needle-nose pliers by holding one side of the ring with the pliers and the other side with your fingers.

    • Another set of needle-nose pliers can be used if the jump ring is too small to grasp.

  4. Bracelet Clasp Replacement: adım 4, 2 resimden 1. Bracelet Clasp Replacement: adım 4, 2 resimden 2.
    • Attach the new, opened jump ring with the needle-nose pliers.

    • Here, there are two corresponding rings that the jump ring must be inserted through.

  5. Bracelet Clasp Replacement: adım 5, 1 resimden 1.
    • Hold the clasp in one hand and the pliers in the other.

    • Attach the new clasp to the opened jump ring being held by the needle-nose pliers by sliding the jump ring through all corresponding rings, including the clasp.

  6. Bracelet Clasp Replacement: adım 6, 2 resimden 1. Bracelet Clasp Replacement: adım 6, 2 resimden 2.
    • Use the needle-nose pliers to close the jump ring by squeezing the two arms of the ring together.

    • Be sure to close the jump ring vertically between the two arms of the pliers. The jump ring should be parallel to the arms of the pliers.

  7. Bracelet Clasp Replacement: adım 7, 1 resimden 1.
    • Use the needle-nose pliers to tighten the jump ring, with the jump ring perpendicular to the two arms of the pliers.

  8. Bracelet Clasp Replacement: adım 8, 2 resimden 1. Bracelet Clasp Replacement: adım 8, 2 resimden 2.
    • Test that the clasp and jump ring are properly attached by holding the bracelet from the clasp and suspending the rest of the bracelet.

    • If the bracelet successfully holds while suspended, the bracelet clasp and jump ring fix is successful.

Sonuç

To reassemble your device, follow these instructions in reverse order.

5 farklı kişi bu kılavuzu tamamladı.

Rachel Gauthier

Üyelik tarihi: 03/28/16

245 İtibar

1 Kılavuz yazıldı

Ekip

Michigan Tech, Team 1-8, Lauer Spring 2016 Michigan Tech, Team 1-8, Lauer Spring 2016 üyesi

MTU-LAUER-S16S1G8

1 Üye

2 adet Kılavuz yazıldı

0 Yorum

Yorum Ekle

İstatistikleri Görüntüle:

Son 24 Saat: 2

Son 7 gün: 8

Son 30 gün: 51

Her zaman: 4,898