Ana içeriğe geç
Brother CS6000i LCD Screen Replacement

Brother CS6000i LCD Screen Replacement

Wasim Benbrahim

Wasim Benbrahim ve 3 diğer katkıda bulunanlar

En son December 31, 2024 tarihinde güncellendi

10 - 20 dakika
Kolay
Öne Çıkan Öğrenci Kılavuzu

This guide will be showing you how to replace the LCD screen on a Brother CS6000i sewing machine. The LCD screen helps the user identify what sewing mode and speed they are working with. Some common symptoms particularly related to a faulty LCD screen would be faulty diodes or a blank screen while the machine is in operation.

Before beginning make sure power is disconnected and needle is removed from machine to prevent injury from electrical shock and or sharp objects.

Neye ihtiyacın var

iFixit bu bağlantılar üzerinden satın aldığınızda komisyon kazanır.
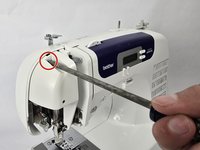
  1. Brother CS6000i LCD Screen Replacement, Body: adım 1, 2 resimden 1. Brother CS6000i LCD Screen Replacement, Body: adım 1, 2 resimden 2.
    • Remove the five 20 mm Phillips #2 screws on the back of the device.

    • Remove the single 28 mm Phillips #2 screw on the back of the device.

    • Remove the single 23 mm Phillips #2 screw on the back of the device.

  2. Brother CS6000i LCD Screen Replacement: adım 2, 2 resimden 1. Brother CS6000i LCD Screen Replacement: adım 2, 2 resimden 2.
    • Pull the white cover off.

  3. Brother CS6000i LCD Screen Replacement: adım 3, 2 resimden 1. Brother CS6000i LCD Screen Replacement: adım 3, 2 resimden 2.
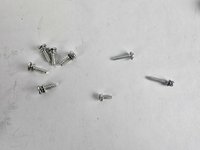
    • Remove the final screw, a 11 mm Phillips #2.

    • After removing all eight screws, you will have five 2 mm screws, one 28 mm screw, one 23 mm screw, and one 11 mm screw, all of which are Phillips #2.

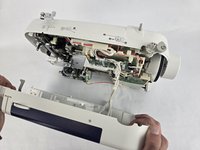
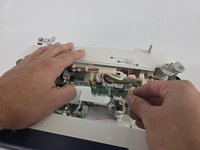
  4. Brother CS6000i LCD Screen Replacement: adım 4, 3 resimden 1. Brother CS6000i LCD Screen Replacement: adım 4, 3 resimden 2. Brother CS6000i LCD Screen Replacement: adım 4, 3 resimden 3.
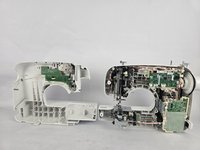
    • Slightly pull apart the two halves of the machine, taking care not to strain the attached cables.

    • Unhook the white wires that are connected to the motherboard.

    • Fully separate the two halves.

  5. Brother CS6000i LCD Screen Replacement, LCD Screen: adım 5, 1 resimden 1.
    • Remove the two 10 mm Philips #2 screws that secure the screen.

    • Unplug the ribbon cable located at the top of the circuit board, then gently remove the LCD screen.

Sonuç

To reassemble your device, follow these instructions in reverse order.

Bir başkası bu kılavuzu tamamladı.

Wasim Benbrahim

Üyelik tarihi: 11/04/24

152 İtibar

1 Kılavuz yazıldı

Ekip

Cuesta, Team 20-1, Krynen Fall 2024 Cuesta, Team 20-1, Krynen Fall 2024 üyesi

CUESTA-KRYNEN-F24S20G1

5 Üyeler

8 adet Kılavuz yazıldı

0 Yorum

Yorum Ekle

İstatistikleri Görüntüle:

Son 24 Saat: 2

Son 7 gün: 7

Son 30 gün: 14

Her zaman: 70