Ana içeriğe geç

Canon EOS Rebel T2i Tripod Mount Replacement

Neye ihtiyacın var

  1. Canon EOS Rebel T2i Tripod Mount Replacement, I/F Terminal Cover: adım 1, 3 resimden 1. Canon EOS Rebel T2i Tripod Mount Replacement, I/F Terminal Cover: adım 1, 3 resimden 2. Canon EOS Rebel T2i Tripod Mount Replacement, I/F Terminal Cover: adım 1, 3 resimden 3.
    • Before beginning, ensure that the camera is off, and the battery is removed.

    • Pry open the rubber I/F terminal cap with your finger.

    • Remove the two M1.7x2.5mm JIS #000 screws that are underneath the I/F terminal cap.

    • Using a plastic pick, or another thin plastic prying tool, pop off the I/F terminal cover from the camera.

  2. Canon EOS Rebel T2i Tripod Mount Replacement, Remove the back casing.: adım 2, 2 resimden 1. Canon EOS Rebel T2i Tripod Mount Replacement, Remove the back casing.: adım 2, 2 resimden 2.
    • On the left side of the camera, remove the following screw:

    • One M1.7x6.0mm JIS #000 screw

    • On the right side, remove the following screws:

    • One M1.7x5.5mm JIS #000 screw

    • One M1.7x3.5mm JIS #000 screw

  3. Canon EOS Rebel T2i Tripod Mount Replacement: adım 3, 2 resimden 1. Canon EOS Rebel T2i Tripod Mount Replacement: adım 3, 2 resimden 2.
    • Remove the battery door.

    • Open the battery door to about a 35° angle.

    • Pull the battery door straight outwards.

    • Remove the following screws from the bottom of the camera:

    • One M1.7x6.0mm JIS #000 screw

    • Two M1.7x2.5mm JIS #000 screws

    • One M1.7x5.5mm JIS #000 screw

  4. Canon EOS Rebel T2i Tripod Mount Replacement, Open the back panel.: adım 4, 3 resimden 1. Canon EOS Rebel T2i Tripod Mount Replacement, Open the back panel.: adım 4, 3 resimden 2. Canon EOS Rebel T2i Tripod Mount Replacement, Open the back panel.: adım 4, 3 resimden 3.
    • Slide the viewfinder eyepiece vertically upwards.

    • Start to pull the back cover partially off of the camera.

    • Use caution when removing the back cover, there is a ribbon cable that connects the LCD screen to the main PCB board.

    • Disconnect the LCD screen ribbon cable from the main PCB board.

    • Use a plastic spudger to lift up the black locking tab.

    • Carefully pull out the ribbon cable from its connector using a pair of angled tweezers.

    • Finish pulling the back cover off of the camera body.

  5. Canon EOS Rebel T2i Tripod Mount Replacement, Front Cover: adım 5, 2 resimden 1. Canon EOS Rebel T2i Tripod Mount Replacement, Front Cover: adım 5, 2 resimden 2.
    • Remove the following screws from the front of the camera:

    • Two M1.7x5.5mm JIS #000 screws

    • On the bottom of the camera, remove the following screws:

    • Three M1.7x5.5mm JIS #000 screws

  6. Canon EOS Rebel T2i Tripod Mount Replacement: adım 6, 3 resimden 1. Canon EOS Rebel T2i Tripod Mount Replacement: adım 6, 3 resimden 2. Canon EOS Rebel T2i Tripod Mount Replacement: adım 6, 3 resimden 3.
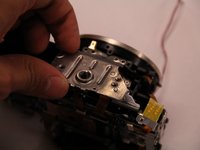
    • Slide a spudger tool towards the tripod mount, underneath the plastic cover.

    • Push the plastic cover up and over the tripod mount.

    • Pull the front cover off of the camera.

    • Electric Shock Warning: With the front cover off, the high voltage capacitor on the DC PCB board is now exposed. It is recommended that you use a capacitor discharge tool to ensure the capacitor is fully discharged before proceeding further.

  7. Canon EOS Rebel T2i Tripod Mount Replacement, Tripod Mount: adım 7, 2 resimden 1. Canon EOS Rebel T2i Tripod Mount Replacement, Tripod Mount: adım 7, 2 resimden 2.
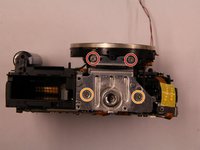
    • Remove the following screws securing the tripod mount:

    • Two M2.0x5.0mm Phillips #000 screws

    • Two M2.0x2.5mm JIS #000 screws

    • With the screws removed, the tripod mount can now be easily pulled free.

Sonuç

To reassemble your device, follow these instructions in reverse order.

Ekli Belgeler

Jacob Jaskolka

Üyelik tarihi: 03/30/15

745 İtibar

4 adet Kılavuz yazıldı

Ekip

UMass Dartmouth, Team 1-1, Shastany Spring 2015 UMass Dartmouth, Team 1-1, Shastany Spring 2015 üyesi

UMASSD-SHASTANY-S15S1G1

3 Üyeler

4 adet Kılavuz yazıldı

0 Yorum

Yorum Ekle

İstatistikleri Görüntüle:

Son 24 Saat: 0

Son 7 gün: 2

Son 30 gün: 6

Her zaman: 1,719