
Dreamcast CMOS Battery Replacement
Giriş
1. adıma gitWhen a Dreamcast ask for time and date every time you power on your system, your CMOS battery is dead. This guide shows how to replace the CMOS battery.
Please note this guide is outdated and I am going to be updating this guide.
Neye ihtiyacın var
Parçalar
Aletler


Daha fazlasını göster…
-
-
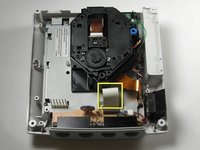
Locate and remove all four black 12mm Phillips #02 screws from the underside of the console.
-
-
-
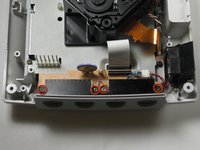
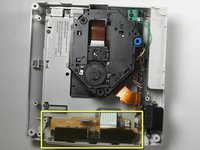
Disconnect the white controller cable by gently pulling the the cable while wiggling it back and forth until it detaches from the controller board.
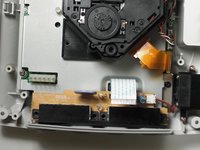
Note that on some Dreamcasts the power board (on the left) overhangs slightly over the controller board, meaning one must also remove the power board at this stage. This is relatively straightforward, fortunately. Remove a screw each at the top left of the power board and at the bottom left of the power board, remove the white clip at the top left, pop out the white clip on the left of the power board and lift the power board out from the front where you have the white block containing eight pins that connect the power board to the sub board. Then proceed per the rest of this guide. Hope this helps.
-
-
-
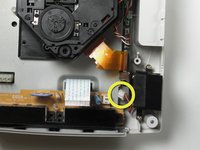
Disconnect the white fan header from the controller port.
Perhaps list the battery type an battery holders that allow for easy replacement in the future?
-
-
-
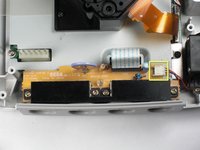
Note where the positive and negative terminals go.
-
Desolder the old CMOS battery from the controller board.
-
-
-
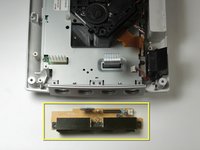
Reinsert the controller board.
-
Attach the battery holder inside with a self adhesive substance, such as double sided foam tape.
-
Insert the battery into the battery holder.
-
Reverse the disassembly directions to reassemble your Dreamcast.
-
Once your Dreamcast is reassembled, go ahead and connect the Dreamcast to your TV or monitor and power, and reset the clock.
-


To reassemble your device, follow these instructions in reverse order.
To reassemble your device, follow these instructions in reverse order.
İptal et: Bu kılavuzu tamamlamadım.
18 farklı kişi bu kılavuzu tamamladı.
9Kılavuz Yorumları
Something that should be noted, even if the pictures kind of hint at it, is that the power board - the large board to the left of the console in Step 3, picture 1 - needs to be removed BEFORE the controller board can be taken out. On my DC the pins that connect the power board to the motherboard have a surprisingly strong grip, so I needed to pull up on that end with some force to get it off. Definitely something to be careful with, as you don't want those pins getting bent out of shape, never mind broken.
Dont use non rechargeble batteries. you can replace it with the little square batteries you found in chinese mp3 headphones… they’re 3.7v, 2000mah and are perfect for the console. This kind of lithium polimer batteries tend to hold charge for as much as six months according to my experience. And they’re easy available, if you can’t find one, just purchase those little chinese micro SD mp3 players/headphones , they’ll have one of this kind inside. Be sure the voltage is 3.7 at a maximum 2.000 mah
Yes I know this guide is out of date as it was very long ago. I am making changes and later updating the pics.
is it not possible to replace the battery without desoldering and replacing the holder? i don’t see why the holder has to be replaced if it’s just the battery that’s bad.
It's because the original holder in the dreamcast (from the looks of it based on the pictures) is actually also soldered to the battery itself.
The original Dreamcast backup battery holder is spot welded directly to the battery. And the battery holder is soldered to the Dreamcast mainboard.
Brendan -