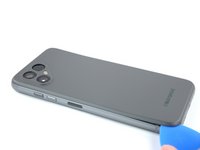
Ana içeriğe geç
Onarım Topluluğuna Katılın - Hesap Oluşturun

Fairphone 4 Screen Replacement

Neye ihtiyacın var

  1. Fairphone 4 Screen Replacement, Pry the back cover up: adım 1, 2 resimden 1. Fairphone 4 Screen Replacement, Pry the back cover up: adım 1, 2 resimden 2.
    • Be sure to power off your phone before you begin.

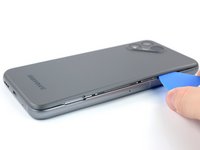
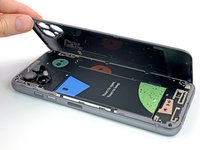
    • Insert your thumbnail, or a prying tool like a spudger, into the notch at the bottom right of the back cover.

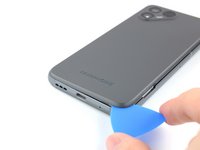
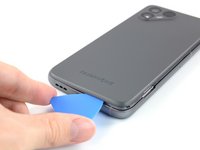
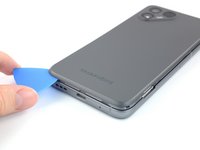
    • Pry the back cover up to start separating its plastic clips.

  2. Fairphone 4 Screen Replacement: adım 2, 3 resimden 1. Fairphone 4 Screen Replacement: adım 2, 3 resimden 2. Fairphone 4 Screen Replacement: adım 2, 3 resimden 3.
    • Using your thumbnail or an opening pick, slide along the right side of the phone to loosen the plastic clips.

  3. Fairphone 4 Screen Replacement: adım 3, 3 resimden 1. Fairphone 4 Screen Replacement: adım 3, 3 resimden 2. Fairphone 4 Screen Replacement: adım 3, 3 resimden 3.
    • Slide along the bottom of the phone to loosen the plastic clips.

  4. Fairphone 4 Screen Replacement: adım 4, 3 resimden 1. Fairphone 4 Screen Replacement: adım 4, 3 resimden 2. Fairphone 4 Screen Replacement: adım 4, 3 resimden 3.
    • Slide along the left side of the phone to loosen the plastic clips.

    • Lift the back cover to release the rest of the plastic clips and remove it.

    • To reinstall the back cover press it firmly into place until you hear a snap from the plastic clips.

  5. Fairphone 4 Screen Replacement, Lever up the Battery: adım 5, 3 resimden 1. Fairphone 4 Screen Replacement, Lever up the Battery: adım 5, 3 resimden 2. Fairphone 4 Screen Replacement, Lever up the Battery: adım 5, 3 resimden 3.
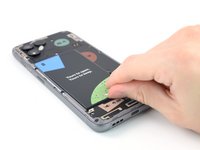
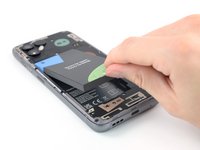
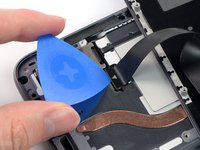
    • Use a fingernail or a prying tool at the marked notch to lever the battery out of its recess.

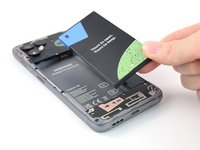
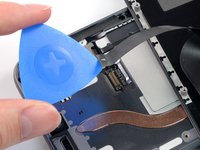
    • Lift the battery out of its recess and remove it.

    • Remove the battery.

  6. Fairphone 4 Screen Replacement, Unscrew the display: adım 6, 1 resimden 1.
    • Remove the eight 4.8 mm-long Phillips screws.

  7. Fairphone 4 Screen Replacement, Create a gap: adım 7, 3 resimden 1. Fairphone 4 Screen Replacement, Create a gap: adım 7, 3 resimden 2. Fairphone 4 Screen Replacement, Create a gap: adım 7, 3 resimden 3.
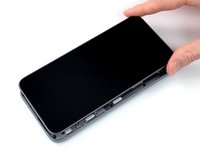
    • Flip the phone over so the screen faces up

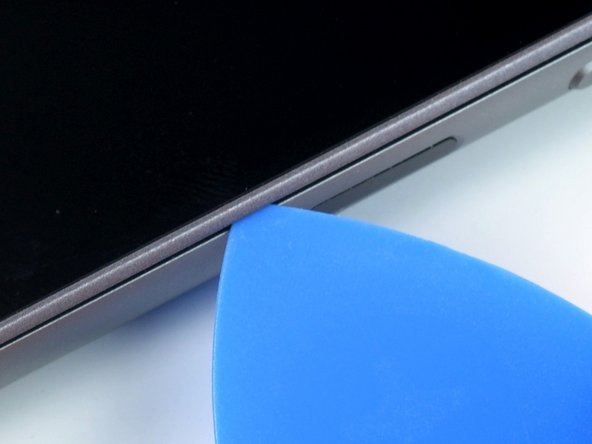
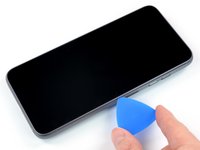
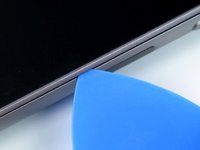
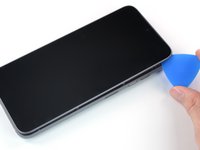
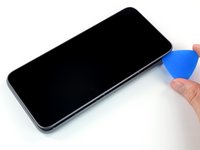
    • Insert an opening pick between the screen and the frame.

  8. Fairphone 4 Screen Replacement, Slide along the edge: adım 8, 2 resimden 1. Fairphone 4 Screen Replacement, Slide along the edge: adım 8, 2 resimden 2.
    • Slide the opening pick along the edge to the top right corner.

  9. Fairphone 4 Screen Replacement: adım 9, 2 resimden 1. Fairphone 4 Screen Replacement: adım 9, 2 resimden 2.
    • Continue to slide the opening pick along the top of the phone.

  10. Fairphone 4 Screen Replacement: adım 10, 3 resimden 1. Fairphone 4 Screen Replacement: adım 10, 3 resimden 2. Fairphone 4 Screen Replacement: adım 10, 3 resimden 3.
    • Slide the opening pick along the left side to the bottom left corner.

  11. Fairphone 4 Screen Replacement, Flip the screen over: adım 11, 3 resimden 1. Fairphone 4 Screen Replacement, Flip the screen over: adım 11, 3 resimden 2. Fairphone 4 Screen Replacement, Flip the screen over: adım 11, 3 resimden 3.
    • Do not remove the screen yet. It's still connected to the phone with a connection cable.

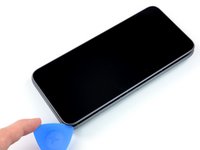
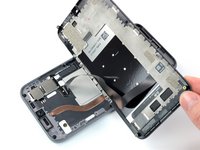
    • Grab the screen and lift it straight up just enough to clear its pegs from the frame.

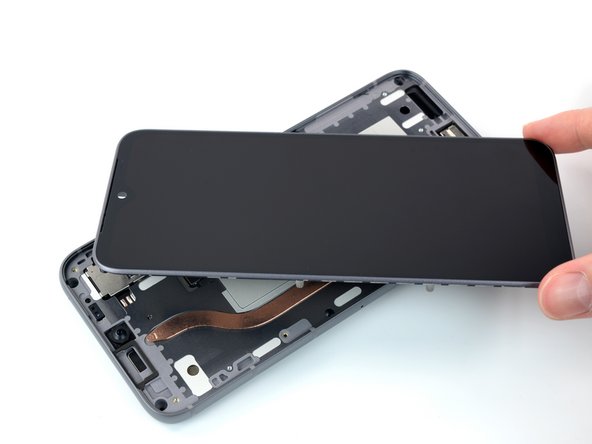
    • Rotate the display carefully clock-wise and flip it over to get access to the connector.

    • Place the display on the device with the screen facing downwards.

  12. Fairphone 4 Screen Replacement, Disconnect the cable: adım 12, 2 resimden 1. Fairphone 4 Screen Replacement, Disconnect the cable: adım 12, 2 resimden 2.
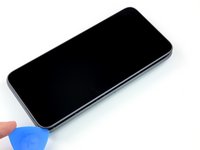
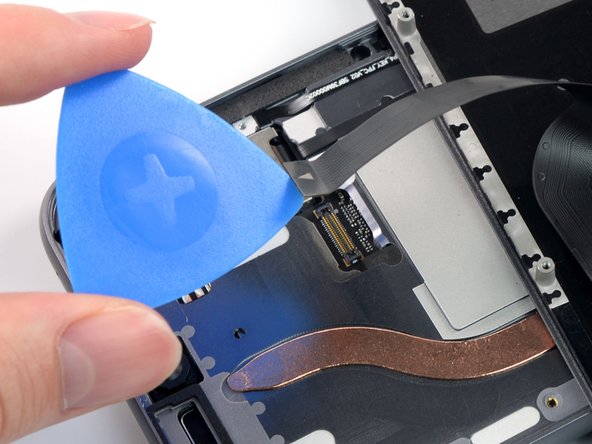
    • Use an opening pick to pry up and disconnect the display connection cable.

    • Remove the screen.

    • Compare your new replacement screen to the original part—you may need to remove a front camera dust cover before you install it.

Sonuç

To reassemble your device, follow these instructions in reverse order.

Take your e-waste to an R2 or e-Stewards certified recycler.

Repair didn’t go as planned? Try some basic troubleshooting, or ask our Answers community for help.

28 farklı kişi bu kılavuzu tamamladı.

Manuel Haeussermann

Üyelik tarihi: 07/13/22

25.265 İtibar

71 adet Kılavuz yazıldı

Ekip

iFixit iFixit üyesi

Staff

123 Üyeler

25.685 adet Kılavuz yazıldı

16Kılavuz Yorumları

20-40 Minutes? ... more like 10 ... and I wasn't even pushing it

Patrick Küster - Yanıt Paylaş

Thanks for your comment! The time estimate was set a little too high, you're right. I've adjusted it!

Manuel Haeussermann - Yanıt Paylaş

10 minutes, like you. Honnestly I'm so happy to be apple to fix it by my own. Thanks to the Fairphone's engineers. I would never buy another phone yet. And I hope I could keep this one 10 more years!

Cédric Chauveau - Yanıt Paylaş

Vielen Dank für die präzise Anleitung. Auf alle heiklen Punkte wurde hingewiesen. Habe es locker geschafft und war danach ganz stolz!

Johanna - Yanıt Paylaş

I can confirm that you need a #0 screwdriver, not a #00, as has been changed in the latest unchecked version.

Jonathan - Yanıt Paylaş

Yorum Ekle

İstatistikleri Görüntüle:

Son 24 Saat: 18

Son 7 gün: 152

Son 30 gün: 664

Her zaman: 25,756