Ana içeriğe geç
Onarım Topluluğuna Katılın - Hesap Oluşturun

Framework Laptop 12 Storage Replacement

Neye ihtiyacın var

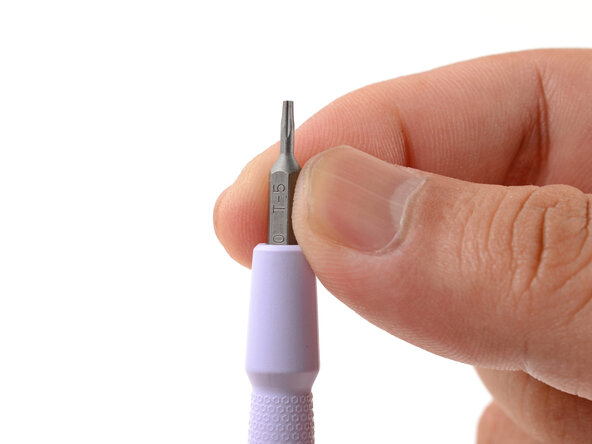
    1. Framework Laptop 12 Storage Replacement, Power down your laptop: adım 1, 3 resimden 1. Framework Laptop 12 Storage Replacement, Power down your laptop: adım 1, 3 resimden 2. Framework Laptop 12 Storage Replacement, Power down your laptop: adım 1, 3 resimden 3.
      • Before you begin repairs, unplug your laptop and shut it down from the operating system. This ensures that the laptop isn't in standby/suspend mode.

      • The indicator LEDs along the edges should be unlit. The laptop should be silent.

      • If you accidentally turn on the laptop during repair, hold the power button down for 10 seconds to shut it down.

      • Make sure your Framework Screwdriver has the T5 Torx bit (labeled as T-5) facing outwards. If it's not, pull the bit out and flip it.

      FixBot'a Sor

      Yorum Ekle

    1. Framework Laptop 12 Storage Replacement, Set your laptop down: adım 2, 1 resimden 1.
      • Set your Framework Laptop face-down on a clean work surface.

      FixBot'a Sor

      Yorum Ekle

    2. Framework Laptop 12 Storage Replacement, Loosen the bottom screws: adım 3, 2 resimden 1. Framework Laptop 12 Storage Replacement, Loosen the bottom screws: adım 3, 2 resimden 2.
      • Use your Framework Screwdriver to fully loosen the eight captive T5 Torx screws on the bottom of your laptop.

      • Most screws in your Framework Laptop (including these) are captive—they're designed to stay in place after you loosen them.

      FixBot'a Sor

      Yorum Ekle

    3. Framework Laptop 12 Storage Replacement, Flip your laptop over: adım 4, 1 resimden 1.
      • Flip your laptop over so it's face-up on your work surface.

      FixBot'a Sor

      Yorum Ekle

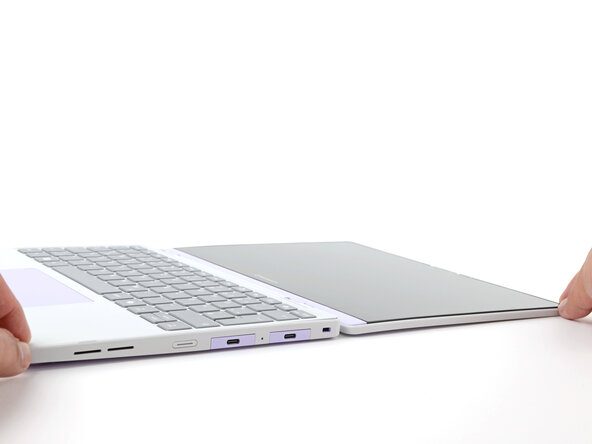
    4. Framework Laptop 12 Storage Replacement, Open your laptop: adım 5, 2 resimden 1. Framework Laptop 12 Storage Replacement, Open your laptop: adım 5, 2 resimden 2.
      • Open the laptop lid so that both the screen and the base lie flat on your work surface.

      FixBot'a Sor

      Yorum Ekle

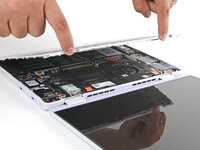
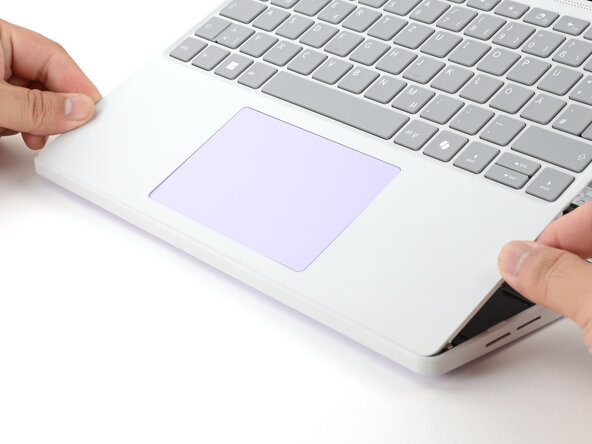
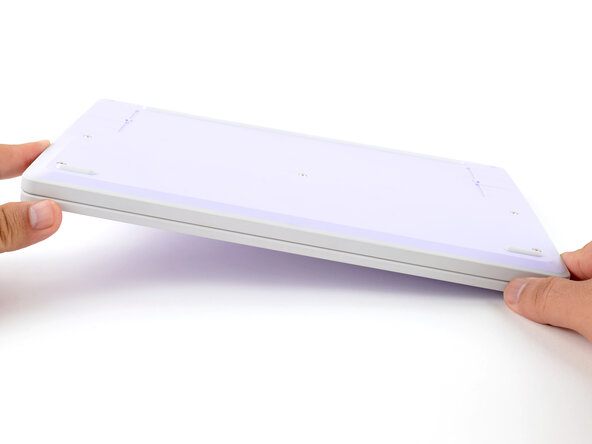
    5. Framework Laptop 12 Storage Replacement, Remove the Input Cover: adım 6, 3 resimden 1. Framework Laptop 12 Storage Replacement, Remove the Input Cover: adım 6, 3 resimden 2. Framework Laptop 12 Storage Replacement, Remove the Input Cover: adım 6, 3 resimden 3.
      • Use your fingers to grip the Input Cover in the hinge cutouts.

      • Lift upwards to swing the Input Cover up from the base of the laptop.

      • Magnets hold the Input Cover down, so you'll feel some resistance. If it feels stuck, check that you've fully loosened all the screws on the bottom of your laptop.

      • Remove the Input Cover.

      FixBot'a Sor

      Yorum Ekle

    1. Framework Laptop 12 Storage Replacement, Unlatch the SSD: adım 7, 2 resimden 1. Framework Laptop 12 Storage Replacement, Unlatch the SSD: adım 7, 2 resimden 2.
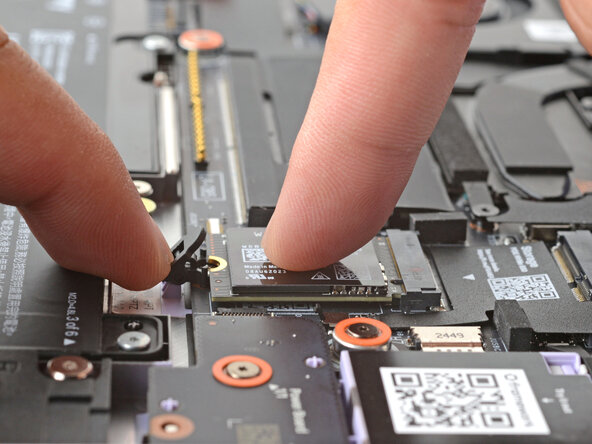
      • Use your finger to press down on the black SSD latch to unlatch the SSD.

      • The SSD will pop up to an angle when it's unlatched.

      FixBot'a Sor

      Yorum Ekle

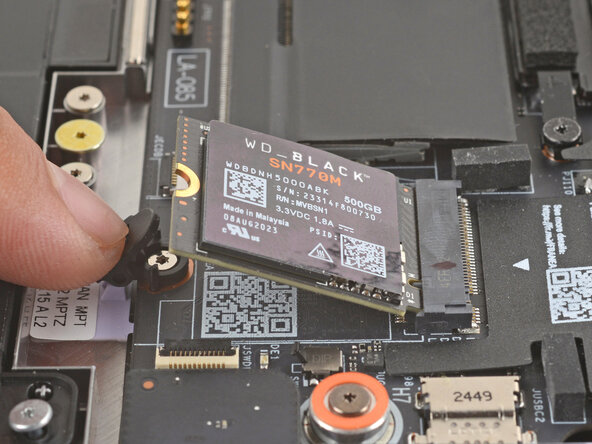
    2. Framework Laptop 12 Storage Replacement, Remove the SSD: adım 8, 3 resimden 1. Framework Laptop 12 Storage Replacement, Remove the SSD: adım 8, 3 resimden 2. Framework Laptop 12 Storage Replacement, Remove the SSD: adım 8, 3 resimden 3.
      • Grab the SSD by its edges and pull it out of its socket.

      • Remove the SSD.

      FixBot'a Sor

      Yorum Ekle

    1. Framework Laptop 12 Storage Replacement, Disassembly complete: adım 9, 1 resimden 1.
      • Congratulations on completing disassembly! The remaining steps will show how to reassemble your Framework Laptop.

      FixBot'a Sor

      Yorum Ekle

    1. Framework Laptop 12 Storage Replacement, Install the SSD: adım 10, 2 resimden 1. Framework Laptop 12 Storage Replacement, Install the SSD: adım 10, 2 resimden 2.
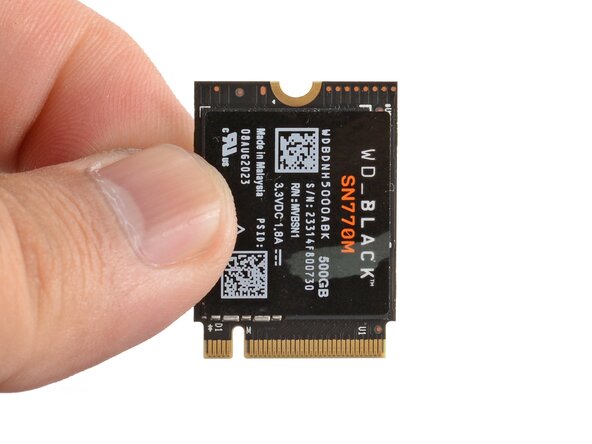
      • Hold the SSD by its edges. Don't touch the gold contacts with your fingers. If you do, wipe the contacts with a clean, lint-free cloth to remove any finger oils.

      • Align the SSD's gold contacts with its socket.

      • Insert the SSD into the socket at a shallow angle. The gold contacts should mostly be covered by the socket.

      • The SSD fits into the socket in one orientation. If it doesn't feel like it fits, try flipping the module.

      FixBot'a Sor

      Yorum Ekle

    2. Framework Laptop 12 Storage Replacement: adım 11, 3 resimden 1. Framework Laptop 12 Storage Replacement: adım 11, 3 resimden 2. Framework Laptop 12 Storage Replacement: adım 11, 3 resimden 3.
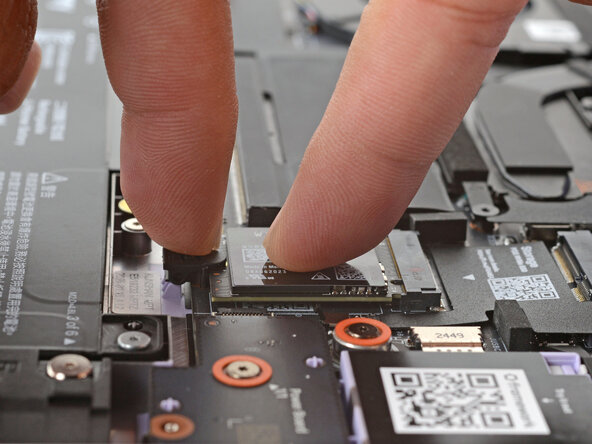
      • Use your finger to press down on the black SSD latch to keep it open.

      • Use another finger to press the SSD down until it lays flat.

      • If the SSD doesn't fit in the latch, you may need to insert the SSD further into its socket.

      • Use your finger to close the latch to secure the SSD.

      • You should hear a click, and the SSD should no longer pop up.

      FixBot'a Sor

      Yorum Ekle

    1. Framework Laptop 12 Storage Replacement, Install the Input Cover: adım 12, 3 resimden 1. Framework Laptop 12 Storage Replacement, Install the Input Cover: adım 12, 3 resimden 2. Framework Laptop 12 Storage Replacement, Install the Input Cover: adım 12, 3 resimden 3.
      • Angle the bottom edge of the Input Cover towards the base of the laptop.

      • Align and insert the bottom edge of the Input Cover into the base of the laptop.

      • Make sure the slots along the bottom edge of the Input Cover slide into the tabs in the base.

      • Lower the Input Cover's top edge onto the laptop until the magnets snap it in place.

      • Make sure the Input Cover sits neatly within the laptop frame and no corners are popping up.

      FixBot'a Sor

      Yorum Ekle

    2. Framework Laptop 12 Storage Replacement, Close and flip your laptop: adım 13, 2 resimden 1. Framework Laptop 12 Storage Replacement, Close and flip your laptop: adım 13, 2 resimden 2.
      • Close the laptop lid.

      • Flip your laptop face-down on a clean work surface.

      FixBot'a Sor

      Yorum Ekle

    3. Framework Laptop 12 Storage Replacement, Tighten the bottom screws: adım 14, 2 resimden 1. Framework Laptop 12 Storage Replacement, Tighten the bottom screws: adım 14, 2 resimden 2.
      • Use your Framework Screwdriver to tighten the eight captive T5 Torx screws on the bottom of your laptop.

      • Tighten the screws until they're snug. Don't over-tighten them, or you may strip the screws.

      FixBot'a Sor

      Yorum Ekle

Sonuç

You finished fixing your Framework Laptop!

Take your e-waste to an R2 or e-Stewards certified recycler.

If you need help, contact Framework support.

İptal et: Bu kılavuzu tamamlamadım.

Bir başkası bu kılavuzu tamamladı.

Arthur Shi

Üyelik tarihi: 01/03/18

344.621 İtibar

915 adet Kılavuz yazıldı

Ekip

Guide Team Guide Team üyesi

Staff

10 Üyeler

32.589 adet Kılavuz yazıldı

0Kılavuz Yorumları

Yorum Ekle

İstatistikleri Görüntüle:

Son 24 Saat: 1

Son 7 gün: 13

Son 30 gün: 54

Her zaman: 863