Ana içeriğe geç
Onarım Topluluğuna Katılın - Hesap Oluşturun

Garmin Nuvi 42LM Screen Replacement

Neye ihtiyacın var

  1. Garmin Nuvi 42LM Screen Replacement, Back Cover: adım 1, 3 resimden 1. Garmin Nuvi 42LM Screen Replacement, Back Cover: adım 1, 3 resimden 2. Garmin Nuvi 42LM Screen Replacement, Back Cover: adım 1, 3 resimden 3.
    • Remove the four screws on the back of the GPS using the T5 Torx screwdriver.

    FixBot'a Sor

    Yorum Ekle

  2. Garmin Nuvi 42LM Screen Replacement: adım 2, 3 resimden 1. Garmin Nuvi 42LM Screen Replacement: adım 2, 3 resimden 2. Garmin Nuvi 42LM Screen Replacement: adım 2, 3 resimden 3.
    • Pry the GPS open using a plastic opening tool.

    • When prying open the device, use caution to avoid damaging the motherboard.

    FixBot'a Sor

    Yorum Ekle

  3. Garmin Nuvi 42LM Screen Replacement, Motherboard: adım 3, 3 resimden 1. Garmin Nuvi 42LM Screen Replacement, Motherboard: adım 3, 3 resimden 2. Garmin Nuvi 42LM Screen Replacement, Motherboard: adım 3, 3 resimden 3.
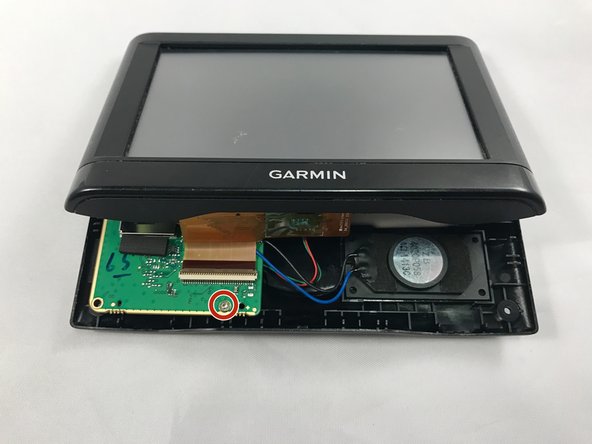
    • Using the T5 Torx screwdriver, remove the two screws located on the motherboard.

    • There are two screws - one in the back and one in the front.

    FixBot'a Sor

    Yorum Ekle

  4. Garmin Nuvi 42LM Screen Replacement: adım 4, 1 resimden 1.
    • Move the motherboard from from its designated location on the GPS.

    • Do not pull on red, green, and black cables when repositioning the motherboard.

    FixBot'a Sor

    Yorum Ekle

  5. Garmin Nuvi 42LM Screen Replacement: adım 5, 2 resimden 1. Garmin Nuvi 42LM Screen Replacement: adım 5, 2 resimden 2.
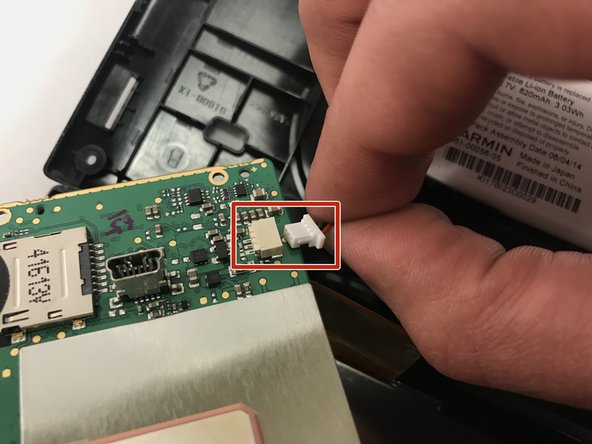
    • Gently unplug the red, green, and black bundled cable to remove the battery.

    FixBot'a Sor

    Yorum Ekle

  6. Garmin Nuvi 42LM Screen Replacement: adım 6, 2 resimden 1. Garmin Nuvi 42LM Screen Replacement: adım 6, 2 resimden 2.
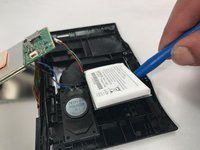
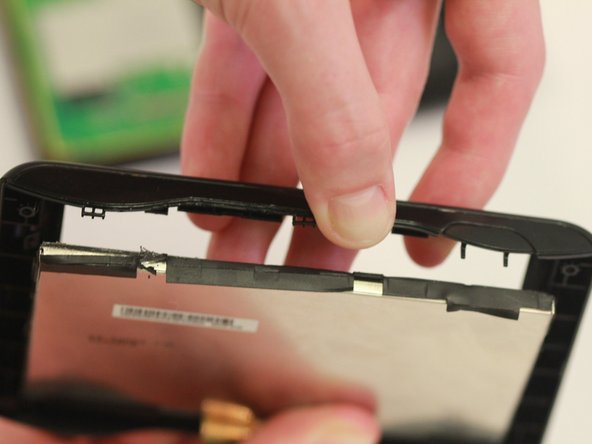
    • Use blue plastic opening tool to carefully pry the battery from the GPS.

    • You might need to use additional force when prying because there is adhesive glue on the back of the battery.

    FixBot'a Sor

    Yorum Ekle

  7. Garmin Nuvi 42LM Screen Replacement: adım 7, 1 resimden 1.
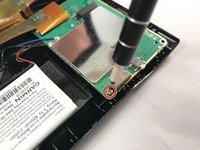
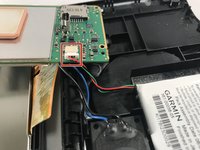
    • Using a soldering iron, desolder the black and blue wires connected to the motherboard.

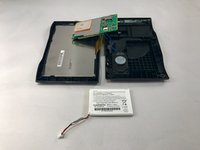
    • Once the black and blue wires are desoldered, llift the motherboard out and away from the device.

    • Check out this awesome guide on how to solder and desolder connections.

    FixBot'a Sor

    Yorum Ekle

  8. Garmin Nuvi 42LM Screen Replacement, Screen: adım 8, 2 resimden 1. Garmin Nuvi 42LM Screen Replacement, Screen: adım 8, 2 resimden 2.
    • Push out the screen by pulling back the black clips.

    • The screen is attached to the motherboard and needs to be replaced with it.

    FixBot'a Sor

    Yorum Ekle

Sonuç

To reassemble your device, follow these instructions in reverse order.

İptal et: Bu kılavuzu tamamlamadım.

2 farklı kişi bu kılavuzu tamamladı.

1Rehber Yorum

Where do I purchase the screen for the Nuvi 42LM?

DR ROGER BROWNE - Yanıt Paylaş

Yorum Ekle

İstatistikleri Görüntüle:

Son 24 Saat: 1

Son 7 gün: 7

Son 30 gün: 21

Her zaman: 701