Giriş
This repair guide was authored by the iFixit staff and hasn’t been endorsed by Google. Learn more about our repair guides here.
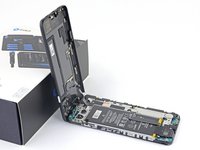
Follow this guide to replace the motherboard on a Google Pixel 4a 5G.
The unreinforced display panel on the Pixel 4a 5G is fragile. Pay special attention to the warnings in the opening procedure if you are reusing the screen.
Neye ihtiyacın var
-
-
Insert a SIM eject tool, bit, or straightened paper clip into the SIM tray hole.
-
Press directly into the hole to eject the SIM card tray.
-
Remove the SIM card tray.
-
-
-
Take note of the two seams on the edge of your phone:
-
Screen seam: This seam separates the screen from the rest of the phone. This is where you have to pry.
-
Frame seam: This is where the plastic frame meets the back cover. It is held in place by screws. Do not pry at this seam.
-
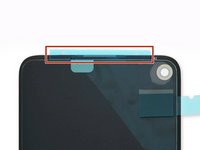
Before you begin, note the following areas on the screen:
-
Screen flex cable: Do not insert the opening pick deeper than instructed or you risk damaging this cable.
-
Adhesive perimeter: Prying beyond this narrow perimeter without angling the pick will damage the OLED panel.
i don't understand the "screen flex cable" nor the "adhesive perimeter" instructions
-
-
-
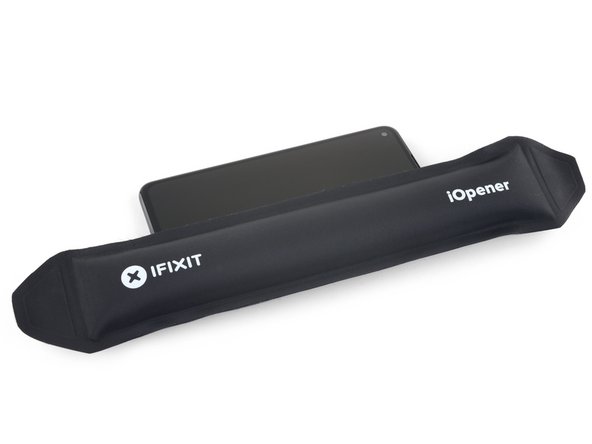
Apply a heated iOpener to the right edge of the display for one minute to soften the adhesive.
-
-
-
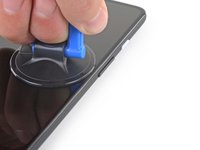
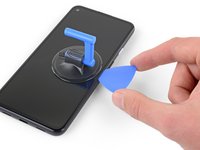
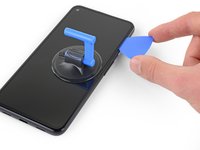
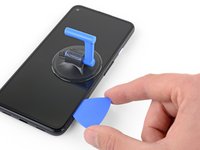
Place a suction cup as close to the right edge of the screen as possible.
-
Lift the suction cup with a strong steady force.
-
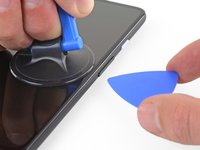
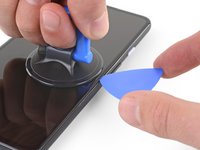
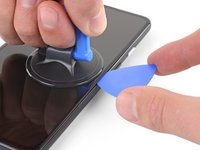
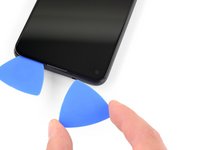
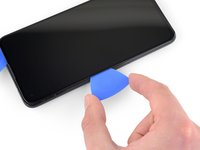
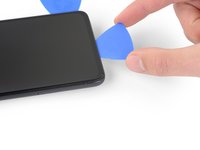
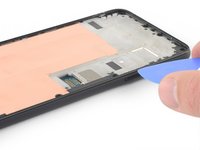
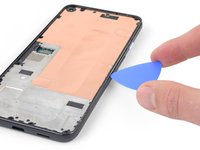
Insert the tip of an opening pick into the screen seam no more than 1 mm.
For a very cracked screen, I placed clear packing tape on top of the screen to use the suction cup at all. Also had to suction cup and pry/pick at multiple sides of the screen. Small fragments of broken glass won't pry up, so had to use tweezers to pull at glass fragments to release them from the adhesive underneath.
-
-
-
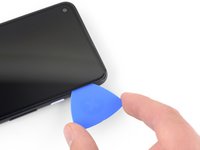
With the pick 1 mm into the gap, pivot the pick upwards to a steep angle.
-
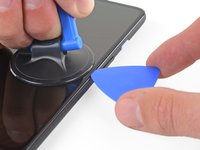
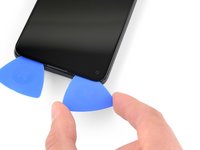
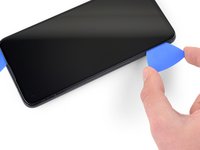
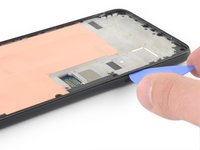
At a steep angle, carefully push the pick into the gap about 1/4 inch (6 mm). The pick should slide in below the OLED panel.
If only the battery needs to be replaced, be sure to pay attention to the angle at which the pick is moved. Even the slightest deviation and the display is crap. I followed the instructions, but obviously I got to the display somewhere. Unfortunately the display now remains black and I have a flashing green bar at the top. So be careful.
-
-
-
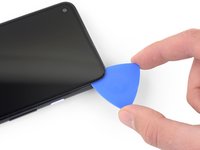
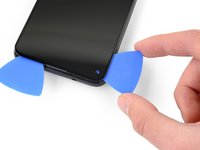
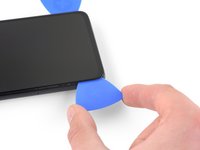
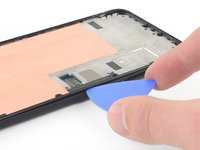
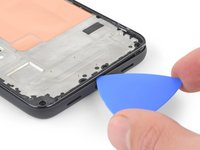
Slide the pick along the right edge of the screen to cut the adhesive.
-
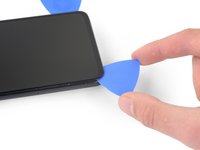
Leave the pick in the bottom-right corner to prevent the adhesive from re-sealing.
-
-
-
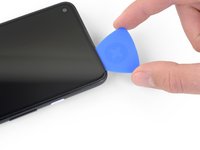
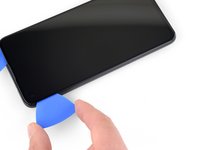
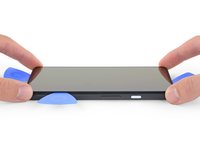
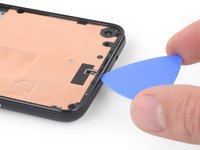
Insert another opening pick into the right edge of the phone at an angle where a gap has already formed to prevent damage to the OLED panel.
-
Slide the opening pick around the top of the phone to cut the adhesive.
-
Leave the pick inserted along the top edge to prevent the adhesive from resealing.
The corners seems particularly tricky with the adhesive. Make sure to reapply heat in the corners. I cracked my screen while detaching the corners.
-
-
-
Insert another opening pick into the top edge of your phone at an angle where a gap has already formed to prevent damage to the OLED panel.
-
Use the pick to slice around the top-left corner where the camera window is.
-
Leave the pick inserted along the left edge of your phone to prevent the adhesive from re-sealing.
-
-
-
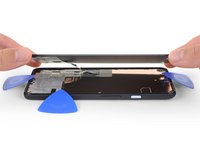
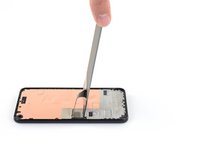
Lift from the top edge and swing the screen over the bottom edge until you can rest it glass-side down.
-
-
Bu adımda kullanılan alet:Tweezers$4.99
-
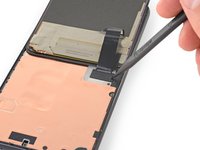
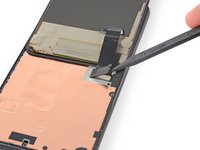
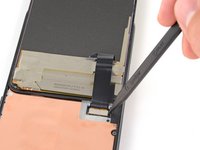
Use your fingernail or a pair of tweezers to carefully peel off the tape covering the screen connector.
-
-
-
-
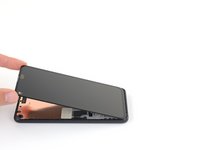
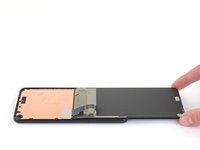
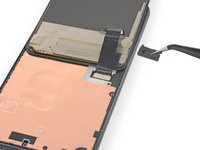
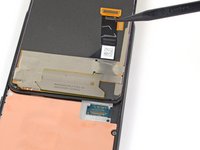
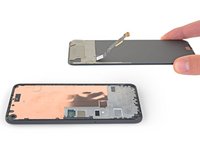
Remove the screen.
-
Check if your replacement screen has speaker mesh and top edge adhesive pre-installed.
-
If it does, you won't need the top edge adhesive.
-
If it doesn't, remove the larger clear liner from the top edge adhesive and apply it to the screen (not the frame). Make sure the larger cutout lines up with the speaker mesh.
-
Follow this guide to apply the custom-cut adhesive.
There are four adhesives provided in the current kit provided by ifixit. They have a blue and clear backing with a thin black strip, as shown on here. The adhesives instructions provided in this general guide are not very clear and I messed up my first one, which made the other three useless leading me to just buy a b-7000 adhesive instead. However, for anyone wanting to correctly use the ifixit adhesives, first line up the black strip on the edge of your phone where the screen will rest and peel off the first clear portion. Then peel off the blue portion and you will be left with a thin black adhesive strip. Do this for all four pieces in the configuration shown on the page linked above and then place your screen on, press down gently, then turn the phone screen down and place some books on to provide stronger contact between the adhesive and the new screen. Good luck!
thanks a lot!
Zurdits -
That was so much clearer thank you!
Super Anleitung. Allerdings habe ich die Kalibriersequenz leider nicht gesehen. Das Display funktioniert, aber der zweifinger Zoom arbeitet nicht. Kann man die Kalibriersequenz neu aufrufen oder was kann ich tun. In manchen Anleitungen steht, das man im Recovery Mode Display Befehle ausführen kann. Ein Werksreset des Pixel 4A 5G hat nicht geholfen.
Beim ersten Neustart nach der Reparatur wird das Display eine Kalibriersequenz durchlaufen. Berühre das Display dabei nicht, der Touchscreen könnte nicht richtig kalibriert werden, was zu einer schlechten Funktion führen kann.
Danke im voraus
The adhesive strips do not cover the corners, and I guess there is a good chance of dust comming into the device. Had issues with the front camera after the first repair. Maybe the rounded corner strips could be included in the repair kit?
-
-
Bu adımda kullanılan alet:Magnetic Project Mat$19.95
-
Use a T3 Torx driver to remove the nine 4.4 mm-long screws securing the back cover to the midframe.
I found 2 extra screws in mine. FYI. (From America)
I also have 11x T3 in a US model. And the two at the bottom near the USB-C port are shorter by ~1mm than the others.
-
-
-
Insert an opening pick into the seam between the midframe and the back cover, right above the SIM card slot.
-
Slide the opening pick along the right edge of your phone to release the plastic clips securing the back cover to the midframe.
-
-
-
Flip your phone over so the back cover is facing up.
-
Carefully swing the back cover up to an upright position.
-
Rest the back cover against an object such as a cardboard box or soda can.
-
-
-
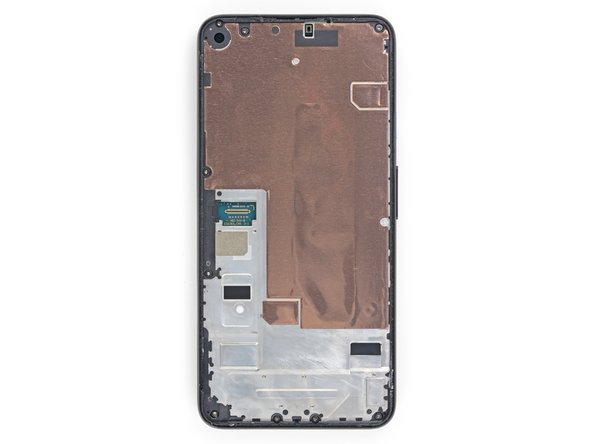
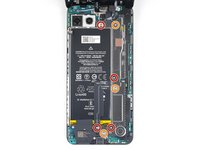
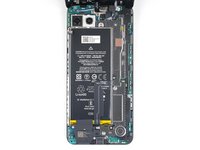
Use a T3 Torx screwdriver to remove the seven screws securing the motherboard bracket:
-
Four 4.0 mm-long screws
-
Three 2.1 mm-long screws
Hi. Thank you for the great Tuto! Do you know where can I find a replacement battery?
-
-
-
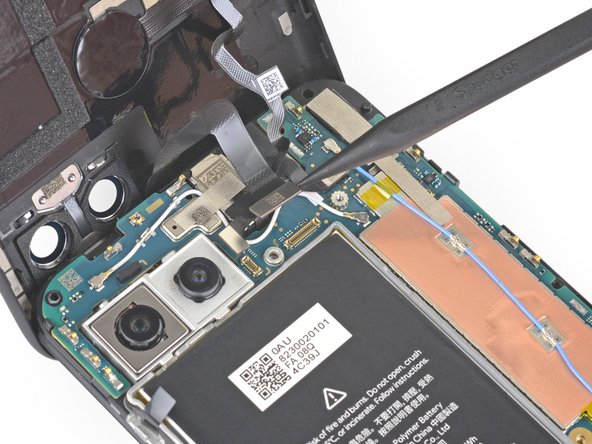
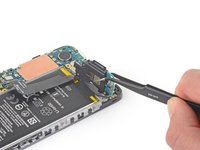
Use the tip of a spudger to disconnect the battery cable from the motherboard.
-
-
-
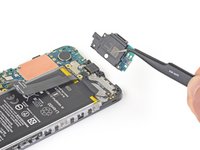
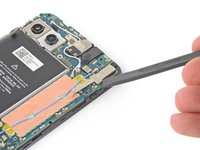
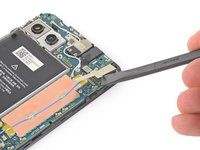
Use the tip of a spudger to pry up and disconnect the fingerprint sensor cable.
-
-
-
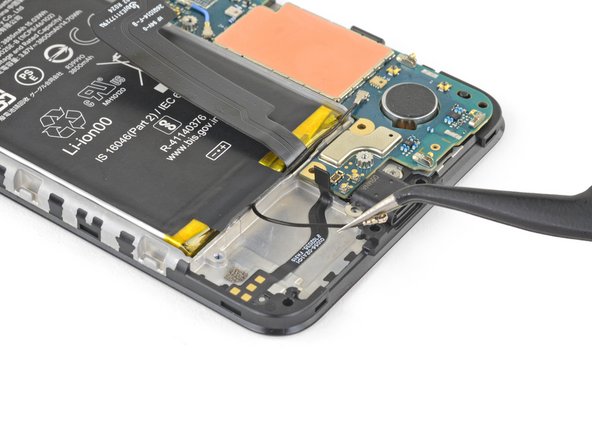
Use a T3 Torx driver to remove the two 4.2 mm-long screws from the loudspeaker assembly.
-
-
Bu adımda kullanılan alet:Tweezers$4.99
-
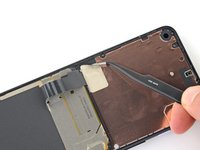
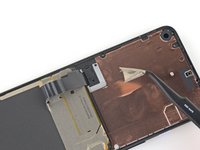
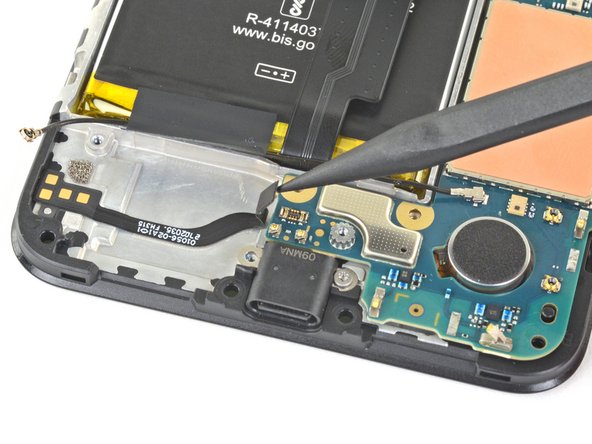
Use your fingers or a pair of tweezers to peel the tape off of the copper foil.
-
-
Bu adımda kullanılan alet:Tweezers$4.99
-
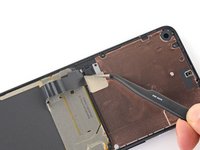
Use your fingers or a pair of tweezers to pull the antenna cable out from underneath the tape covering it.
-
-
-
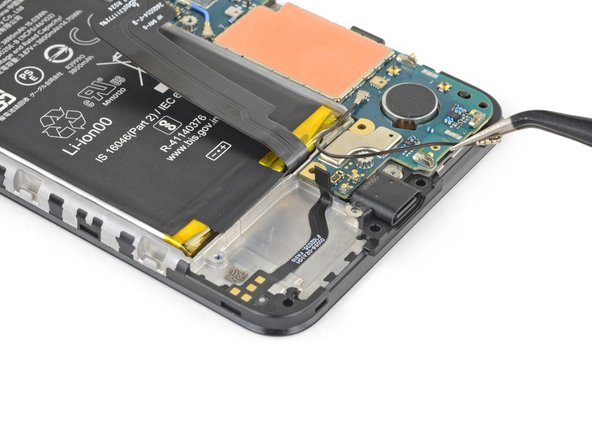
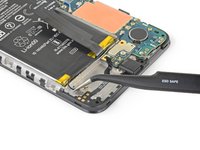
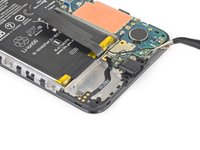
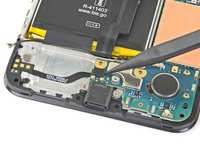
Use the tip of a spudger to disconnect the loudspeaker cable from the motherboard.
-
-
-
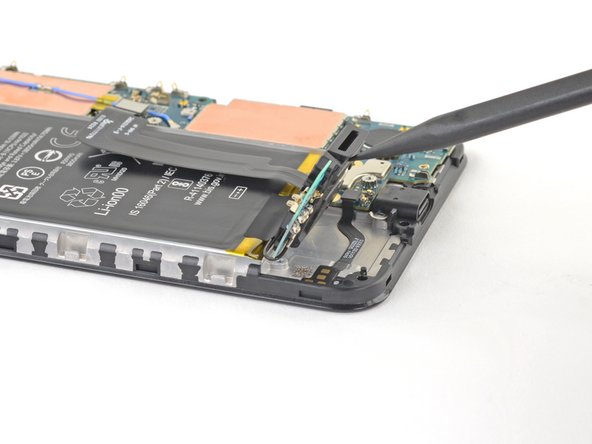
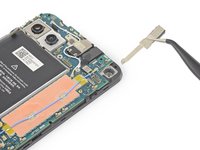
Use the tip of a spudger to disconnect the headphone jack cable from the motherboard.
-
-
-
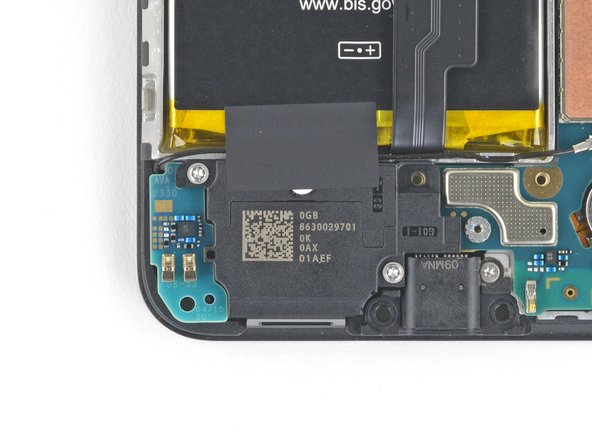
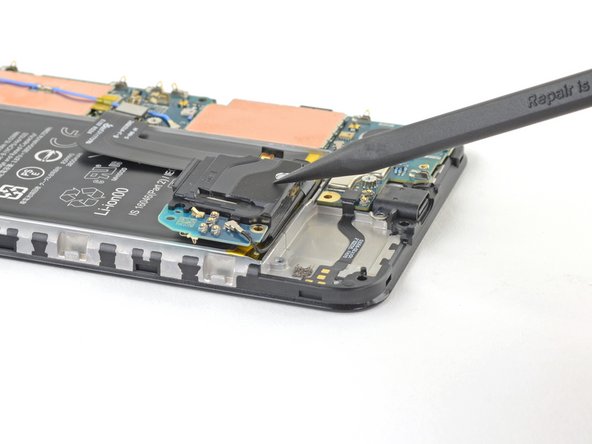
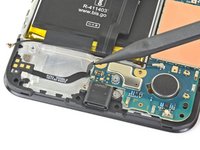
Use a T3 Torx screwdriver to remove the 2.1 mm-long screw securing the charging port.
-
-
-
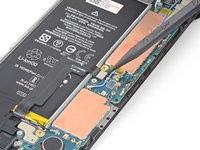
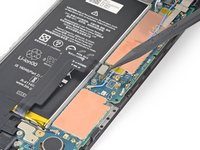
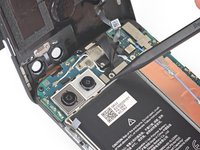
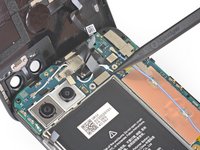
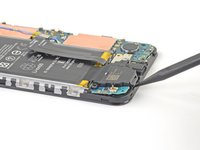
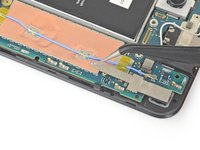
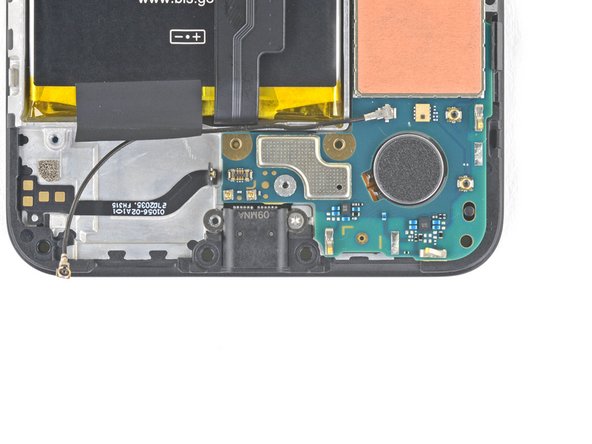
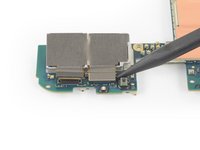
Insert the tip of a spudger into the gap between the motherboard and the midframe near the front-facing cameras to pop it free from the first clip.
-
-
-
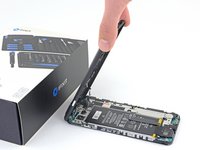
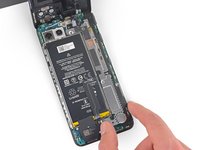
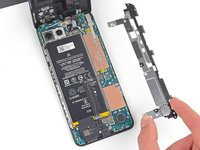
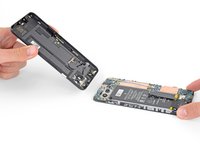
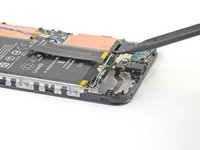
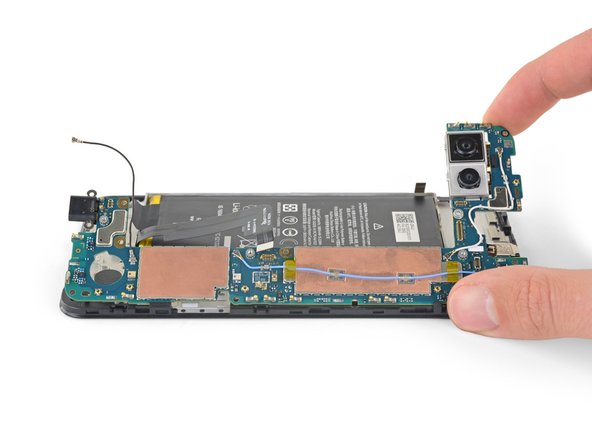
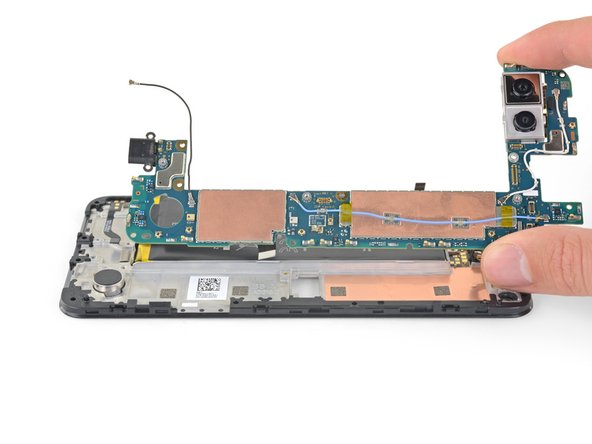
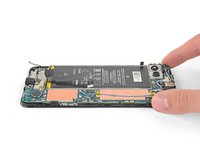
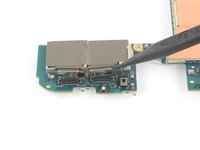
Grab the motherboard with your fingers and open it like a book.
-
Lift the motherboard straight out to remove it.
Mine (US model) has the two "squeeze sensor" cables on the middle of the motherboard. These need to be disconnected before lifting it out.
-
-
-
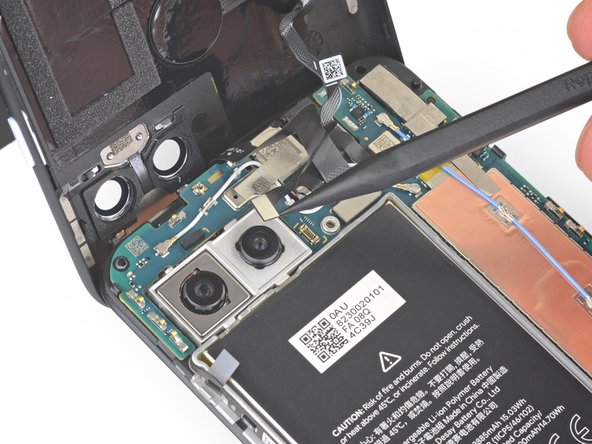
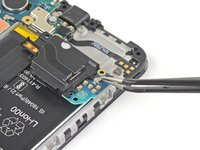
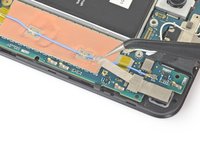
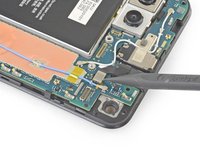
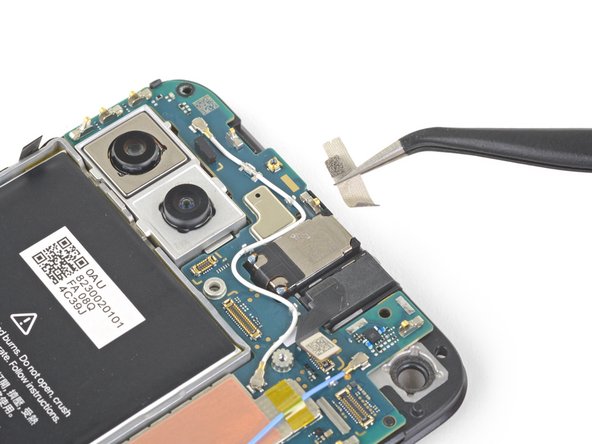
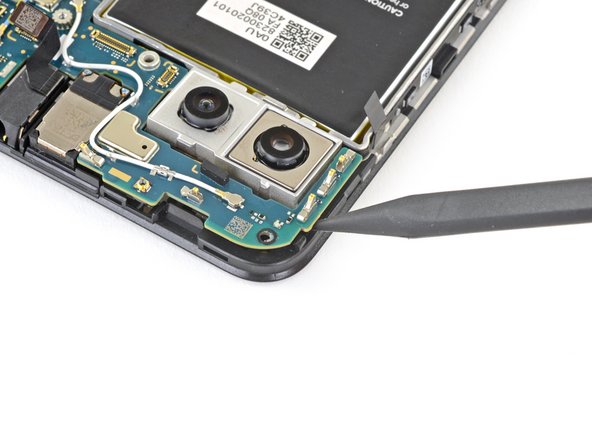
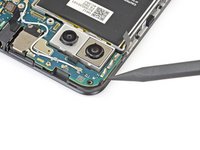
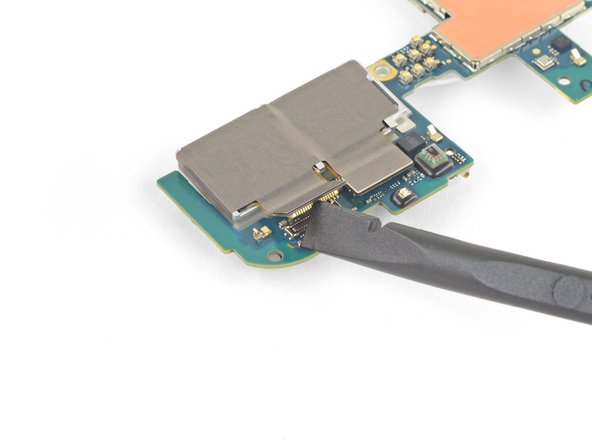
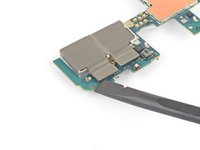
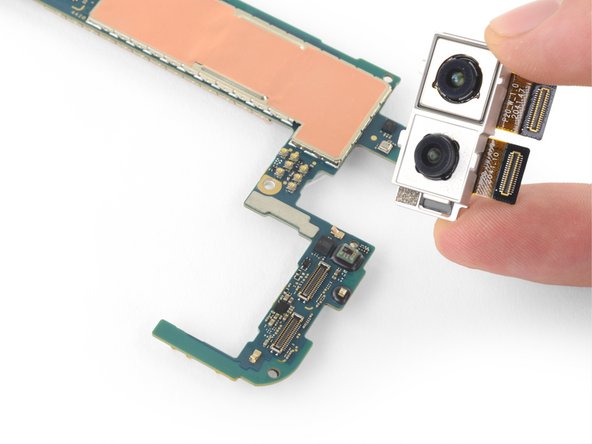
Use the flat end of a spudger to disconnect the left camera from the motherboard.
-
-
-
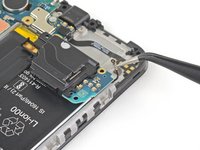
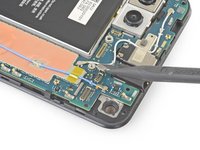
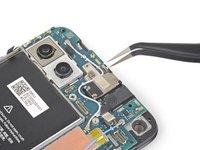
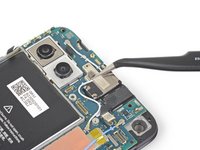
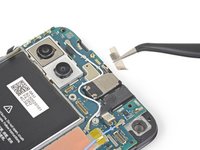
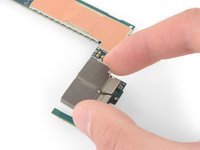
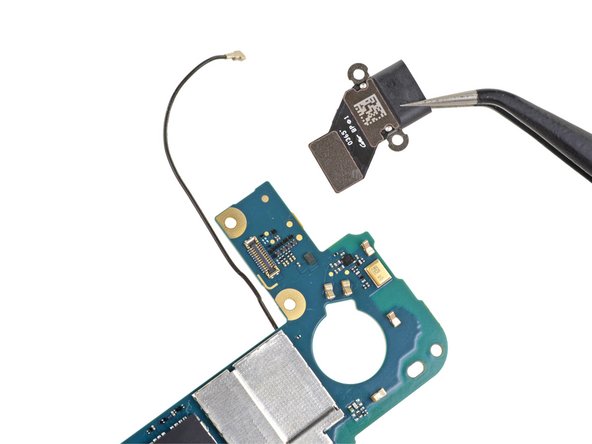
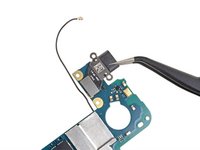
Remove the USB-C port assembly from the motherboard.
-
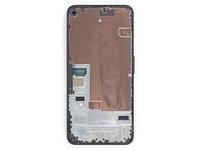
Only the motherboard remains.
-


Compare your new replacement part to the original part—you may need to transfer remaining components or remove adhesive backings from the new part before installing.
To reassemble your device, follow the above steps in reverse order.
Take your e-waste to an R2 or e-Stewards certified recycler.
Repair didn’t go as planned? Try some basic troubleshooting, or ask our Answers community for help.
İptal et: Bu kılavuzu tamamlamadım.
4 farklı kişi bu kılavuzu tamamladı.

5Kılavuz Yorumları
Can you even get parts for these?
Unfortunately, I CAN'T FIND WHERE TO BUY THE MOTHERBOARD :(
Can anyone tell me what is the SIM Connector part number for Pixel 4a5g?