Giriş
This repair guide was authored by the iFixit staff and hasn’t been endorsed by Google. Learn more about our repair guides here.
Follow this guide to replace a broken, cracked, or unresponsive screen on your Google Pixel 9 Pro.
If your screen doesn't come with adhesive pre‑installed, you'll need replacement screen adhesive in order to complete this repair.
Note: Any repair can compromise the water resistance of your phone. Retaining water resistance after the repair will depend on how well you reapply the adhesive.
Neye ihtiyacın var
-
-
Apply overlapping strips of packing tape to the cracked glass until the whole screen is covered—this will allow the suction cup to stick to the screen.
-
Consider wearing safety glasses to protect your eyes from any glass shaken free during the repair.
-
-
-
Use a hair dryer, heat gun, or hot plate to heat the entire screen until it's almost too hot to touch.
-
-
-
Apply a suction handle to the center of the screen's top edge.
-
-
-
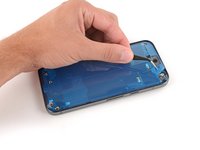
Pull up on the suction handle with strong, steady force to create a gap between the screen and frame.
-
Insert the tip of an opening pick under the screen.
-
-
-
Slide the opening pick along the top edge to separate the adhesive securing it.
-
-
-
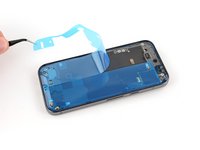
Flip the screen over the right edge of your phone and prop it up with the suction handle.
-
-
-
-
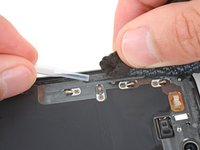
Use angled tweezers to pry up the top edge of the screen cable bracket.
-
Remove the bracket.
-
-
-
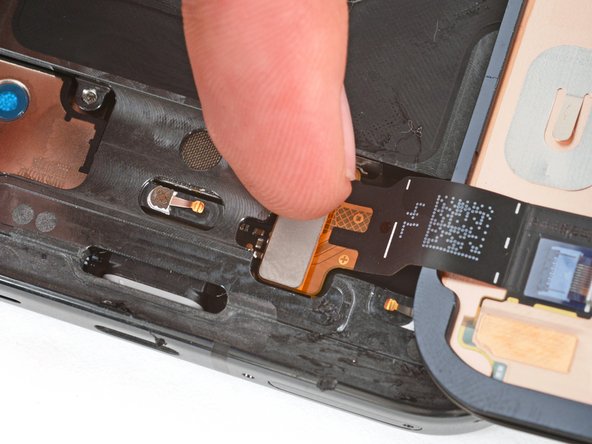
Insert the point of a spudger under the left edge of the screen cable press connector and pry up to disconnect it.
-
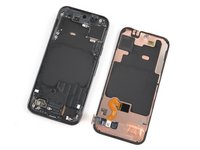
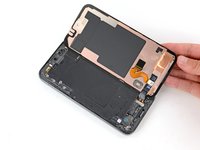
Remove the screen.
-
-
-
When handling your screen, grip it by its edges.
-
When placing the screen on your work area, make sure nothing is touching the bottom of the screen. Consider placing it on a soft, lint-free cloth.
-
-
-
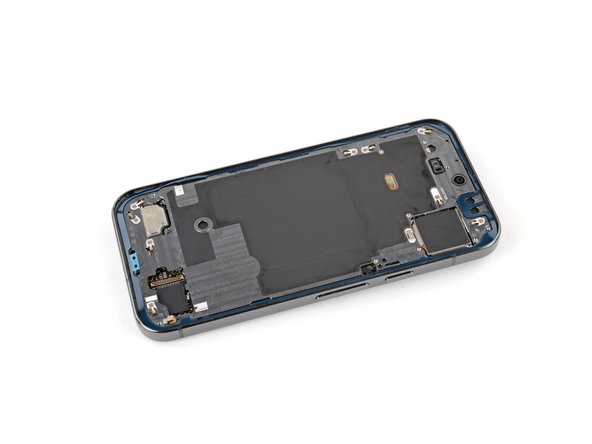
Use a spudger to scrape up and remove all the old screen adhesive from the perimeter of the frame.
-
Once you've removed all the old adhesive, use isopropyl alcohol and a microfiber cloth to clean up the adhesive residue from the perimeter of the frame.
-
Allow the frame to dry completely before continuing.
-
-
-
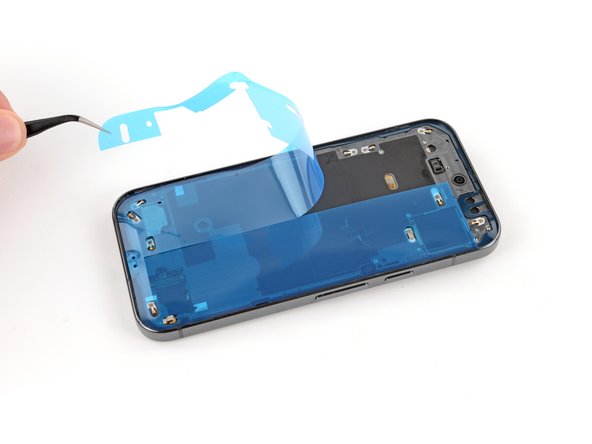
Before applying the adhesive, make sure you know its proper orientation on the frame. Hold the adhesive over your phone to find its proper alignment.
-
The adhesive has a corresponding groove on the perimeter of the frame.
-
Cutouts in the blue liner correspond to spring contacts on the frame.
-
-
-
Peel down the top half of the larger, clear liner to expose the adhesive—don't remove the whole liner yet.
-
-
-
Use the flat end of a spudger to firmly press around the perimeter of the adhesive to secure it to the frame.
-
-
-
Carefully lay your replacement screen display‑side‑down just to the right of your phone so you can reconnect the cable.
-
-
-
Align the screen press connector over its socket and gently press down on one side until it clicks into place, then press down on the other side.
-
Now is a good time to test your phone before sealing it up. Power it on and check that it works. Power it back down before you continue reassembly.
-
Hook the bottom edge of the screen cable bracket into its cutout and firmly press down on the top edge until the bracket clicks into place.
-


Congratulations on completing your screen repair!
To run a diagnostics test with the built-in Pixel Diagnostic tool, click here.
Take your e-waste to an R2 or e-Stewards certified recycler.
Repair didn’t go as planned? Try some basic troubleshooting, or ask our Answers community for help.
Congratulations on completing your screen repair!
To run a diagnostics test with the built-in Pixel Diagnostic tool, click here.
Take your e-waste to an R2 or e-Stewards certified recycler.
Repair didn’t go as planned? Try some basic troubleshooting, or ask our Answers community for help.
İptal et: Bu kılavuzu tamamlamadım.
Bir başkası bu kılavuzu tamamladı.

