Ana içeriğe geç
HP Photosmart D110a Motherboard Replacement

HP Photosmart D110a Motherboard Replacement

Tim Wise

Tim Wise ve 9 diğer katkıda bulunanlar

En son January 10, 2025 tarihinde güncellendi

20 - 40 dakika
Orta
İşlem Görüntüleri
Adım Kırpıcı

If your HP Photosmart D110a (also known as HP Photosmart D110 series) is experiencing symptoms such as failure to power on, persistent error messages, connectivity issues, or irregular operation, the motherboard may need replacement. A faulty motherboard can manifest in various ways:

  • Printer won't turn on or stays stuck on the startup screen
  • Control panel unresponsive or displaying error codes
  • Unable to connect to wireless network
  • Print jobs failing to process
  • Scanner or copy functions not working

Before proceeding with this repair:

  • Verify the issue isn't caused by software problems by performing a printer reset
  • Back up any stored printer settings as they will be lost after motherboard replacement
  • Ensure you're working in a static-free environment as the motherboard is sensitive to electrostatic discharge
  • Disconnect the printer from power and remove any installed ink cartridges

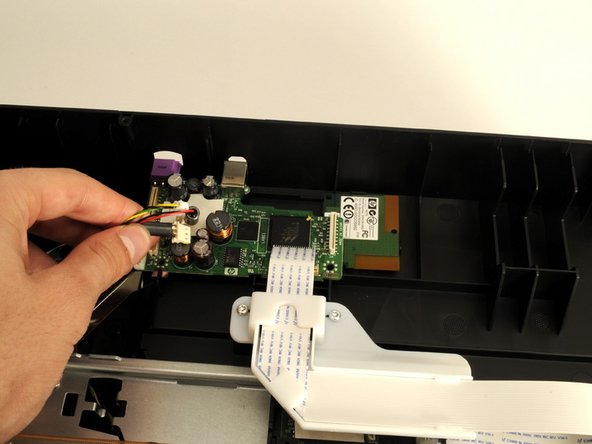
This repair requires careful handling of delicate ribbon cables and electronic components. While not technically complex, it's recommended to attempt this guide with 2 or more people to help manage the printer's weight and components during disassembly.

  1. HP Photosmart D110a Motherboard Replacement, Printer Hood Assembly: adım 1, 1 resimden 1.
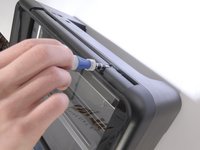
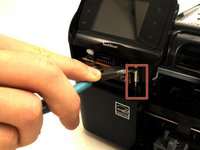
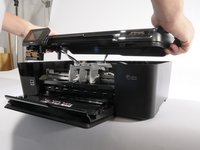
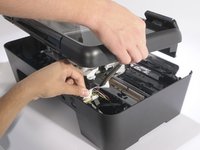
    • Pull down both front panels to open the printer. Lift the scanner flap upward by pulling down on it; there are two mouth pieces that need to be pulled down.

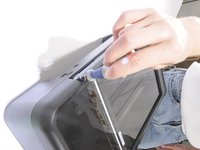
    • Adjust the flap covering the scanner upward, as shown.

  2. HP Photosmart D110a Motherboard Replacement: adım 2, 1 resimden 1.
    • Pull the scanner flap gently away from the printer to release its two clips.

  3. HP Photosmart D110a Motherboard Replacement: adım 3, 1 resimden 1.
    • Locate the three screws on top of the printer.

    • The orange circle shows a fourth screw located behind the power panel. Ignore this one for now, as directions to remove this screw are in Step 5.

  4. HP Photosmart D110a Motherboard Replacement: adım 4, 3 resimden 1. HP Photosmart D110a Motherboard Replacement: adım 4, 3 resimden 2. HP Photosmart D110a Motherboard Replacement: adım 4, 3 resimden 3.
    • Using a T-9 screwdriver, remove the three screws from the printer's top.

  5. HP Photosmart D110a Motherboard Replacement: adım 5, 2 resimden 1. HP Photosmart D110a Motherboard Replacement: adım 5, 2 resimden 2.
    • To remove the power button panel:

    • Reach inside the printer's front opening.

    • Press the small clip behind the power button.

    • A picture of the power button panel removed is provided to show the location of the clip that needs to be pressed.

    • Pull the panel out from right to left.

  6. HP Photosmart D110a Motherboard Replacement: adım 6, 2 resimden 1. HP Photosmart D110a Motherboard Replacement: adım 6, 2 resimden 2.
    • Remove the fourth screw, which was covered by the power button panel.

    • Do not try and torque the screw from an angle. This will ruin the screw's head, and make it even more difficult to remove the screw. Only remove it as already described.

    • This screw is placed awkwardly. We found holding a T9 bit in a pair of needle nose pliers gave us enough leverage to pull it up.

  7. HP Photosmart D110a Motherboard Replacement: adım 7, 3 resimden 1. HP Photosmart D110a Motherboard Replacement: adım 7, 3 resimden 2. HP Photosmart D110a Motherboard Replacement: adım 7, 3 resimden 3.
    • With a partner's help:

    • Have one person lift the hood 2-3 inches.

    • Have the other person disconnect the three cables from the motherboard (the green PCB) to the hood by gently pulling upward on them.

    • Remove the hood completely.

  8. HP Photosmart D110a Motherboard Replacement, Motherboard: adım 8, 2 resimden 1. HP Photosmart D110a Motherboard Replacement, Motherboard: adım 8, 2 resimden 2.
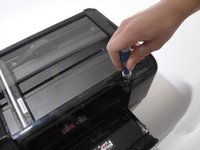
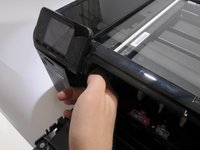
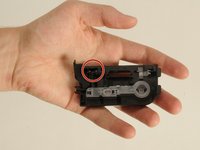
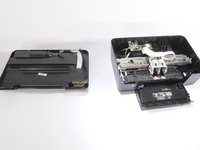
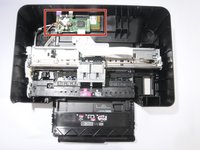
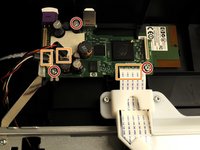
    • Once the lid is removed, the motherboard (the only green PCB board) will become accessible.

  9. HP Photosmart D110a Motherboard Replacement: adım 9, 3 resimden 1. HP Photosmart D110a Motherboard Replacement: adım 9, 3 resimden 2. HP Photosmart D110a Motherboard Replacement: adım 9, 3 resimden 3.
    • Use a T9 Torx Security screwdriver to remove the three screws securing the motherboard.

    • With your fingers or a spudger, remove the cables and ribbon cable by gently pulling them free from their sockets.

  10. HP Photosmart D110a Motherboard Replacement: adım 10, 1 resimden 1.
    • Gently lift the mother board up from the printer and set it aside.

Sonuç

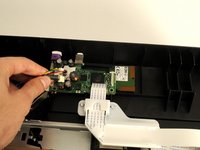
To reassemble your device, follow these instructions in reverse order.

2 farklı kişi bu kılavuzu tamamladı.

Tim Wise

Üyelik tarihi: 04/01/11

173 İtibar

7 adet Kılavuz yazıldı

Ekip

Cal Poly, Team 10-38, Forte Spring 2011 Cal Poly, Team 10-38, Forte Spring 2011 üyesi

CPSU-FORTE-S11S10G38

5 Üyeler

10 adet Kılavuz yazıldı

0 Yorum

Yorum Ekle

İstatistikleri Görüntüle:

Son 24 Saat: 0

Son 7 gün: 0

Son 30 gün: 20

Her zaman: 5,031