Giriş
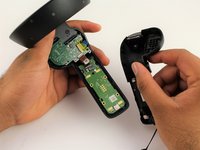
This guide goes over how to replace the controller's joystick on the circuit board.
If you are experiencing problems with the joystick, you will want to open up the device to fix the problem. A common solution associated with this problem is to take a small dry tissue or towel and clean the parts of the controller to ensure there is no debris limiting the joystick’s range of motion. If that doesn’t work, move the shaft underneath the joystick around to see how fluid it is. If the shaft is the problem, the joystick component will have to be replaced.
To complete this task you will need the indicated screwdriver and spudger. Note that you will need to solder to replace the joystick component which can be a potential danger.
Neye ihtiyacın var
-
-
-
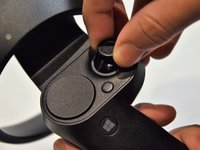
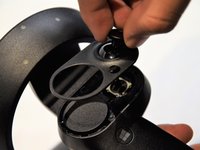
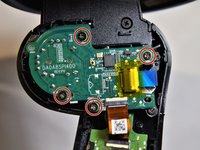
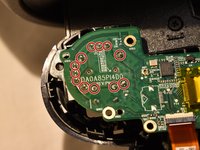
Using a Phillips #00 screwdriver, remove the four 4mm screws located on the joystick circuit board underneath the top half of the controller.
-
-
-
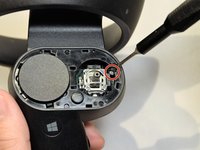
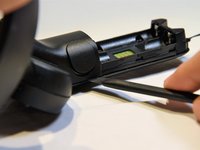
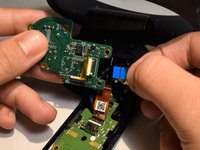
The joystick controller is soldered directly to the circuit board. You can find instructions for removing soldered components here.
-
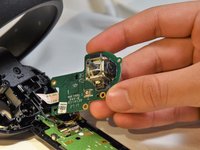
The joystick controller is secured by 12 solder connections. Once these have been desoldered, the controller can be removed.
-


To reassemble your device, follow these instructions in reverse order.
İptal et: Bu kılavuzu tamamlamadım.
3 farklı kişi bu kılavuzu tamamladı.
Ekip

Cal Poly, Team S18-G5, White Winter 2019 Cal Poly, Team S18-G5, White Winter 2019 üyesi
CPSU-WHITE-W19S18G5
2 Üyeler
14 adet Kılavuz yazıldı
2Kılavuz Yorumları
I think this might be the stick: https://www.mouser.com/ProductDetail/Alp...
Alps RKJXV 23 degree 10K ohm multi-directional switches
I haven’t soldered it yet so do not take my word as fact, it just looks right.